Sweet potatoes are a super source of vitamin A. A half-cup of sweet potato contains more than twice the daily amount needed to support normal vision. They’re rich in vitamins C, B-6, and manganese, and assist in metabolism.
Sweet potato plants originated in Central and South America and were first domesticated over 5,000 years ago. They thrive in temperatures ranging from 75°F to 95°F. Southern California’s mild winters and hot summers offer an ideal environment for their growth.
Planting can begin in March and continue through June for a plentiful harvest between August and October.
Choosing Sweet Potato Varieties
Sweet potato varieties suitable for Southern California’s growing conditions include:
- Beauregard is a high-yield, disease-resistant variety with medium-sized tubers, coppery skin, and orange flesh.
- Jewel sweet potatoes have deep orange flesh and are resistant to Fusarium wilt and soil rot.
- Covington is a deep orange variety that produces large yields of uniform-sized sweet potatoes. It is resistant to Fusarium wilt.
- Georgia Jet is an early-maturing sweet potato with good yields and excellent flavor. It has dark red skin and deep orange flesh.
- Centennial produces large, tubular-shaped sweet potatoes with coppery skin and light orange flesh. It’s resistant to Fusarium wilt and produces well in hot climates.
- Bush Puerto Rico is a smaller variety perfect for growing in containers or small spaces. It has a deep orange flesh and a unique, nutty flavor.
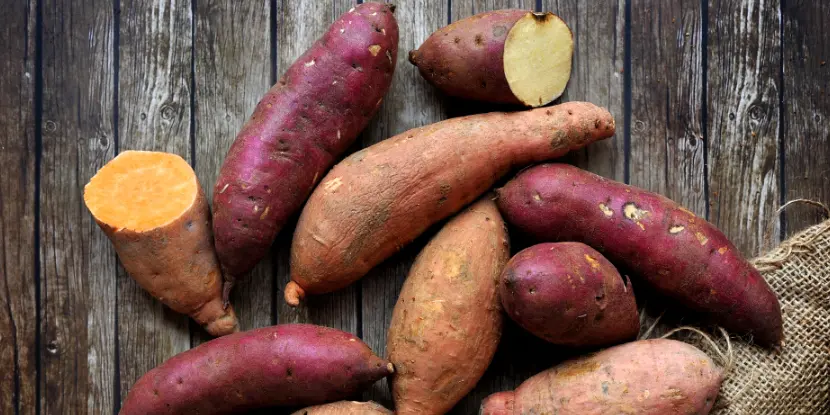
Varieties of sweet potatoes. There are over 100 in all!
Propagating Sweet Potatoes
Most gardeners purchase sweet potato plants as seedlings. But you also have the option to propagate sweet potatoes from slips, which are shoots that sprout from the tubers. Here’s how to do it:
- Choose an organic sweet potato from a reliable source.
- Slice the sweet potato into large chunks, each containing one or two eyes. Place these chunks into a container with water, submerging half of each piece. You can use toothpicks to hold the pieces upright.
- Place the container in a warm, sunny spot. After a few weeks, you’ll notice sprouts growing from the eyes of the sweet potato chunks.
- Once the sprouts, or slips, are about 6–12 inches long, carefully twist them off the tuber. Be gentle to avoid damaging the slips.
- Place the slips in a container of water, keeping the leaves above the waterline. Roots should begin to form within a few days.
- Once the slips have developed healthy roots, you can plant them in the garden or a container.
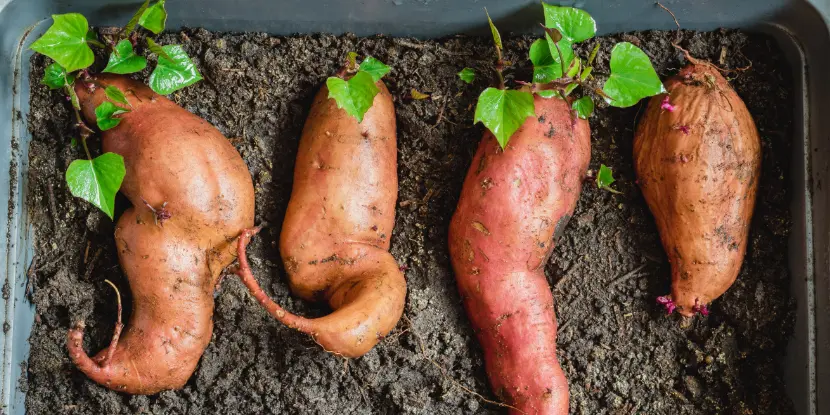
New growth on sweet potato tubers.
Planting Sweet Potatoes
When to Plant
The ideal time to plant sweet potatoes in Southern California is between March and June.
Planting in early spring gives the sweet potatoes ample time to develop before the summer heat sets in, putting you on schedule for a bountiful harvest from August through October.

Sweet potato slips growing in a jar of water.
Light Conditions
Sweet potato plants need at least 6 to 8 hours of direct sunlight daily for optimal growth.
While they tolerate partial shade, too much shade will hinder their growth and reduce the quality and quantity of the sweet potatoes.
Place them in a part of the garden where they receive maximum sunlight, avoiding spots shaded by trees or large structures.
Preparing the Soil
- Sweet potatoes prefer well-draining soil with a slightly acidic pH between 5.0 and 6.5. Conduct a soil test and adjust as needed.
- Loosen the soil to a depth of 12 to 15 inches. This will help the tubers grow without obstruction.
- Mix in organic matter, such as compost or well-rotted manure, to improve soil structure and fertility. Aim to add 2 to 3 inches of organic material to the topsoil.
- If your soil is heavy clay or tends to retain water, consider planting sweet potatoes in raised beds or mounds for proper drainage and aeration.
- Create rows or raised beds 8 to 10 inches high and spaced 3 feet apart to provide ample room for the vines to spread and the tubers to develop.
- Water the prepared soil thoroughly a day or two before planting. It should be moist but not soggy.
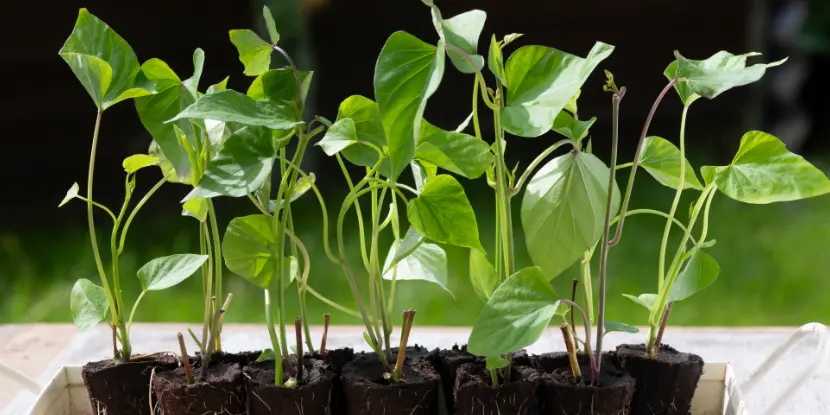
Sweet potato slips ready for transplanting.
Transplanting Sweet Potatoes
- Dig holes approximately 12 inches apart in the prepared rows or raised beds. Each hole should accommodate the slips and their roots, about 4 to 6 inches deep.
- Place a sweet potato slip into each hole. Gently firm the soil around the base of each slip to eliminate air pockets.
- After planting, water the slips thoroughly to help settle the soil and initiate root development. Keep the soil moist as the plants establish themselves.
- Apply a layer of mulch, such as straw or grass clippings, around the plants to retain soil moisture, suppress weeds, and maintain an even soil temperature.
- As the vines grow, guide them to spread evenly across the rows or raised beds. This maximizes sunlight exposure and air circulation, which is crucial for healthy growth.
Watering Sweet Potatoes
- Sweet potatoes need about 1 inch of water per week throughout the growing season.
- Water deeply and less frequently to encourage deep root growth. This typically means watering once or twice weekly, adjusting based on weather and soil conditions.
- Excessive watering can lead to root rot. Ensure the soil has good drainage to prevent standing water.
- Apply organic mulch to retain moisture, reduce evaporation, and keep the soil temperature consistent.
- About 3–4 weeks before harvesting, reduce watering to toughen the skin of the sweet potatoes and improve storage quality. Keep the soil relatively dry to prevent the tubers from splitting.
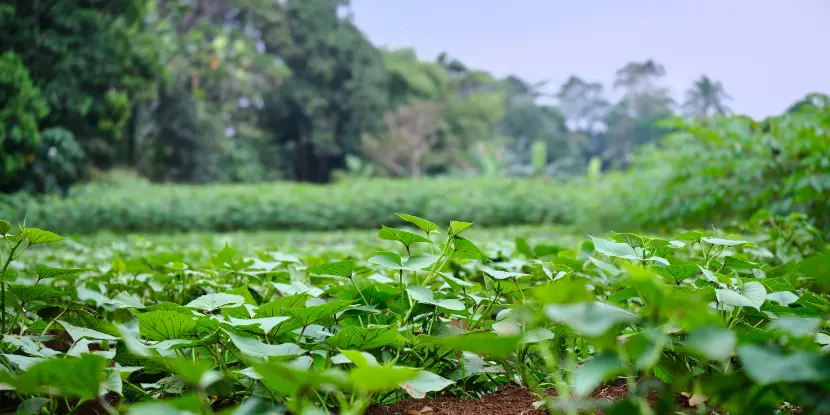
Sweet potato plants in a field.
Fertilizing Sweet Potatoes
- Before planting, enrich the soil with a balanced, slow-release fertilizer to ensure a steady supply of nutrients throughout the growing season. Incorporate the fertilizer into the top 6 inches of soil.
- Too much nitrogen can cause excessive vine growth at the expense of tuber production. Use a fertilizer with a balanced N-P-K ratio, such as 10-10-10 or 12-12-12.
- Higher levels of phosphorus and potassium support root development and tuber growth. Consider adding bone meal or rock phosphate for phosphorus and wood ash or greensand for potassium.
- 4-6 weeks after planting, side-dress with a low-nitrogen, high-potassium fertilizer to boost tuber development. Apply the side-dressing in a band along the side of the rows, avoiding direct contact with the plants.
- Compost and well-rotted manure are excellent organic fertilizers. Apply a 2 to 3-inch layer of compost around the plants at planting and mid-season.
- Monitor plant growth and apply additional fertilizer based on the plants’ visual health and vigor. Sweet potatoes typically need 2-3 feedings per season in nutrient-rich soils.
Pests & Diseases
Pests
- Sweet Potato Weevil: Identity by the elongated snout and orange-red body. Control via certified slips, crop rotation, pheromone traps, and removing infected plants.
- Flea Beetles: Small beetles that create foliage holes. Use floating row covers and insecticidal soaps.
- Wireworms: These click beetle larvae bore into tubers. Control with crop rotation and regular soil tilling.
Diseases
- Fusarium Wilt: Causes wilting and yellowing leaves; brown vascular tissue. Control with resistant varieties, crop rotation, and proper sanitation.
- Root Knot Nematodes: Cause root galls and reduced yield. Use crop rotation, resistant varieties, and beneficial nematodes.
- Black Rot: Causes dark lesions and yellowing vines. Control with resistant varieties, crop rotation, and proper sanitation.
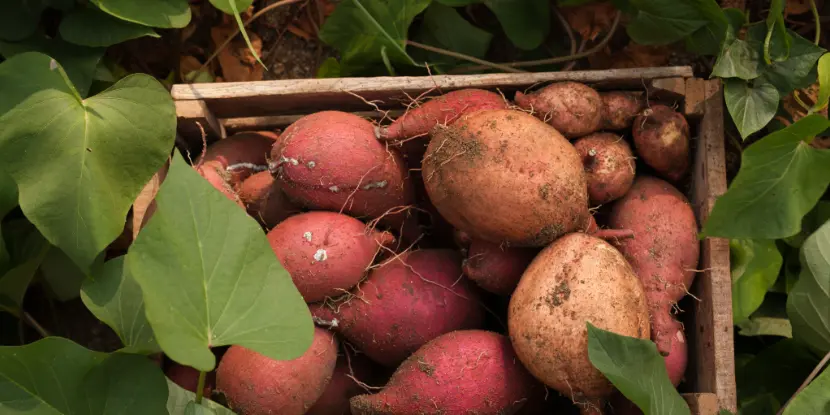
Freshly harvested sweet potato tubers.
Harvesting Sweet Potatoes
- Sweet potatoes are typically ready to be harvested 3 to 4 months after planting, usually when the leaves start to yellow and die back. The exact timing also depends on the variety and growing conditions.
- Use a digging fork or spade to lift the tubers from the soil. A fork is often best because it reduces the risk of cutting or damaging the sweet potatoes.
- Before harvesting, loosen the soil around the plants, starting about 12 to 18 inches away from the center of the plant. This will help you lift the tubers without breaking them.
- Carefully lift each sweet potato plant from the soil. Shake off excess soil and gently pull the tubers from the roots.
- Remove and discard any damaged or diseased tubers. Clean and sort the healthy ones by size for better curing and storage.
- Cure the sweet potatoes in a warm, humid area (85°F and 85% humidity) for about 10 days. This process hardens the skin, improves flavor, and lengthens storage life.
- Once cured, store the sweet potatoes in a cool, dry, and dark area. Ideal storage temperatures range between 55°F to 60°F, with high humidity to maintain their natural moisture content.
- Sweet potatoes bruise easily, so handle them gently during harvesting, curing, and storage.
FAQs: Growing Sweet Potatoes
Q: What’s the best time to plant sweet potatoes?
Plant your sweet potatoes once all danger of frost has passed and soil temperatures have reached at least 60°F. This typically falls between late spring and early summer, depending on the region.
Q: What type of soil is ideal for growing sweet potatoes?
Sweet potatoes prefer well-drained, loamy soil with a slightly acidic to neutral pH of 5.5 to 7.0. They don’t perform well in heavy, compacted, or rocky soils.
Q: How much sunlight do sweet potatoes need?
They require full sun, meaning at least 6 to 8 hours of direct sunlight daily.
Q: How should I prepare the planting site for sweet potatoes?
Till the soil to a depth of 8-10 inches and incorporate a generous amount of compost or well-rotted manure to improve fertility and drainage.
Q: What’s the proper spacing for sweet potato plants?
Sweet potato slips (young plants) should be planted about 12 to 18 inches apart in rows 3 to 4 feet apart. This spacing allows room for the vines to spread and the tubers to expand.
Q: How often should I water sweet potatoes?
Water regularly to keep the soil consistently moist but not soggy. Sweet potatoes generally require about 1 inch of water per week from rainfall or irrigation.
Q: Do sweet potatoes need fertilizer?
Sweet potatoes benefit from an early application of a balanced, low-nitrogen fertilizer at planting time. Avoid excessive nitrogen, which promotes foliage growth at the expense of tuber development.
Q: How do I combat pests and diseases in sweet potatoes?
Practice crop rotation, avoid overhead watering to reduce leaf wetness, and keep the area free of debris. Use appropriate organic or chemical treatments only as necessary, and follow label instructions.
Q: When are sweet potatoes ready to harvest?
Sweet potatoes are usually ready to harvest 90 to 120 days after planting when the leaves start to yellow. Dig a test potato to check the size before fully harvesting.
Q: How should I harvest sweet potatoes?
Carefully dig around the plants with a spade or fork, starting a few inches from the vines. Lift the entire plant gently to avoid damaging the tubers.
Q: What is the proper way to cure sweet potatoes?
After harvesting, cure sweet potatoes in a warm (about 85°F), humid (85% humidity) environment for 7 to 10 days. This process improves their flavor, texture, and storage longevity.
Q: How long can sweet potatoes be stored?
Cured sweet potatoes can be stored in a cool (about 55°F), dark, and well-ventilated place for up to 6 months. Avoid refrigerating them, as cold temperatures can affect their taste.