If you’re looking to start a garden, but don’t have the space for a traditional garden plot, you may want to consider a raised garden bed.
A raised bed is simply an elevated platform for growing plants. The frame can be made of various materials, including bricks and metal, but in this blog post, we’ll show you how to build a raised bed out of wood.
A raised garden bed will fit on almost any size lot. We built ours 12′ x 3′, which was perfect for our side yard.
Supplies
- 2 2×12 boards
- 2 2×12 boards
- Kellogg Garden’s Raised Bed & Potting Mix
- 10 Bags of Quickrete 3/4″ gravel
- 4″ exterior screws
- 4 wood stakes
- String
- Inverted marking paint
- Flex Seal spray
- Thompson’s Water Seal
- Large paint brush
- Small paint pail
You don’t need a lot of tools for this project. Anawalt Lumber can cut your wood to length in-store, so some tools we list are optional.
- Drill
- Shovel (preferably a trenching shovel)
- Level (the longer, the better)
- Tape measure
- Miter saw (optional)
- Circular saw (optional)
- Hand saw (optional)
1. Choose A Spot for Your Raised Garden Bed
The perfect location for your garden can make all the difference in its success. We had limited space, but found a spot with sun exposure for at least half the day, which will be enough for the herbs we’re growing.

Raised gardens with healthy vegetable plants.
2. Measure & Mark Your Plot
Before you can start digging your trench for your raised bed, you need to measure and mark the area. Grab a tape measure and some stakes, and stake out the corners of your bed. We wanted our bed to be 18″ away from the fence, so there would be room to work on the side and back of the bed.
Once you have placed your stakes, wrap the string around each corner to outline your raised bed. Next, use inverted marking paint to mark the outline of your bed and remove the stakes and string. Now you’re ready to start digging!
3. Dig Your Trench & Add Gravel for Drainage
Now that you have your outline, you need to dig a trench and add gravel for drainage. Using the paint outline as your guide, dig a trench that is 4″-6″ wide and 4″ deep. It’s not necessary to level the trench perfectly as you dig since you can fix that when you add the gravel.
Once you’ve finished digging, tamp down the ground to make it more compact. This will help to keep the area level and prevent it from settling too much over time. If the ground is already hard and compact, you may not need to do much tamping. Otherwise, you may need to put some effort into it.
Next, grab your bags of gravel and begin pouring them into the trench. Start with an even layer, then use your level to make adjustments as necessary. Once you have poured the gravel in to fill the trench and you are happy it is level, give it a little light tamping again to ensure it is flat for when you make your frame.
4. Create the Frame for Your Raised Garden Bed
It’s time to grab your 2x12s for the frame of your raised bed. If you had them cut to length at Anawalt, then you are ready to build the frame. If you chose to cut them yourself, then get your cutting tool of choice ready. The boards we bought were already 12 ft., so we didn’t need to cut those, but we needed to cut the boards for our sides. To make our raised bed 3 ft. long, we needed to cut our side pieces of wood to 32″ since we have to account for the 2″ board thickness.
Building the frame for your raised garden bed is a simple process, but it’s important to do it correctly to ensure that your bed is stable and will last for years to come. Start by grabbing two of your 2×12 boards and placing them together, with the shorter board on the inside of the longer board. Use screws to secure the two boards, making sure to insert them evenly spaced apart. Repeat this process until all four sides of your frame are complete.
Once your frame is assembled, double-check that is level, and make adjustments as necessary. Because it’s just a raised garden bed, we want it to look square, but it doesn’t have to be perfectly square. When you’re satisfied that it’s square enough and level, you’re ready to seal the wood.
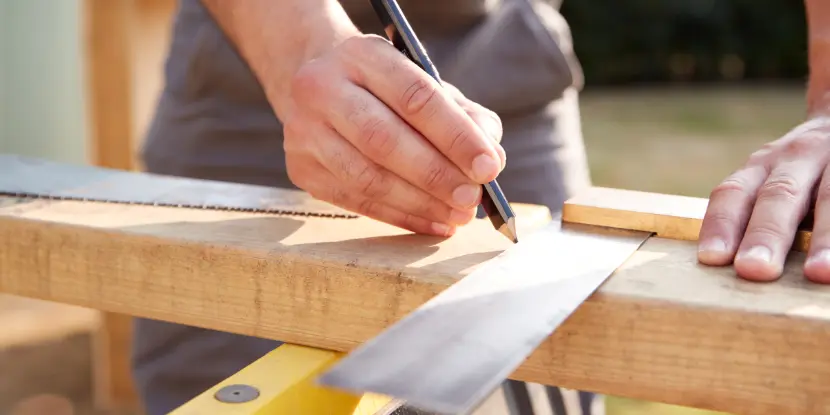
Measuring wood for a raised garden.
5. Seal Your Raised Garden Bed
Now that your raised garden bed frame is complete, you should waterproof the wood. This will help to protect the wood from rot and weathering, and it will also make it easier to clean. We recommend using Flex Seal on the inside of your raised garden bed rather than a plastic liner because it’s much easier to install to achieve the same results.
Spray on a generous amount of Flex Seal, making sure to get into all of the corners and crevices. I over-sprayed the corners to create a good seal. Once you have applied Flex Seal to the entire interior surface of your raised garden bed, let it dry for about 15 minutes. After 15 minutes have passed, tap the Flex Seal with your finger to how much it has dried. It should feel tacky but none comes off and sticks to your fingers. If any comes off, let it continue to dry for 15 more minutes.
With the interior waterproofed, it’s time to seal the exterior. We recommend using Thompson’s Water Seal because it will help to protect the wood from water damage and weathering, and it will look good. You can choose to use a water seal with tint or stain, but we liked the look of the clear coat.
Grab your paint pail or paint tray and pour some water seal into it. Using your paintbrush, apply a generous amount to the top and sides of the wood. Don’t worry if it runs onto the side with the Flex Seal.
Once you have applied the water sealer to all sides, leave everything to dry for 24 hours.
6. Add Soil & Plant
After your sealants have dried, it’s time to add soil and plant your garden. You can use either potting mix or topsoil, but a straight potting mix can get expensive without providing extra benefits. We used Kellogg Garden’s Raised Bed & Potting Mix for our raised garden bed because it’s organic, affordable, and will provide our plants the nutrients they need.

Adding soil to a raised garden frame.
Fill your raised bed with soil to 1″ below the top. This prevents the soil from spilling over the sides when you are working in it.
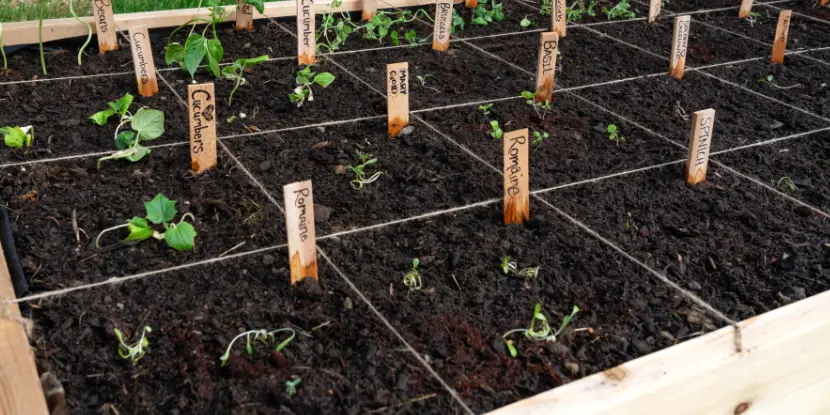
A raised garden laid out in plots.
And that’s it! You’ve now built a raised garden bed! We hope you found this blog post helpful, and that you enjoy growing your very own vegetables, flowers, herbs, or whatever you want. We always love seeing photos of your gardens, so please share them with us on Facebook or Instagram. Happy gardening!
FAQs: Building a Raised Garden Bed
Q: What’s the best wood for a raised garden bed?
Cedar and redwood are excellent choices because they’re naturally rot-resistant and can withstand weather conditions without sustaining damage from moisture or insects.
Q: How deep should a raised bed be for most vegetables?
12-18 inches depth is optimal for most vegetables, allowing enough room for roots and adequate drainage.
Q: Do I need to line the bottom of my raised garden bed?
Lining the bottom with a porous material like landscape fabric can help prevent weeds from growing up into the bed while still allowing water to drain.
Q: What soil is best for raised garden beds in Southern California?
A mix of potting soil, compost, and manure is ideal. The compost provides nutrients, while the potting soil and manure help retain moisture, which is crucial in dry climates.
Q: How often should I water my raised garden bed?
Watering needs vary by season, with more frequent watering necessary in the hotter, dryer months. It’s generally best to water deeply a few times weekly rather than a little bit every day.
Q: What vegetables grow well in raised beds?
Tomatoes, peppers, lettuce, and root vegetables like carrots and radishes thrive in the warm, sunny conditions of Southern California.
Q: Can I build a raised garden bed on concrete?
Yes, you can if there’s adequate drainage. Consider setting the bed on feet or blocks and drilling holes at the bottom for water to escape.
Q: What’s the best way to protect my raised bed garden from pests?
Row covers or netting can protect plants from birds and insects. Regularly inspecting and removing pests by hand or with natural pesticides is also effective.
Q: How can I maximize water retention in my raised bed during the summer in Southern California?
Adding mulch on top of the soil can help retain moisture, reduce water evaporation, and keep the soil temperature stable.
Q: Is it necessary to rotate crops in a raised garden bed?
Crop rotation helps prevent soil depletion and reduces the risk of disease and pest infestations. Rotate your crops seasonally or annually for the best results.