Kale is a “superfood” packed with vitamins, nutrients, antioxidants, and phytonutrients. But, as with all vegetables, its nutrient profile degrades once it’s picked.
- Chlorophyll depreciates shortly after harvest, leading to color changes and nutritional decline.
- Vitamin C levels drop, with a 50% loss in just one week.
- Storage at room temperature can contribute to significant nutrient loss.
Ouch! What to do?
Grow kale in your garden, of course, to get the most out of this nutritious leafy vegetable. It’s surprisingly easy!
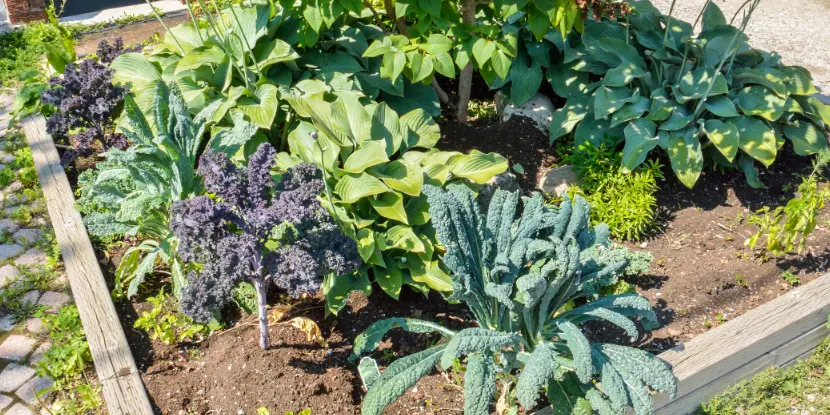
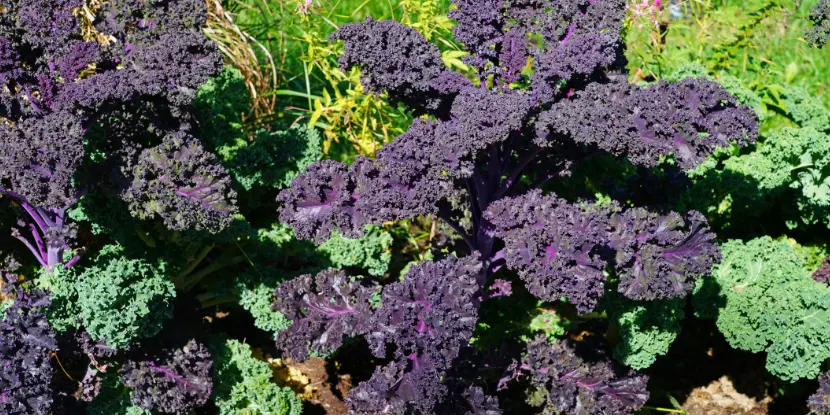
Varieties of kale grown in a raised be alongside companion plants.
Why You Should Grow Your Own Kale
As the keeper of the kale, you control everything from soil fertility to harvest time.
- No Pesticides or Chemicals: You determine what goes into the soil and onto your plants. You can use organic methods to keep pests at bay.
- Freshness: Freshly picked kale is at its peak flavor and nutrient density. You needn’t worry about how long it has sat in a grocery store or transport.
- Variety: You’re not limited to the one or two varieties sold at grocery stores. There are many kale varieties, each with a unique flavor profile and nutritional benefits.
- Cost: You’ll have an endless supply of inexpensive organic kale in your backyard.
Choosing Your Kale Variety
Some kale varieties are better suited for Southern California’s climate and growing conditions than others. The best options include:
- Curly Kale (Brassica oleracea var. sabellica): This plant is highly adaptable to different soil types and is known for its ruffled leaves and robust flavor.
- Lacinato Kale (Dinosaur Kale or Toscano Kale): This kale thrives in warmer climates and is characterized by dark blue-green leaves with a slightly crinkled texture.
- Red Russian Kale (Brassica napus var. pabularia): With its red veins, green leaves, and a slightly sweet taste, Red Russian Kale is visually appealing and also heat-tolerant.
- Siberian Kale: This variety tolerates both heat and cold. Its broad, flat leaves are more tender than other types, ideal for salads.
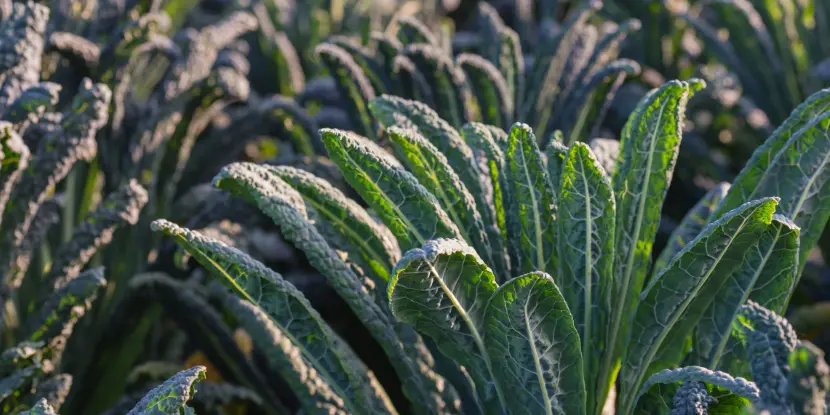
The long spear-like leaves of Tuscan kale.
Ideal Growing Conditions for Kale
- Sunlight: Kale requires at least 6 to 8 hours of direct sunlight daily. While it tolerates partial shade, direct sunlight boosts its growth and flavor.
- Soil pH: The plant prefers soil with a pH between 5.5 and 6.8. Add lime to raise the pH level if your soil is too acidic.
- Moisture: Keep soil consistently moist but not soggy. Mulching around the base of plants helps retain moisture and prevent weed growth.
- Fertilizer: Use a balanced organic fertilizer before planting, and side-dress with compost or an organic vegetable fertilizer once plants are established.
Temperature
Cool temperatures are optimal — between 45°F and 65°F. Kale tolerates some frost, making it an excellent crop for fall and winter gardens.
It can also withstand Southern California’s hot summers, especially if planted in a location with afternoon shade to mitigate the intense heat.
Lacinato Kale and Siberian Kale are well-suited for warmer climates, showing an impressive resilience to heat.
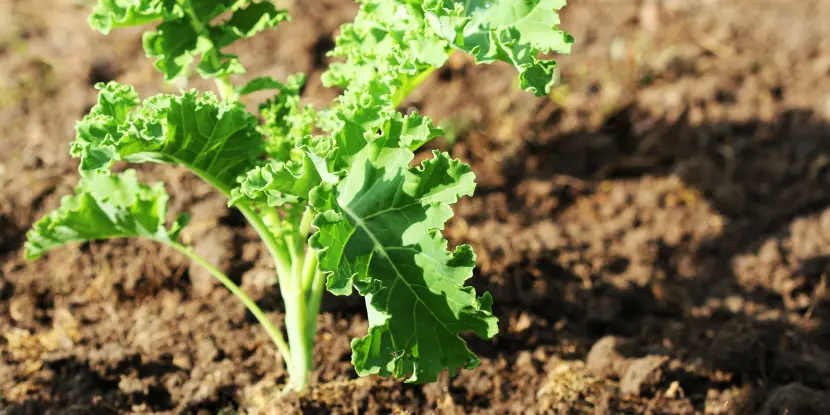
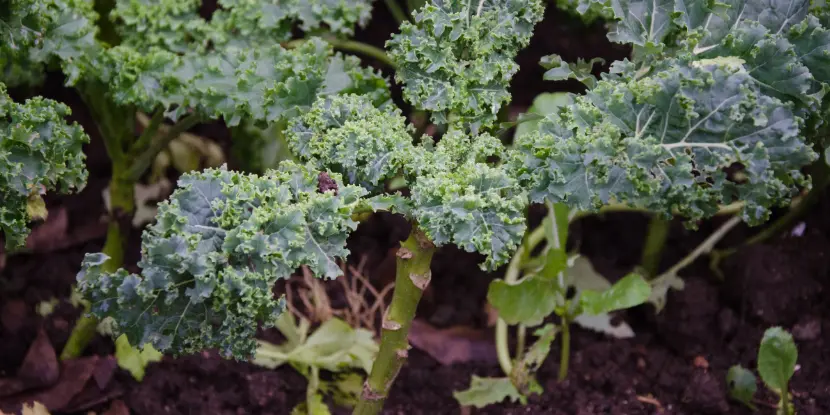
A young kale plant in the garden.
When to Plant Kale in SoCal
Kale can be planted year-round in most parts of Southern California.
Planting in September or October allows the kale to establish itself during the cooler months, leading to a sweeter taste post-frost.
Consider planting additional seeds every few weeks throughout the fall for a continuous harvest. Extreme summer temperatures can lead to bitterness, making fall plantings best for flavor.
Preparing Your Garden Bed for Kale
- Choose the Right Location: The planting area should receive at least 6 to 8 hours of direct sunlight daily. Avoid places prone to waterlogging.
- Test Soil pH: Use a soil testing kit to determine the pH level. Aim for a pH between 5.5 and 6.8. If your soil is too acidic or alkaline, adjust the pH accordingly with lime (to increase pH) or sulfur (to decrease pH).
- Clear the Area: Remove any weeds, rocks, or debris from the planting area. This eliminates competition and provides room to grow.
- Amend the Soil: Mix in organic compost to improve structure and fertility if your soil is heavy clay or too sandy.
- Till the Soil: Use a garden fork or tiller to loosen the soil to about 12 inches deep. This allows the kale roots to penetrate and expand.
- Add Fertilizer: Mix a balanced organic fertilizer into the top few inches of soil to give your kale a healthy start.
- Level the Soil: Rake the surface of your garden bed smooth, breaking up any large clumps of dirt.
- Moisturize Before Planting: Water the prepared bed lightly a day before planting your kale seeds or transplants to keep the soil moist (but not waterlogged).
Purple and green kale growing alongside each other.
Planting Kale Seeds
Seed Selection & Germination
Choose high-quality kale seeds from a reputable supplier; if you buy online, ensure the variety is well-suited for cultivation in your area.
Germination time varies by cultivar but is typically around 7 to 10 days.
Steps for Planting Seeds
- Rake the top of your garden bed lightly so that seeds will have better contact with the soil.
- Follow seed packet instructions for appropriate seeding depth (usually about 1/4 inch).
- Space kale seeds 12 to 18 inches apart in rows at least 18 inches apart.
- Cover the seeds with soil and gently pat them down.
- Water lightly.
- Keep the soil consistently moist until seedlings emerge.
Closeup of kale leaves growing from a central stalk.
Transplanting Kale Seedlings
- Prepare your garden bed as outlined above.
- Dig a hole slightly larger than the root ball of your seedling.
- Place the transplant in the hole and fill with soil, gently patting it around the plant.
- Water well.
- Space kale plants 12 to 18 inches apart in rows at least 18 inches apart.
Caring for Kale Plants
- Mulch around plants to retain moisture and prevent weeds.
- Water regularly, aiming for 1 to 1.5 inches per week.
- Harvest outer leaves when they reach the desired size (usually 6 to 8 inches long).
- Fertilize with compost or organic vegetable fertilizer every few weeks during the growing season.
- Keep your kale bed free of weeds, which compete with your plants for nutrients and water.
- Monitor your kale plants for pests like aphids and cabbage worms. Handpick any pests, or use organic insecticidal soap to control infestations.
- To reduce the risk of disease, avoid overhead watering; water at the base of plants.
- Remove any yellowing or damaged leaves to promote healthy growth.
Harvesting & Storage
Harvest kale leaves when they reach the desired size, usually 8 to 10 inches long. Use scissors or garden shears to snip off individual leaves, leaving the central bud intact for continued growth.
Fresh kale leaves can be stored in a plastic bag in the refrigerator for up to a week. Blanch and freeze kale for long-term storage, then add it to soups and stews later.
From hearty soups to delicious salads, there are endless ways to incorporate kale into your meals. Try sautéing it with garlic and olive oil or blending it into a nutrient-packed smoothie.

FAQs: Growing Kale
Q: How often should I water kale plants?
Kale plants prefer consistent moisture, so aim to water them regularly, especially during dry spells. Don’t overwater, as this can lead to root rot.
Q: Can I grow kale indoors?
Yes, as long as there’s adequate sunlight and moisture. A grow light can supplement natural light and ensure healthy growth.
Q: How do I prevent kale from becoming bitter?
Harvest it when the leaves are young and tender. Blanching the leaves before cooking can also reduce bitterness.
Q: Are there good companion plants for kale?
Kale grows well alongside lettuce, spinach, and Swiss chard. Avoid planting it near cabbage, cauliflower, and other brassicas to prevent cross-pollination.
Q: Can I replant kale after harvesting?
Kale plants can regrow after harvesting. Cut the central stalk down to a few inches above the soil, and new leaves will begin to grow. However, for optimal growth, it’s best to start with fresh seeds or seedlings.
Q: How long does a kale plant live?
Kale plants are biennial, meaning they have a two-year lifespan. However, most gardeners harvest and replant kale every year for continued production. With proper care and growing conditions, kale plants can produce leaves for several months before seeding in their second year.
Q: Can kale survive frost and snow?
Kale is remarkably frost-tolerant. A light frost can make kale leaves sweeter. While heavy snows can damage the plant, kale can survive and continue to produce leaves in temperatures as low as 20°F (-6°C).
Q: What’s the best way to deal with kale pests?
Introduce beneficial insects like ladybugs to control aphid populations. For cabbage worms, regularly check the undersides of leaves and manually remove pests or use Bacillus thuringiensis (Bt), a natural soil-dwelling bacterium.
Q: Can I use kale as a microgreen?
Absolutely! Kale seeds can be planted densely in trays and harvested as microgreens. These tender young shoots are packed with nutrients and are perfect for salads and sandwiches. Harvest them when they’re about 2 inches tall for the best flavor.
Q: What should I do if my kale plants are flowering?
When kale plants begin to flower, it’s a sign they are bolting, usually due to warm weather. Once bolting occurs, kale becomes more bitter. You can harvest and eat the flowers, which are edible and sweet, but it’s often best to harvest the leaves before the plant fully bolts.
Q: Is kale susceptible to disease?
Kale can be vulnerable to black rot, downy mildew, and powdery mildew. To reduce the risk, ensure good air circulation around your plants and avoid overhead watering to keep the foliage dry. Crop rotation and planting disease-resistant varieties can also prevent these issues.