Straw bales conjure up images of hay rides, old episodes of Hee Haw on YouTube, and livestock at feeding time.
But did you know they’re increasingly popular in urban gardens? No garden plot required! They’re a perfect medium for veggies, herbs, flowers — you name it.
Straw bales hold several advantages over soil:
- They’re low-cost and widely available.
- They’re free of weeds, pests, and diseases that plague traditional garden beds.
- Their raised height reduces the strain of bending or kneeling.
- They can be stacked to create vertical gardens and maximize space.
Remember Hee Haw? So do we. That’s not what we’re talking about.
As the straw bale decomposes, nutrients are released into the straw matrix, serving as a fertile base for plant roots.
- The straw bale is an insulating layer, protecting roots from excessive ground heat.
- The decomposition process generates warmth, which allows for an extended growing season even in cooler climates.
- Straw retains moisture to provide a consistent hydration to plants.
- The fibrous structure of the straw bale offers ample support for plant roots.
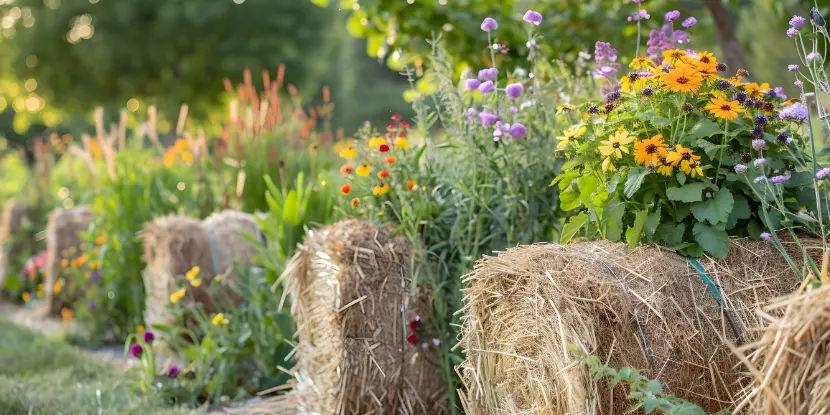
Straw bales planted with flowers.
Getting Started
You’ll need the following materials:
- Straw bales (not hay bales — they can contain seeds that will sprout in your garden)
- Organic fertilizer
- Compost or other nutrient-rich material
- Heavy-duty garden gloves to protect your hands
- A trowel or small shovel for digging small holes in the bales
- Garden stakes or twine to support taller or vine-like plants
- Hose or watering can
- Wheelbarrow or cart to transport heavy bales and other materials to your gardening site
Look for bales of wheat, barley, or oats — they provide the best-growing medium. Straw bales are usually available at feed and farm supply stores, but you can also find them at garden centers.
Choose a spot that receives full sun for most of the day. You’ll need to water the bales frequently, so make sure your chosen location is close to a water source.
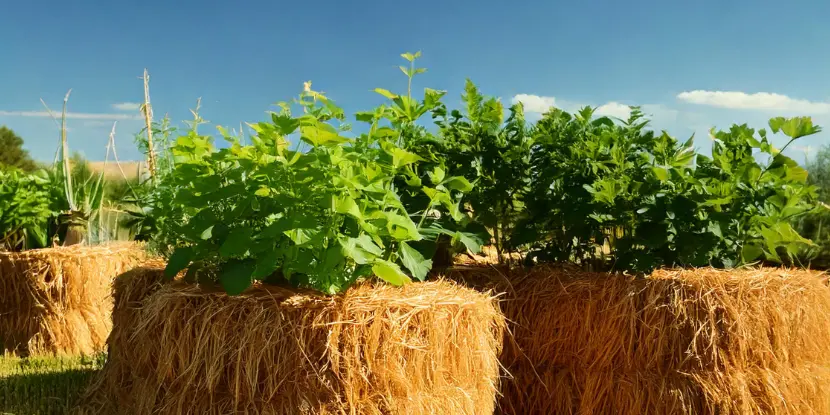
Healthy squash plants growing from straw bales.
Conditioning Your Bales
This process involves slowly decomposing the inside of the bale over several days by adding water and nutrients. Here’s how to do it:
- Position your bales in your chosen location with the cut side facing up and the strings on the sides (not touching the ground).
- Water them thoroughly, soaking them until water escapes from the bottom.
- Add organic fertilizer over the top of each bale — about two cups per bale.
- For best results, add compost or other nutrient-rich material between each layer of straw within the bales.
- Water daily for 3 days to keep your bales evenly moist.
- On day 4, reduce watering to every other day and continue this schedule for an additional week.
- By day 10, your bales should be ready for planting! The inside of the bale should be warm, and the straw should be breaking down into a soft, spongy texture.
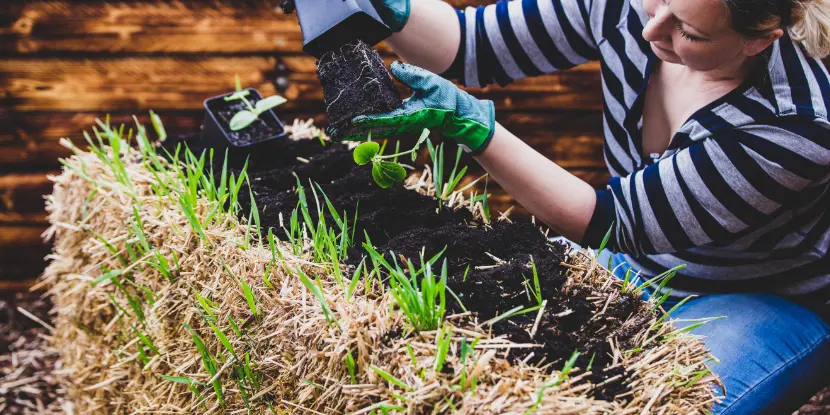
A gardener plants a straw bale garden.
Planting in Straw Bales
- Dig small holes in the top of the bale to plant your seedlings or seeds. Space them according to their planting instructions.
- Secure any plants that need support to nearby structures or create a trellis over the bales.
- Water your plants regularly and add organic fertilizer throughout the growing season.
- At the end of the growing season, you can compost your spent straw bales or spread them as mulch in your garden beds.
Tips for Success
- Avoid using straw bales that have been treated with herbicides.
- Monitor the moisture level of your bales regularly and water as needed. Bales may dry out faster in hot or windy weather.
- Rotate crops each season to prevent nutrient depletion in your bales.
- Add a layer of compost or other organic material on top of the bale halfway through the growing season to replenish nutrients.
- For root vegetables, simply dig into the bale to harvest them. For above-ground veggies, carefully cut through the straw bale to remove them.
What Can You Grow?
Here, your options are limited only by the space a plant needs to develop.
- Vegetables like tomatoes, peppers, and cucumbers benefit from the warmth and nutrients of decomposing straw.
- Leafy greens like lettuce, spinach, and kale thrive in nutrient-rich straw bales.
- Herbs like basil, cilantro, and parsley are ideal for straw bale gardening.
- Strawberries and other small fruits can flourish in this unconventional garden bed.
- Flowers like marigolds, petunias, and zinnias do splendidly.
Root Vegetables
Root vegetables like beets and carrots demand special consideration.
- They need room to develop underground.
- Loose, decomposed straw allows them to penetrate and grow without obstruction.
- Plant your root vegetables in the center of the bale, where decomposition is most advanced, and bales are more nutrient-rich.
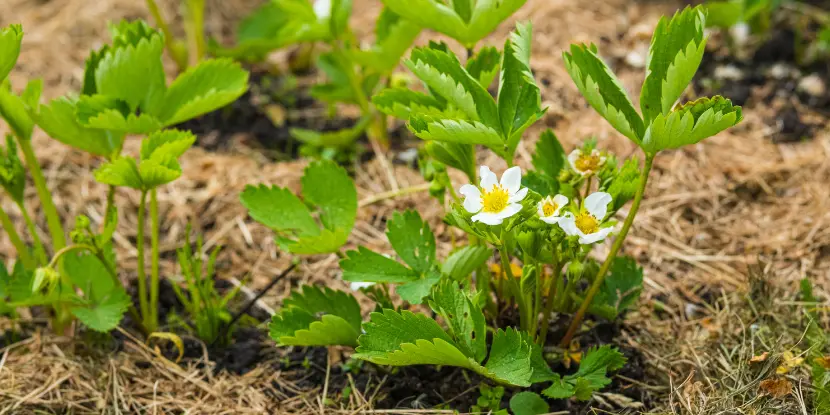
Strawberry plants in a bed of mulch.
FAQs: Straw Bale Gardening
Q: Can I reuse straw bales?
Straw bales typically last one growing season. While you can reuse them, they become compost or mulch material as they decompose.
Q: How do I know when my straw bales are ready for planting?
Conditioned straw bales should feel warm and have begun to break down. The straw will soften, and you’ll notice a sweet, earthy smell — signs that decomposition is underway.
Q: Is straw bale gardening suitable for all climates?
Yes, though it may require adjustments. In colder climates, the bales provide insulation; in hot regions, you may have to water more often.
Q: Do straw bales attract pests?
Straw bales are less susceptible to pests than traditional soil gardens. However, you may encounter slugs or snails. To manage them, apply organic pest control measures like diatomaceous earth.
Q: How often should I fertilize my straw bale garden?
We recommend fertilizing your straw bale garden every four to six weeks, depending on the plant’s growth and the fertility of your bales. Use a balanced organic liquid fertilizer.
Q: Can I grow perennials in a straw bale garden?
Straw bale gardening is best suited for annual plants since the bales decompose over the growing season. Perennials require a permanent location and soil structure that straw bales don’t provide.
Q: How do I maintain the structure of my straw bales?
Ensure they’re moist but not saturated throughout the growing season. This balance helps the bale retain its shape while providing optimal conditions for plant growth. Use garden stakes as additional support.
Q: Can I grow in straw bales without adding fertilizers?
While it’s technically possible, using fertilizers enhances the nutrient content of the bales and supports healthier plant growth. Straw lacks significant nutrients, so supplementation with organic fertilizers or compost during conditioning provides your plants with the nutrients to thrive.

