Like so many other popular garden plants, celery originated in the Mediterranean. It was first mentioned in Chinese writings in the 5th century AD and has been cultivated for centuries.
Ancient civilizations used celery as a medicinal plant. In 14th-century Italy, it was selectively bred into the form we recognize today. It provides the “crunch” in tuna salad sandwiches, as Frank Barone observed on Everybody Loves Raymond. Without it, you have tuna slop.
Celery’s Mediterranean heritage makes it a perfect plant for Southern California, where the climate is never too hot (yeah, right!) or too cold, just like Goldilocks’ preferred porridge.
This guide will show how to grow the time-tested vegetable in your Southern California backyard, with better results than the bitter, limp, store-bought celery in your crisper.
Best Celery Varieties for Southern California
The following varieties hold up well in Tinseltown’s growing conditions:
- Tall Utah is known for its sturdy stalks and exceptional flavor. It thrives in Southern California’s mild winters and warm summers, producing tall, crispy stems.
- Golden Self-Blanching has self-blanching stalks that turn a golden color. It’s an excellent choice for gardeners who prefer a less bitter taste and a variety that does well even in partial shade.
- Pascal is prized for its tender, juicy stems. It’s resistant to bolting, which makes it a winner in Southern California’s variable weather.
- Giant Red is an heirloom variety with red-hued stalks and a robust, slightly nutty flavor. It’s resilient to a range of growing conditions.
Starting from Seeds & Stalks
You can start your plant from seeds or stalks and clippings. The latter method, “regrowing,” is a simple way to recycle kitchen scraps into a productive garden yield.
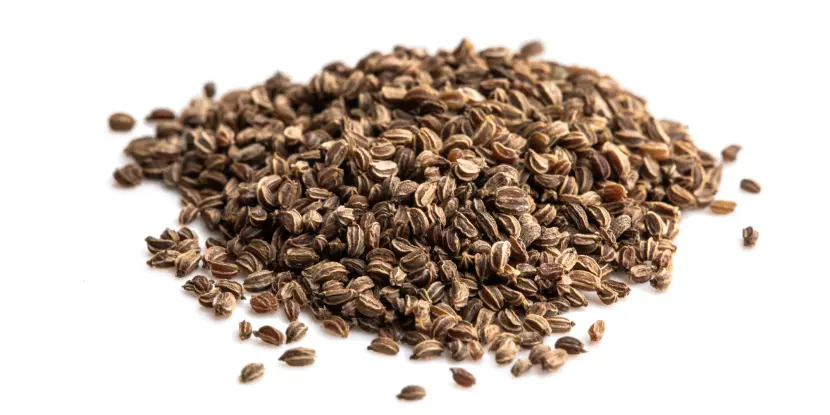
Celery seeds ready for planting.
Starting from Seeds
- To accelerate germination, soak celery seeds in warm water for 12-24 hours. This removes the natural inhibitors on the seed coat.
- Fill seed trays with a seed-starting mix. Sow the seeds on the surface, pressing them lightly into the soil without covering them completely. Celery seeds need light to germinate.
- Mist the soil to keep it moist but not soggy. Cover the trays with plastic wrap or a humidity dome.
- Keep the trays in a spot with temperatures around 70°F (21°C). Celery seeds typically germinate within 2-3 weeks.
- Once the seedlings have developed a couple of true leaves and are around 2 inches tall, transplant them to individual pots or directly into the garden bed.
Regrowing from Stalks
- Cut a celery stalk about 3 inches from the base. The base should be intact and undamaged.
- Place the base in a dish with about 1 inch of water, ensuring the cut side faces up. Keep the dish in a sunny spot.
- Change the water every couple of days to keep it fresh and mold-free.
- Within a week, you should see new growth emerging from the center of the base.
- When the new shoots are 2-3 inches tall, transplant the celery base into the soil, covering it with only the new shoots exposed. Water thoroughly.
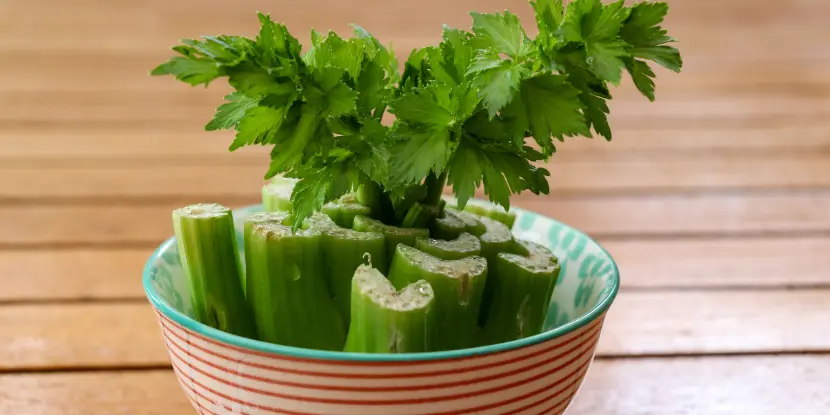
New celery growing from a stalk.
Starting from Clippings
- Take a healthy 4-6 inch long cutting from the top of a celery stem.
- Place the cut end in a jar with water, ensuring it covers about 1-2 inches of the end. Place it on a sunny windowsill.
- Watch for roots to develop over the next couple of weeks. Change the water regularly.
- Once the roots are about 1 inch long, plant the cutting in the garden with the base buried and the leafy part exposed.
Preparing the Garden
Soil
Celery prefers rich, well-draining soil with plenty of organic matter. Soil should be loose and friable and have a pH between 6.0 and 7.0. If the soil is too acidic, add lime to raise the pH. If it’s too alkaline, incorporate sulfur or peat moss.
Compost or aged manure will enhance the soil’s nutrient profile and water-holding capacity. This is crucial for celery, which has shallow roots and needs unbroken access to moisture and nutrients.
Sun
Celery grows best in full sun but can tolerate partial shade. Aim for at least 6 hours of direct sunlight daily. In hotter inland areas, afternoon shade can protect the plants from wilting.
Water
Celery is a water-loving plant. Keep soil moist but not waterlogged. Mulching around the base of the plant helps retain soil moisture and keep weeds at bay.
When to Plant
Celery grows well in temperatures between 50-70°F (10-21°C), so plan your planting accordingly. Fall and spring harvests will produce the best results.
Sow celery seeds indoors during late winter, ready for transplanting outside when the last frost has passed.
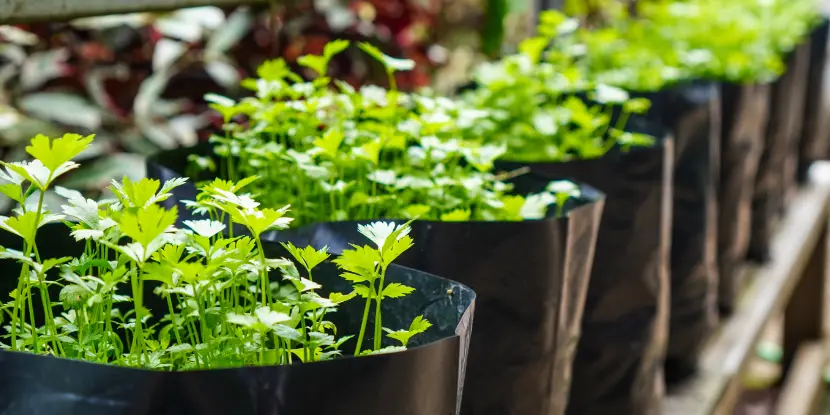
Celery seedlings growing in a greenhouse.
Spring Planting
In mild Southern California regions, you can sow celery seeds directly into the ground from early spring onward. Keep an eye on soil temperature; if it’s still cold, the seeds won’t germinate.
If you’re transplanting seedlings, start them indoors during late winter before putting them outside in the spring to ensure a harvest before the summer heat arrives.
Fall Planting
Fall planting is an excellent option in areas with mild winters. Sow the celery seeds in late summer and transplant seedlings outside when temperatures start to cool.
Transplanting Celery to the Garden
1. Preparing the Garden Bed
- Select a location with well-draining soil and at least 6 hours of sunlight daily.
- Amend the soil with compost or aged manure to provide a nutrient-rich environment.
- Balance the soil pH between 6.0 and 7.0 for optimal growth.
- Create trenches 6-8 inches deep, spaced about 18 inches apart.
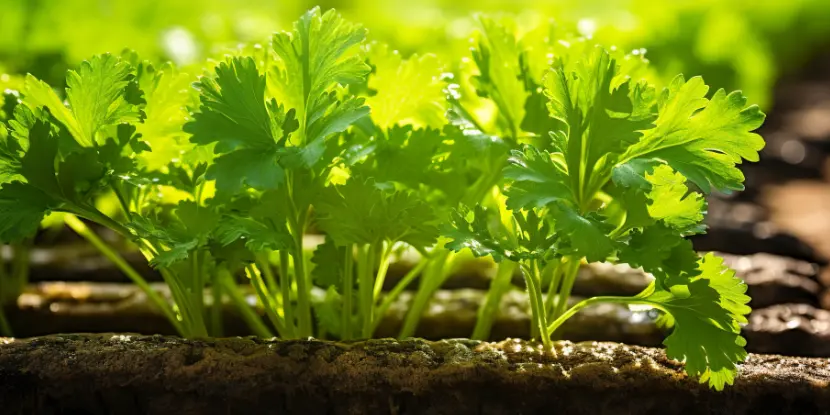
Young celery plants growing in rows.
2. Hardening Off the Seedlings
Hardening helps the seedlings acclimate to outdoor conditions and reduces transplant shock.
- Start hardening off the seedlings about 1-2 weeks before you plan to transplant them. Place the seedlings outside in a sheltered, shady spot for a few hours daily.
- Gradually increase the exposure to direct sunlight and outdoor conditions.
- Bring the seedlings back inside at night.
- After a week, the seedlings should be ready for transplanting.
3. Transplanting the Seedlings
- Water the seedlings thoroughly before transplanting to minimize shock.
- Space the plants 6 inches apart in each trench and cover their roots with soil, leaving only around an inch of stem exposed above ground level.
- Water the plants thoroughly after transplanting.
4. Caring for Your Celery Plants
- Keep soil consistently moist, but be careful not to overwater. Aim for about an inch of water per week.
- Mulch around the base of the plants to retain moisture and suppress weeds.
- Fertilize every 2-3 weeks with a balanced fertilizer or compost tea.
- As the plants grow, “earth up” by mounding soil around the base of the stalks to help them develop strong, upright stems
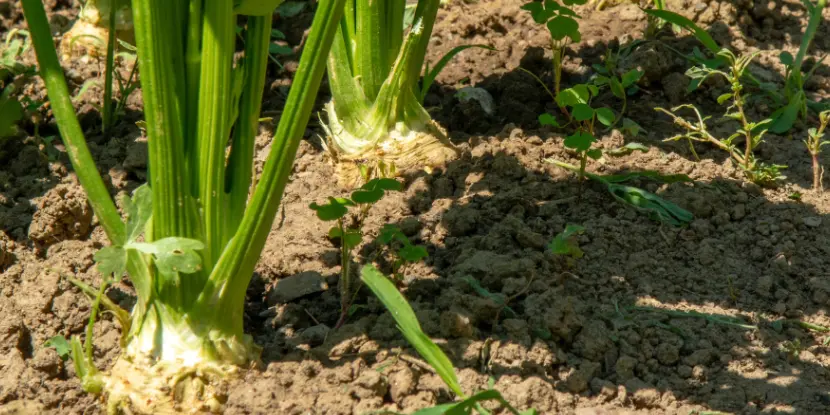
Celery plants need frequent watering due to their shallow roots.
Growing Celery in Containers
Celery is an excellent vegetable to grow in containers, especially if you have limited garden space.
- Choose containers at least 8-12 inches deep and wide enough to accommodate the celery’s root system. Containers should have drainage holes at the bottom.
- Use a high-quality potting mix rich in organic matter. To enhance the nutrient content, incorporate compost or aged manure.
- If planting seeds, follow the steps outlined in the “Starting from Seeds” section. For seedlings, fill the container with soil, make a small hole, and place one seedling in the center, covering the roots with soil.
- Keep the soil consistently moist, watering whenever the top inch of soil feels dry. Fertilize every few weeks with a balanced fertilizer.
- As celery grows, it may need support to prevent the stalks from bending or breaking. Use stakes or trellises to keep them upright.
Preventing Celery Bolting
Bolting occurs when celery sets seed prematurely, often triggered by temperature fluctuations or stress. When celery flowers and bolts, the stalks turn tough, bitter, and unpalatable. To ensure a successful harvest, follow these tips:
- Celery is sensitive to temperature changes. Try to maintain a consistent growing environment between 50-70°F (10-21°C). Avoid planting too early in the spring or too late in the fall when temperatures can be unpredictable.
- Harden off seedlings before transplanting them outdoors. Gradually expose them to outdoor conditions over a week to minimize shock.
- Drought stress can trigger bolting. Mulching around the base of the plants helps retain soil moisture and regulate temperature.
- Regularly fertilize with a balanced fertilizer to support healthy growth and reduce the likelihood of bolting.
- If you experience an unseasonably hot spell, protect celery with shade cloth or other temporary shade.
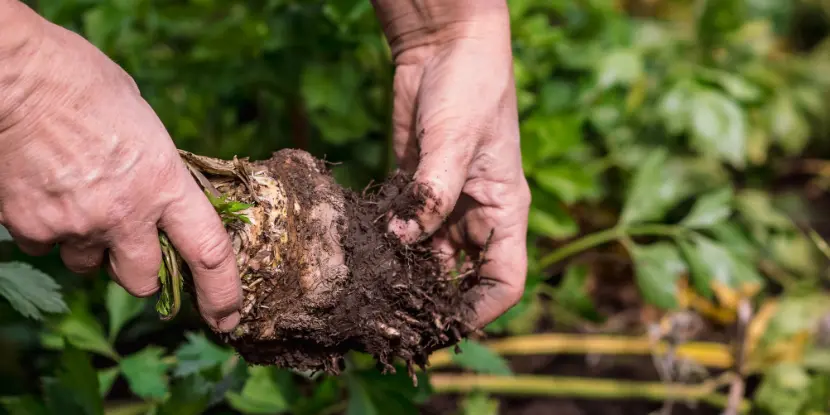
The shallow root system of a celery plant.
Controlling Pests & Diseases Organically
To keep your celery plants free from pests and diseases, consider these organic methods:
- Handpicking: Regularly inspect celery plants and manually remove pests like aphids and caterpillars. Dispose of the pests away from the garden.
- Neem Oil: Apply neem oil spray to control soft-bodied insects. Neem oil is a natural insecticide that can deter a wide range of pests.
- Insecticidal Soap: Use insecticidal soap to target aphids, spider mites, and whiteflies. This soap works on contact, breaking down the outer shell of these insects.
- Beneficial Insects: Introduce insects like ladybugs, lacewings, and predatory wasps to feed on common celery pests.
- Row Covers: Install floating row covers to let in light and water while keeping pests out.
- Crop Rotation: Rotate your celery crop with other unrelated vegetables to prevent soil-borne diseases.
- Clean Gardening Practices: Remove plant debris and weeds from the garden, as they can harbor pests and diseases. Clean tools and hands after working with infected plants.
- Companion Planting: Plant celery with companions like marigolds, garlic, and onions, which naturally repel pests.
- Bacillus Thuringiensis (Bt): Use Bt, a naturally occurring bacterium, to target and control caterpillar infestations without harming beneficial insects.
- Copper Sprays: For fungal diseases like early blight, apply copper-based fungicidal sprays.
Harvesting Celery
When to Harvest
- Celery typically matures from seedlings in 3-4 months. You’ll know it’s time to harvest when the stalks are at least 12 inches tall and about 1 inch in diameter.
- For a fall planting, harvest before temperatures drop below freezing. In milder climates, you can continue harvesting throughout the winter months.
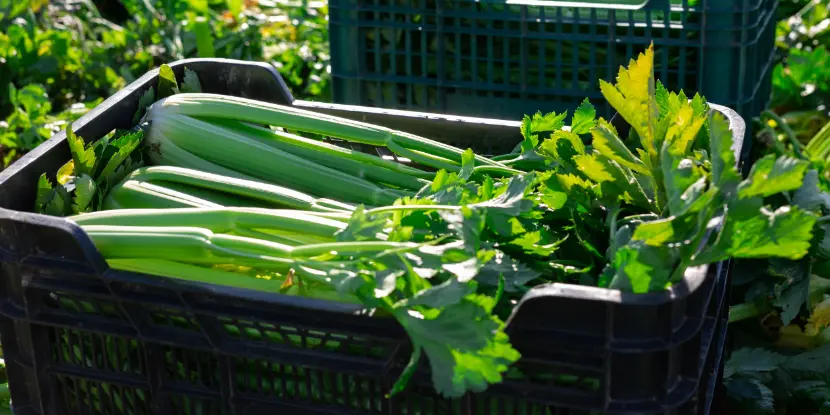
Freshly harvested celery plants.
Blanching Celery
Blanching involves covering celery talks to prevent direct exposure to sunlight. This tenderizes the celery, reduces its bitterness, and improves flavor. We recommend the following methods:
- Earthing Up: About two to three weeks before the expected harvest, mound soil around the base of the celery plants, covering them up to the bottom of the leaves. Keep the soil loose and not tightly packed around the stalks.
- Using Collars: To block out light, place cardboard or specially designed celery collars around the stalks. These collars can be made from thick paper, cardboard tubes, or dark plastic. Wrap the material around the stalks without damaging them.
- Covering with Row Covers: Install floating row covers or cloth to shade the celery plants. Temporarily cover the plants in the late afternoon and remove the covers in the morning, repeating this process daily until you’re ready to harvest.
How to Harvest
- Whole Plant Harvest: Use a sharp knife or garden shears to cut the entire celery plant just above the soil line. Make a clean cut to avoid damaging the celery stalks.
- Stalk-by-Stalk Harvest: If you prefer a continuous harvest, cut the outer stalks first, leaving the inner stalks to continue growing. Remove only the larger, mature stalks and allow the inner ones to develop further.
- Use and Storage: Consume fresh celery within a week for optimal taste and texture. For extended storage, celery can be blanched and frozen or kept in the refrigerator wrapped in a damp cloth inside a plastic bag.
FAQs: Caring for Celery Plants
Q: How long does it take for celery to mature?
Depending on the variety and growing conditions, celery typically takes 85-120 days to mature from seed to harvest.
Q: Is celery challenging to grow in Southern California?
No, celery is relatively easy to grow in Southern California with the right conditions and care.
Q: Why are my celery stalks thin and stringy?
This could be due to a lack of nutrients or inconsistent watering. Ensure your plants receive adequate moisture and regularly fertilize with a balanced fertilizer.
Q: Can I grow celery from the scraps?
Yes, you can grow celery from the base of a stalk. Cut off the base and place it in a shallow water dish, submerging the cut end. Change the water every few days until new leaves appear, then transplant the celery into soil.
Q: Can I harvest celery more than once per growing season?
If you only harvest a few stalks at a time, the celery plant will continue to produce new growth throughout the growing season, allowing you to enjoy fresh celery longer.
Q: What are some common pests that affect celery plants?
Common pests include aphids, slugs, snails, and celery leaf miners.
Q: What kind of soil does celery prefer?
Celery prefers rich, well-draining soil with a pH between 6.0 and 7.0. Amending the soil with plenty of organic matter, such as compost or aged manure, can provide the nutrients necessary for healthy growth.
Q: How often should I water my celery plants?
Water regularly to keep the soil from drying out. Aim to provide about 1-1.5 inches of water per week from rainfall or supplemental watering.
Q: Can celery be grown indoors?
Yes, celery can be grown indoors with sufficient light. Place the plants in a south-facing window or position grow lights to ensure they get at least 6-8 hours of sunlight daily.
Q: What is blanching, and how do I do it with celery?
Blanching involves mounding soil or wrapping paper around the celery stalks to protect them from sunlight. This process makes the stalks more tender and less bitter. Blanching should be done 2-3 weeks before harvest.
Q: How can I store harvested celery to keep it fresh?
Wrap the stalks in a damp paper towel and place them in a plastic bag or an airtight container to maintain their crispness. Properly stored celery can last for 2-3 weeks in the refrigerator.

