
Watermelon was first cultivated in West Africa over 4,000 years ago. Ancient Egyptians associated the fruit with regeneration and often placed watermelon seeds in the tombs of kings.
The plant thrives in the American South, which is hot and humid like its native West Africa. Given the right care and conditions, it can flourish in your Southern California garden.
The ancient Egyptians grew watermelons fit for a pharaoh. You can, too, if you follow the guidelines in this blog.
Selecting the Right Variety
Choose a drought-resistant cultivar that can withstand the region’s summer dry spells.
- Crimson Sweet: A classic oblong watermelon with deep red flesh and a tough, medium-thick rind. It has a high sugar content and is disease-resistant.
- Sugar Baby: A small, round watermelon with dark green skin and bright red flesh. It matures quickly and is perfect for smaller gardens or containers.
Seedless Watermelon Varieties
Seedless watermelons are sterile on their own. They require a pollinator variety planted nearby to produce fruit. Plants well-suited to Southern California include:
- Queen of Hearts: A disease-resistant variety with small, round fruit high in sugar.
- Triple Crown: A large, oval watermelon with a sweet flavor, bright red flesh, and a thin rind. It does well in hot and dry climates.
- Millionaire: Produces large, oval fruits with crisp, sweet red flesh. It needs consistent watering and fertile, well-drained soil.
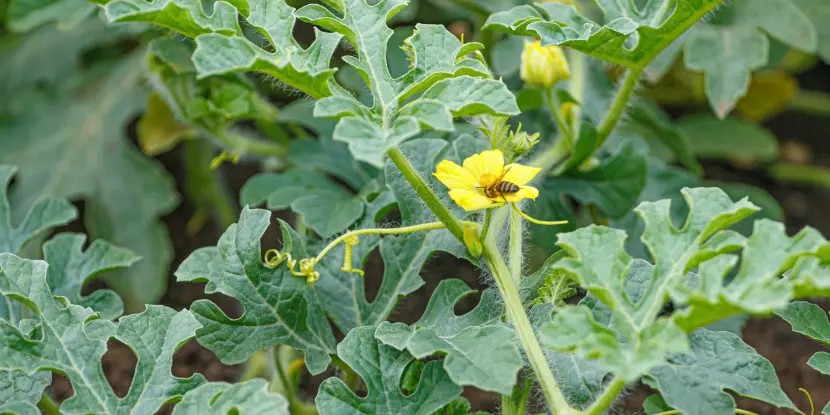
A bee pollinating a watermelon plant.
Light & Temperature
Watermelon plants are sun worshipers. Place them in a location with ample sunlight and warmth.
- Full sun exposure is crucial for sweet fruits — at least 6 to 8 hours of direct sunlight daily.
- The ideal temperature range for growing watermelon is between 70°F and 90°F (21°C to 32°C). Seeds germinate best in warm soil around 70°F (21°C). Growth is stunted below 50°F (10°C) or above 95°F (35°C).
- Watermelon requires a growing period of 70 to 90 frost-free days. Schedule your planting after the last spring frost to avoid cold damage.
Step-by-Step Soil Preparation
- Aim for a pH between 6.0 and 6.8. You can purchase a soil pH test kit from your local garden center.
- Remove any weeds, stones, or debris from the planting area. This ensures unobstructed growth and prevents pests and diseases.
- If your soil is heavy clay, incorporate compost or organic matter to improve its structure and drainage. For sandy soils, organic matter will help retain moisture and nutrients.
- Use a rototiller or garden fork to till the amended soil to a depth of at least 12 inches. This creates a loose and aerated foundation for the watermelon roots to grow.
- To improve drainage and warmth, form the soil into raised beds about 12 inches high and 36 inches wide. Raised beds capture heat from the sun.
- Ensure the soil is moist but not waterlogged before planting. A simple test is to squeeze a handful of soil; it should hold together but crumble easily when you open your hand. If it’s too dry, water the soil lightly; if it’s too wet, give it a few days to dry out.
- Rake the soil lightly to even out the surface. Now, you’re ready to plant your watermelon seeds or seedlings.
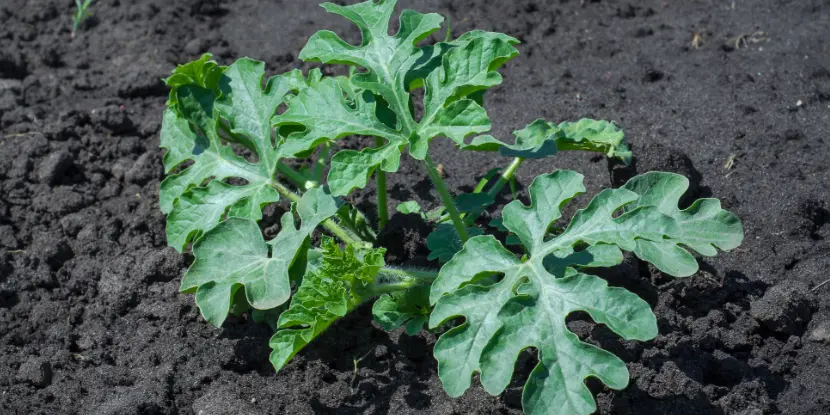
A young watermelon plant in the garden.
Planting Watermelon Seeds
- Plant your watermelon seeds indoors approximately 3 to 4 weeks before the last expected frost date. Use peat pots filled with a high-quality seed starting mix, planting 2-3 seeds per pot and pressing them about 1/2 inch deep into the soil. The soil temperature should be around 70°F (21°C) to encourage germination, which occurs within 7 to 10 days.
- Once the seedlings have sprouted and grown their first leaves, thin them by snipping off the weaker seedlings at the soil level, leaving only the strongest plant in each pot. It’s a cruel world; only the strongest survive.
- About a week before transplanting, gradually acclimate the seedlings to outdoor conditions to prevent shock. This process, known as hardening off, involves placing the plants outdoors in a sheltered, partially shaded area for increasing lengths each day.
- Choose a sunny, well-drained spot in the garden for transplanting. Dig holes about 2 feet apart in raised beds, carefully remove the seedlings from their pots (avoid disturbing the roots), and plant them at the same depth they were growing in the pots. Water thoroughly after planting.
For planting seeds directly in the garden:
- Wait until the soil has warmed to at least 70°F (21°C). Plant the seeds 1 inch deep, spacing them 2 feet apart in rows, or sowing several seeds in mounds spaced 3 to 4 feet apart.
- Keep the soil moist but not waterlogged until germination occurs. Once the plants are established, water deeply but less frequently, allowing the soil to dry slightly between waterings.
- After the seedlings have grown their first true leaves, thin them to the most vigorous plant per hill or space them about 2 feet apart in rows.
Water & Fertilizer
Fertilizing
Apply a balanced, slow-release fertilizer. Follow the instructions on the fertilizer’s packaging for the appropriate amount. Watermelons should be fertilized at several key stages of growth for optimal development and fruit production.
- Apply a balanced fertilizer after transplanting the seedlings or once the seeds have germinated and established plants.
- When the plants begin to develop vines, apply a second round of fertilizer. This supports the rapid growth phase and the development of robust vines.
- A third application of fertilizer just before the plants start to flower can boost the growth and development of the fruits.
- Apply a fourth round of fertilizer when the watermelons begin to set fruit.
Watering
- Watermelons need deep, consistent watering throughout their growing season. Allow the soil to dry slightly between waterings, but don’t let it dry out.
- A thick layer of mulch around the plants helps retain soil moisture, prevent weeds, and regulate soil temperature.
- Avoid getting water on the plant’s leaves, which can promote diseases.
- Drip irrigation is the best way to deliver water directly to the roots and conserve moisture. A sprinkler system also works, but water early in the day, so the foliage dries before nightfall.
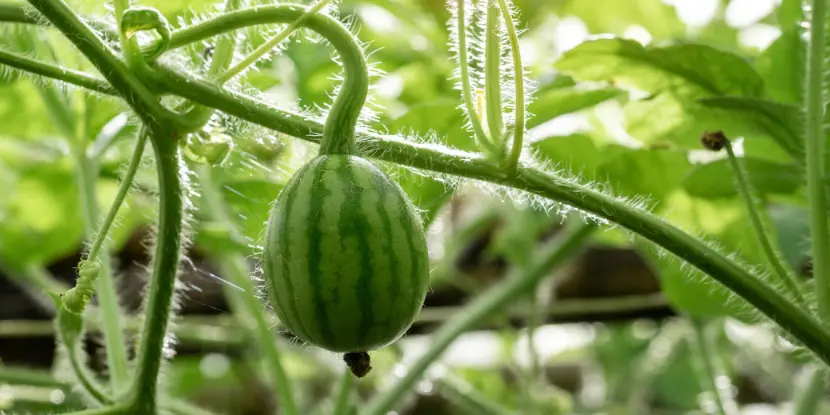
A young watermelon on the vine.
Pests & Diseases
Pests
- Aphids: Tiny, pear-shaped insects that suck sap from plants. You can remove them with insecticidal soap or a strong spray of water.
- Squash Bugs: These insects feed on the leaves, stunting plant growth and causing wilting. Remove them by hand or with insecticides.
- Cucumber Beetles: These pests feed on the leaves, flowers, and fruits of watermelon plants. Their larvae also feed on the roots. Control them with insecticides or floating row covers.
Natural Alternatives to Insecticides
- Companion Planting: When grown alongside watermelons, certain plants repel or distract pests. Marigolds, for example, deter beetles and nematodes, while nasturtiums can attract aphids away from the crop.
- Neem Oil: Derived from the seeds of the neem tree, neem oil is a natural insecticide that disrupts the life cycle of insects at all stages (egg, larvae, and adult).
- Insecticidal Soap: Made with simple soap and water, insecticidal soap can remove soft-bodied insects like aphids. The soap damages the outer layer of the insects, causing dehydration and death.
- Beneficial Insects: Ladybugs and lacewings feed on aphids and keep their populations in check.
- Row Covers: Lightweight fabric floating row covers can prevent pests from reaching young plants without blocking light or rain. They’re particularly effective against cucumber beetles and squash bugs.
- Manual Removal: Although labor-intensive, removing pests like squash bugs or aphids by hand is a reliable way to keep them in check.
Diseases
- Powdery Mildew: A fungal disease that appears as white powdery growth on leaves and stems. Prevent it by watering early in the day and removing infected leaves.
- Fusarium and Verticillium Wilt: Soil-borne fungal diseases that cause wilting, yellowing leaves and stunted growth. Prevent them by rotating crops.
- Bacterial Fruit Blotch: A bacterial disease that produces water-soaked spots on fruits, leading to rot. Remove infected plants to control it.
- Anthracnose: A common fungal disease signaled by dark, sunken fruit lesions. Remove infected plants and practice crop rotation to prevent it.
Preventative Measures for Diseases
- Remove plant debris or fallen fruits from the garden bed to stall the spread of diseases.
- Planting watermelons in the same spot year after year can lead to a buildup of diseases. Rotate crops to different areas of the garden each season.
- Wet foliage can promote the growth and spread of diseases. Water at the base of plants or use drip irrigation.
- When buying seeds or seedlings, look for varieties resistant to common watermelon diseases in your area.
- Clean gardening tools and equipment regularly, especially if they’ve come into contact with infected plants.
- Early detection is crucial. Inspect watermelon plants regularly for signs of disease and remove infected plants immediately.
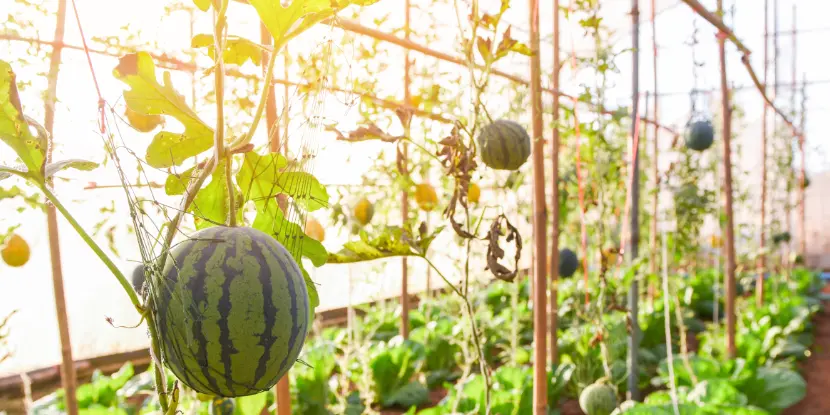
Greenhouse watermelons supported by netting.
Supporting Growing Vines
Supporting your watermelon vines prevents fruit rot, ensures good air circulation, and keeps your garden tidy. It also makes it easier to spot and manage pests and diseases. Here, you have multiple choices:
- Smaller watermelon varieties can be grown on strong trellises. This method elevates the fruit off the ground. Install a trellis sturdy enough to bear the weight of the fruit. Use fabric or netting slings to cradle the developing watermelons and distribute their weight evenly.
- For larger varieties, garden stakes or cages can keep the vines off the ground. While the fruit may still rest on the ground, this method organizes the vines and improves airflow.
- Applying a thick layer of straw or plastic mulch under the vines can prevent the fruit from touching the wet soil directly, significantly reducing the risk of rot. Mulches also help retain soil moisture and regulate temperature, creating a more favorable environment for the vines.
- Planting watermelon seeds or seedlings on raised mounds or hills helps with drainage, preventing water from pooling around the roots and reducing the likelihood of fruit rot.
- Properly spacing your watermelon plants allows ample airflow between them to minimize the risk of fungal diseases.
Companion Planting for Watermelons
Companion planting involves growing crops or flowers in proximity for mutual support.
It’s an age-old technique gardeners have used for centuries to maximize their yields and create a more sustainable ecosystem.
Watermelons are heavy feeders. They benefit from the nutrients certain companion plants provide, while other companion plants can repel pests, reducing the need for pesticides.
Some of the best companion plants for watermelon include:
Growing Seedless Watermelons
Seedless watermelons are propagated through controlled breeding and pollination. Many garden centers carry young seedless plants.
Cross-pollination occurs between seedless and seeded watermelon plants, and is necessary for the fruit to develop. Farmers plant seedless watermelon seeds alongside seeded varieties, and bees transfer pollen from the seeded varieties to the seedless ones.
You can also take cuttings from seedless watermelons.
- Cutting should be 4-6 inches long. Remove any leaves from the lower part of the cutting to expose the stem.
- Dip the cut end of each cutting into rooting hormone powder or gel to stimulate root growth and improve the chances of successful propagation.
- Plant the cuttings in a well-draining potting mix. Keep soil moist, but not soggy.
- Place the cuttings in a warm, humid environment with indirect sunlight. Roots should develop in a few weeks.
Harvesting Watermelons
In Southern California, watermelon harvest typically begins in late spring to early summer, approximately 90 to 120 days or 12 to 16 weeks from planting. How can you know when a watermelon is ready to be picked?
- The Tendril Test: Look for the tendril closest to the fruit; the watermelon is probably ripe when it turns brown and dries up.
- Thumping (Supermarket Test): A ripe watermelon produces a deep, hollow sound when thumped. Under-ripe or overripe melons tend to have a duller sound.
- The Ground Spot: Check the spot where the watermelon rests on the ground. A ripe watermelon will have a creamy yellow spot, while an unripe one will show a white or greenish spot.
- Skin Gloss: The skin of a ripe watermelon will go from shiny to a dull matte finish.
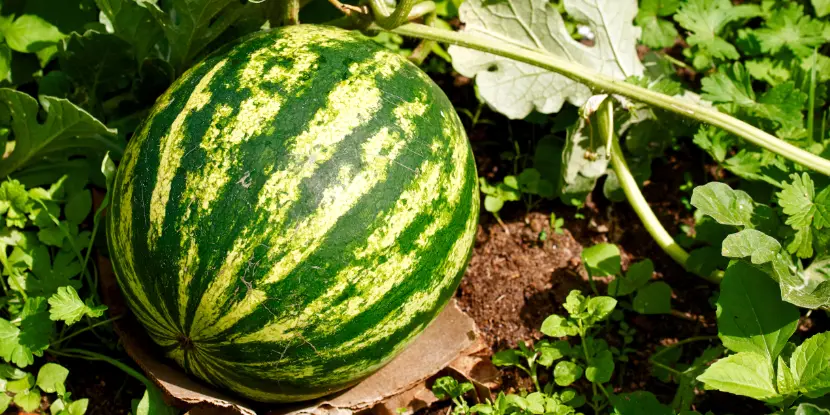
A ripe watermelon ready for harvest
Storing Watermelons
Watermelons are best stored in a cool, dry place away from direct sunlight. They should be kept at a temperature range of 50-60°F (10-15°C).
For cut watermelons, wrap the cut side with plastic wrap and store them in the refrigerator to keep them fresh and prevent them from absorbing other food odors.
Watermelons can last up to two weeks in proper storage conditions. However, once cut, they should be consumed within 3-4 days for the best flavor and texture.
Allow the watermelon to come to room temperature before serving, enhancing its sweetness and juiciness.
Bon appétit!

Commercially grown watermelons in the field.
FAQs: Growing Watermelons
Q: How do I plant watermelons?
Watermelons are warm-season crops that thrive in temperatures between 70 and 85 °F. Plant seeds directly in well-drained soil after the last frost date, spacing them about 6 feet apart in rows 6 to 8 feet apart. Ensure the soil pH is between 6.0 and 6.8 for optimal growth.
Q: What are the ideal growing conditions for watermelons?
Watermelons require full sun, warm temperatures, and well-drained soil. They grow best in areas with a long, hot growing season and can tolerate drought conditions but need consistent moisture for optimal fruit development. Ensure good air circulation to prevent diseases.
Q: How often should I water watermelon plants?
Watermelon plants need consistent moisture, especially during the fruiting stage. Water deeply once a week, providing around 1 to 2 inches. Mulching around the plants can help retain soil moisture and suppress weeds.
Q: When should I harvest watermelons?
Harvest watermelons when the tendril closest to the stem turns brown and the spot where the fruit touches the ground turns yellow. The bottom of the fruit should also sound hollow when tapped. Typically, watermelons are ready for harvest 80 to 90 days after planting.
Q: How can I support watermelon vines?
You can support watermelon vines with trellises or sturdy supports like stakes or cages. This helps keep the fruit off the ground, reduces the risk of rot and pests, and saves space in the garden.
Q: What common pests and diseases affect watermelons?
Common pests that affect watermelons include aphids, cucumber beetles, and squash bugs. Diseases such as powdery mildew, anthracnose, and fusarium wilt can also impact plant health. Practice crop rotation, use resistant varieties, and monitor plants regularly to manage pests and diseases.
Q: How can I improve the sweetness of my watermelons?
Ensure they receive adequate sunlight, water consistently, and avoid stressing the plants. Use a balanced fertilizer with slightly more potassium than nitrogen and phosphorus. Harvest at the right time when fruits are fully ripe.
Q: Can I grow watermelons in containers?
Yes, but choose dwarf or bush varieties suitable for smaller spaces. Use large containers with good drainage and support the vines as they grow. Ensure adequate sunlight, water, and nutrients for successful container cultivation.
Q: How can I tell if my watermelon is ripe?
Ripe watermelons are dull or matte on the surface, and the underside (where it rests on the ground) turns yellow. The skin toughens, and the tendrils near the stem dry up and turn brown. Additionally, the fruit produces a hollow sound when tapped.
Q: Are there companion plants that benefit watermelon growth?
Companion plants like marigolds, nasturtiums, and radishes can help repel pests like aphids and cucumber beetles, which are common watermelon pests. Planting herbs like basil and dill nearby can attract beneficial insects that prey on harmful pests.
Q: How can I prevent watermelon vines from taking over my garden?
Consider using trellises or providing vertical supports for the vines to climb. Prune the vines regularly to remove excess growth and redirect energy towards fruit production. You can also use barriers like mulch or landscape fabric to contain vine spread.
Q: What should I do if my watermelon plants aren’t producing fruit?
If watermelon plants are not producing fruit, ensure they receive adequate sunlight, water, and nutrients. Bees are essential for pollination, so encourage pollinator activity by planting flowers nearby. If pollination remains an issue, hand-pollinate the flowers using a small brush or cotton swab.
Q: Can watermelons cross-pollinate with other melons?
Watermelons can only cross-pollinate with other watermelons, not with other types of melons like cantaloupes or honeydews. Keep different watermelon types at least a half-mile apart to maintain pure varieties.
Q: What are some common watermelon varieties to grow?
Popular varieties include ‘Sugar Baby’ (icebox type), ‘Crimson Sweet’ (classic picnic type with sweet red flesh), and ‘Moon and Stars’ (heirloom variety with a distinctive look). Choose based on your climate zone, garden size, and personal taste preference.