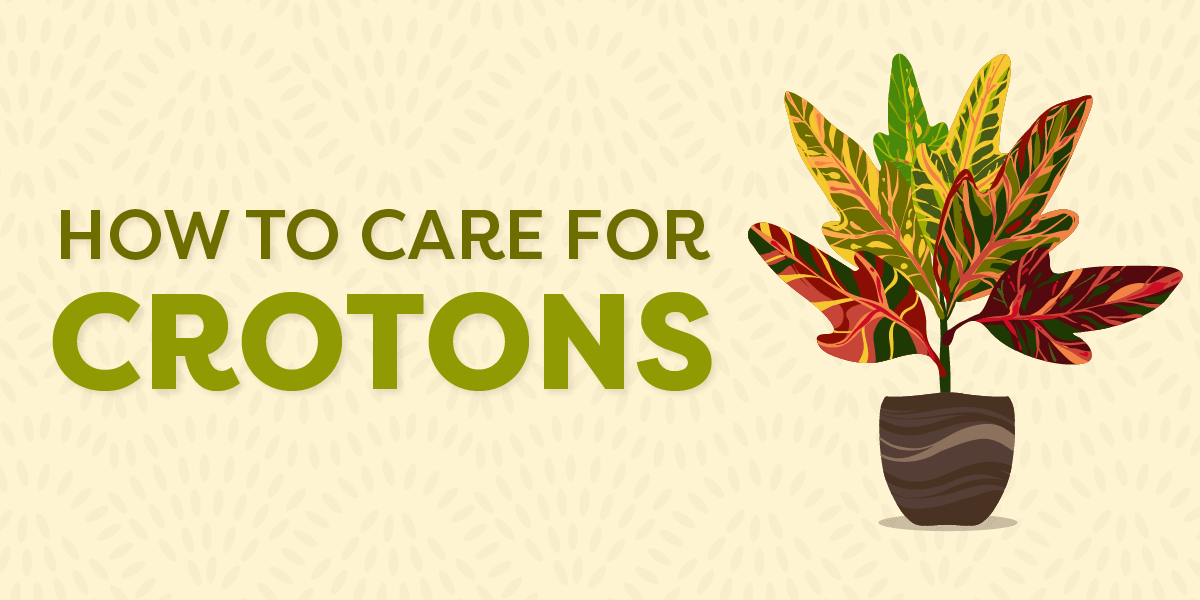
Also called variegated laurel, crotons come from the South Pacific Islands.
Their growth habit varies — dwarf crotons are bushy and compact, while tree-like varieties are tall and have a good spread. The plants are usually maintained at two to three feet, but given the opportunity, they can grow into large trees.
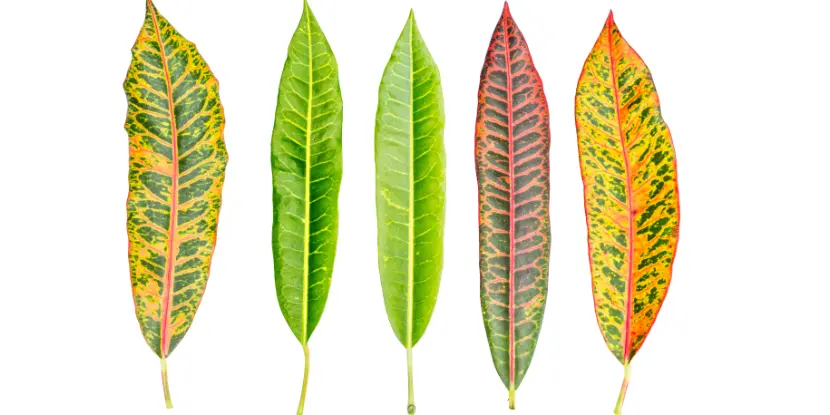
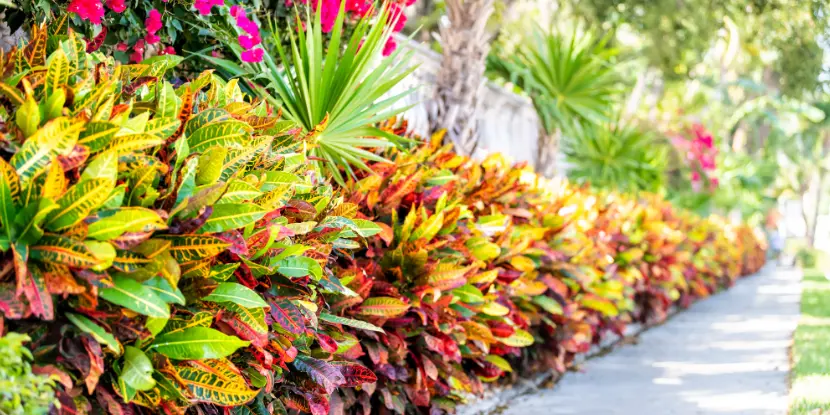
Variation in croton plant foliage.
Light & Crotons
Crotons are known for their rich, vibrant colors — from deep greens to bright yellows, fiery reds, and even purples.
The secret to these stunning colors? Most crotons require bright, indirect sunlight to thrive. The leaves may lose their variegation without adequate light, turning a less vibrant green.
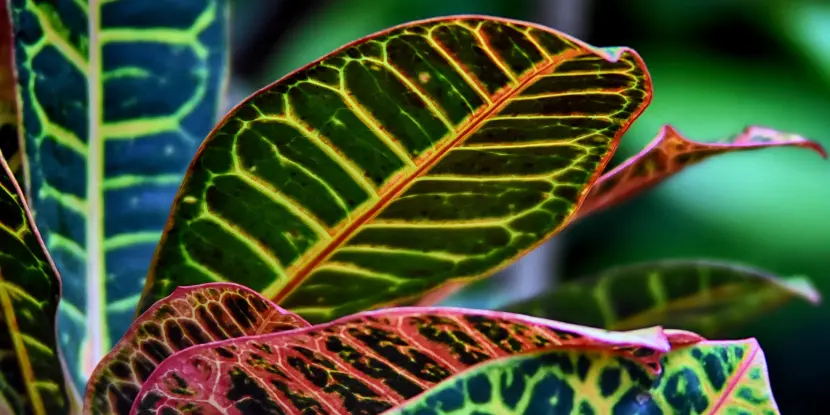
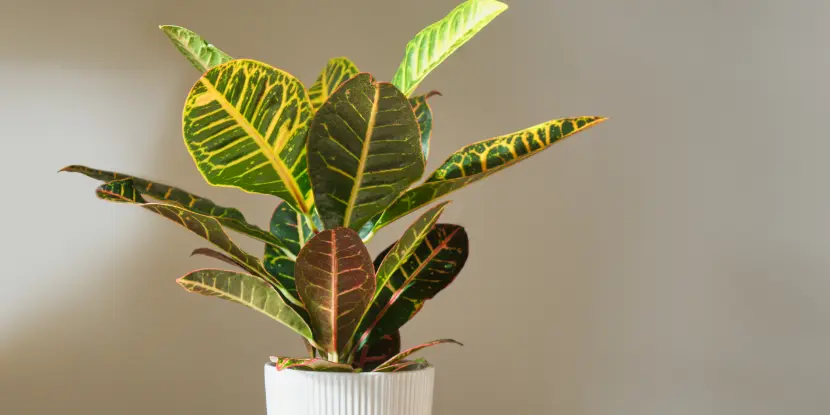
The striking patterns of croton plant leaves.
Plants should be placed near a window where they can bask in the sunlight, but take care — direct sunlight can scorch their leaves.
Some crotons thrive in full sun, while others do best in semi-shade to full shade. In general, the more sunlight the foliage receives, the brighter the colors will be. Crotons’ indoor light requirement is about six to eight hours; they also respond well to grow lights.
Soil Conditions
Crotons prefer well-draining, nutrient-rich soil that balances moisture retention and drainage. A soil pH between 4.5 and 6.5 is ideal, catering to their preference for slight acidity.
Use a tropical plant mix for potting. This typically includes peat, pine bark, and perlite or vermiculite, ensuring good aeration and drainage.
Root rot is a common issue in poorly drained soils. The container you choose should have adequate drainage holes, and a layer of gravel or small stones at the bottom can further enhance drainage.
Watering Crotons
Keep the soil lightly moist at all times, being careful not to overwater. Never allow the soil to dry completely, which can cause leaf drop.
Mist the foliage at least two to three times weekly to provide the additional humidity that crotons crave. This mimics the humid environment of their native habitat and can keep leaves bright and healthy.
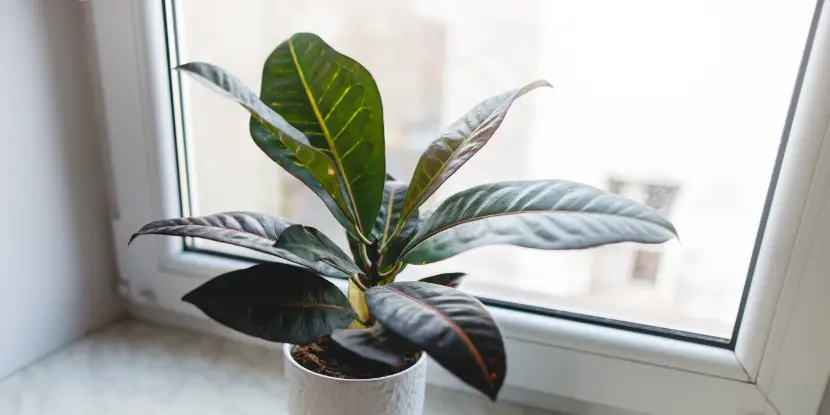
A croton plant growing in indirect light.
Temperature Range for Crotons
Crotons do best in warm, moist conditions and are sensitive to cold drafts and sudden temperature changes. They prefer a consistent environment with a minimum winter temperature of around 60 degrees Fahrenheit.
Sudden changes in temperature or exposure to cold drafts can cause leaf drop; in severe cases, the plant may begin to defoliate.
Fertilizing Crotons
- Opt for a balanced, soluble fertilizer suitable for houseplants, trees, and shrubs.
- Fertilize frequently but lightly; don’t overwhelm the plant with nutrients.
- During the growing season, from spring through summer, feeding your crotons every 4 to 6 weeks can support their lush foliage.
- Reduce the frequency of fertilizing during the dormant winter months to prevent nutrient overload.
Controlling Pests
Common pests include scales, thrips, mealybugs, and spider mites. These tiny invaders can cause significant damage to the plant by feeding on the sap, weakening growth, and dulling leaf colors.
- If possible, isolate the affected plant to prevent the spread of pests to other plants.
- To remove visible pests such as mealybugs and scales, use a cotton swab dipped in alcohol.
- Use a strong water jet to dislodge pests like spider mites from the foliage. This can be done during regular watering, but ensure the plant is allowed to dry afterward.
- Apply insecticidal soap, which is safe for most houseplants and effective against many pests.
- Neem oil is a natural pesticide that disrupts the life cycle of many pests. Spray a neem oil solution onto the plant, especially the underside of the leaves, where pests often hide.
- For severe infestations, consider using a systemic insecticide. This pesticide is absorbed and distributed throughout the plant, providing long-term control.
Croton plants growing in a greenhouse.
Preventing Diseases
While generally robust, crotons are susceptible to fungal diseases like leaf spot and root rot, especially when over-watered or in poor drainage conditions.
- Plant crotons in containers with adequate drainage holes. Consider adding a layer of gravel or small pebbles at the bottom to improve water flow.
- Keep the soil moist but not soggy. Always check the top inch of soil for dryness before watering.
- Position plants so air circulates freely around them to prevent fungal spores from settling.
- Routinely inspect your crotons for signs of disease, such as brown spots or unusual leaf discoloration, so that you can tackle problems early.
- Regularly remove fallen leaves and debris from the pot or ground to reduce the risk of fungal diseases.
- Keep newly acquired plants isolated for a few weeks to prevent the introduction of diseases to your existing plants.
- Use fungicidal sprays, particularly during humid or wet seasons, following the product’s instructions carefully.
Pruning Crotons
Regular pruning is essential to maintain the shape and size of your croton plant. It also helps remove dead or damaged leaves, improving the plant’s overall appearance.
- Examine your croton for dead, damaged, or diseased leaves and branches. Removing these first will help prevent disease spread and encourage healthier growth.
- Determine where to make your cuts by looking for leaf nodes (the small bumps where leaves and stems grow). Cutting above a leaf node will encourage new growth.
- Using your sanitized shears, make clean, precise cuts just above the leaf nodes or at the base of dead or damaged branches. Avoid tearing the plant tissue, as this can lead to infection.
- Continue to prune selectively to shape the plant as desired, either for a bushier appearance or to maintain a certain height. Remove any branches that cross or look out of place.
- After pruning, keep an eye on your croton for signs of stress or disease and provide appropriate care, such as watering and fertilizing, to support recovery and new growth.
A healthy potted croton plant.
Propagating Crotons
Another way to maintain a healthy croton plant is through propagation, the process of creating new plants from existing ones.
Stem Cuttings
This method involves taking a cutting from the stem of a mature croton plant and rooting it in water or soil.
- Choose a healthy branch with at least 2-3 sets of leaves.
- Using clean, sharp scissors or gardening shears, cut the branch just below a leaf node (where the leaf meets the stem).
- Remove any lower leaves on the cutting so that there are only 2-3 sets of leaves remaining.
- If rooting in water, place the cutting in a jar or glass filled with room temperature water. Change the water every few days to prevent bacteria build-up.
- If rooting in soil, dip the cut end of the stem into a rooting hormone (available at most gardening stores) before placing it into moist potting mix.
- Keep the cutting in a warm and humid environment, such as a greenhouse or covered with a plastic bag. This will help promote root growth.
- After 4-6 weeks, gently tug on the plant to check for roots. If roots have formed, you can transplant the cutting into a pot with well-draining soil.
Division
This method involves splitting an existing plant into smaller sections, each with its own roots and shoots. It works best for plants that naturally grow in clumps, such as hostas, ornamental grasses, or ferns.
Carefully dig up the entire plant without damaging the roots.
- Use a clean, sharp knife or spade to divide the plant into smaller segments, ensuring each piece has roots attached.
- Replant each division in fresh, well-draining soil and water thoroughly.
Layering
This technique encourages a plant to form roots while still attached to the parent plant, making it a less stressful process for the plant. It’s particularly effective for woody shrubs like roses or climbers like ivy.
- Select a flexible stem that can bend down to the ground.
- Create a small wound on the part of the stem that will be buried.
- Pin the wounded section of the stem to the ground using a small wire or stone, and cover it lightly with soil.
- Keep the area moist, and after a few weeks or months, check for root production. Once rooted, the new plant can be severed from the parent and transplanted.
Repotting Crotons
Repot your croton plant every 2-3 years, or when it outgrows its current container. This will provide fresh soil and more space for the roots to grow.
- Select a container 1-2 inches larger in diameter than the current pot. It should have adequate drainage holes to prevent waterlogging and root rot.
- Add a layer of gravel or small stones at the bottom of the new pot to enhance drainage. Fill the pot partially with a tropical plant mix that includes peat, pine bark, and perlite or vermiculite.
- Water the croton thoroughly a day before repotting to reduce stress on the plant and make it easier to remove from the old pot.
- Gently turn the pot on its side and carefully slide the plant out. If the plant is stuck, tap the sides and bottom of the pot to loosen the root ball.
- Check the root ball for signs of root rot or disease. With sanitized shears, trim away any damaged or unhealthy roots.
- Place the croton in the center of the new pot, ensuring it’s at the same soil level as in the old pot. Adjust the soil level as needed to support the plant.
- Add more tropical plant mix around the root ball, gently pressing the soil to eliminate air pockets while securing (but not compacting) the plant.
- Give the croton a thorough watering to help the soil settle and provide moisture to the roots. Allow excess water to drain out from the bottom.
- Place the repotted croton in a warm, bright location with indirect sunlight. Be alert for any signs of stress or shock, such as leaf drop, and provide appropriate care, maintaining soil moisture and humidity.
FAQs: Croton Plant Care
Q: How often should I water my croton plant?
Crotons require evenly moist soil, so water when the top inch feels dry. This usually means watering once a week, but it may vary depending on your home’s humidity and temperature.
Q: What kind of light does a croton need?
Crotons love bright, indirect sunlight. They can tolerate some direct sunlight, but too much direct light can scorch the leaves, while too little light can make them lose their vibrant colors.
Q: What’s the ideal temperature for a croton plant?
Crotons thrive in temperatures between 60-85°F (15-29°C). They should be protected from drafts and drastic temperature changes.
Q: How do I know if my croton is getting enough light?
If your croton isn’t getting enough light, its leaves may lose some of their color. Conversely, if it’s receiving too much direct sunlight, you may notice the leaves getting scorched or turning brown.
Q: Do croton plants need high humidity?
Yes. Maintaining indoor humidity levels around 40-60% is ideal. To increase humidity, mist the leaves regularly, place a humidifier nearby, or use a pebble tray.
Q: How should I fertilize my croton plant?
During the growing season (spring and summer), fertilize your croton every 4-6 weeks with a balanced, water-soluble fertilizer. Reduce to every 6-8 weeks during the fall and winter months.
Q: How often should I repot my croton plant?
It’s good practice to repot your croton every 2-3 years or when it becomes root-bound. Choose a pot one size larger than the current one to allow for growth.
Q: Can I prune my croton plant?
Yes, pruning is beneficial for crotons. Prune in the spring or summer to remove dead or damaged leaves and to encourage a bushier, more compact growth habit.
Q: What are the common pests that affect croton plants?
Crotons are susceptible to pests like spider mites, mealybugs, and scale insects. Regularly inspect your plant and treat infestations promptly with insecticidal soap or neem oil.
Q: My croton’s leaves are dropping. What could be the cause?
Various stress factors can cause leaf drop, including over-watering, under-watering, low humidity, or sudden changes in temperature or light conditions.