
Daylilies are striking flowering perennials that can enhance a landscape with little gardening effort.
They bloom in various colors and range in size from one foot to 6 feet, though most are from 18 to 36 inches. Their tuberous root system can be deciduous or evergreen.
They can be planted in clumps or as mass plantings for flower bed borders, ground covers, or containers. Their elegant and delicate blossoms are often featured in floral bouquets.
Tip: After harvest, daylilies should be refrigerated for about an hour with their stems in water to make them last longer.

Striking red and orange daylily flowers.
Tip: After being cut, daylilies should be refrigerated for about an hour with their stems in water to make them last longer.
Planting Daylilies
Daylilies are resilient and adaptable, but like all plants, they have their preferences.
Soil
- Daylilies thrive in soil with good drainage. Avoid areas where water tends to pool.
- A balanced mix of sand, silt, and clay ensures adequate aeration and moisture retention.
- The ideal soil pH ranges from 6 to 7, which is slightly acidic to neutral.
- Incorporate organic matter like compost or aged manure to enrich the soil.
- A layer of mulch helps retain soil moisture, regulate temperature, and prevent weed growth.
Sunlight
- Daylilies need at least 6 hours of direct sunlight daily.
- While they tolerate partial shade, especially in hotter climates, they may produce fewer blooms.
- In regions with intense afternoon sun, planting in an area with some afternoon shade can protect the plants from scorching.
Temperature
- Daylilies tolerate a wide range of temperatures, but they thrive in temperatures between 60°F (15°C) and 85°F (29°C).
- They’re hardy in USDA zones 3 through 9, making them suitable for different climates across the country.
- In colder regions, applying a layer of mulch can protect the roots from frost during winter.
- During extreme heat, providing some afternoon shade can prevent stress and wilting.
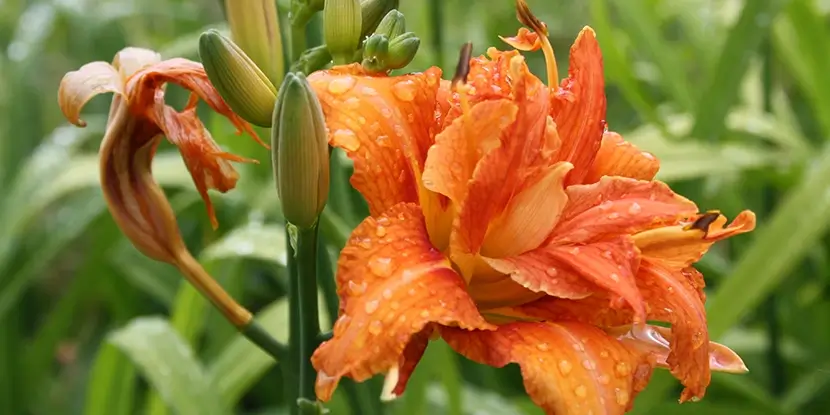
A gorgeous orange daylily bloom.
Planting Process
- Loosen the soil to about 12 inches deep and mix in compost or organic matter.
- Create a hole wide enough to spread the roots and deep enough that the crown of the plant sits just below the soil surface.
- Position the daylily in the hole, with the crown about 1 inch below ground level.
- Backfill the hole with soil, firming it gently around the plant to remove any air pockets.
- Water the newly planted daylily thoroughly to help it settle in its new location.
- Apply a layer of mulch around the base of the plant to help retain moisture and suppress weeds.
Watering Daylilies
- Established daylilies don’t need watering unless a dry period occurs before or during flowering.
- Keep newly planted daylilies moist at all times.
Fertilizing Daylilies
- Feed established daylilies with blooming plant fertilizer, 3-9-12.
- Excessive nitrogen may yellow the leaves and reduce the brilliance of red and pink varieties.
- Feed daylilies lightly at 2 to 4-week intervals from mid-March through mid-June and again in mid-September.
- Always water when feeding if weather conditions are dry and warm.
- Daylilies respond well to bone meal, which should be applied every spring at 5 lbs per 100 sq ft of bed area.
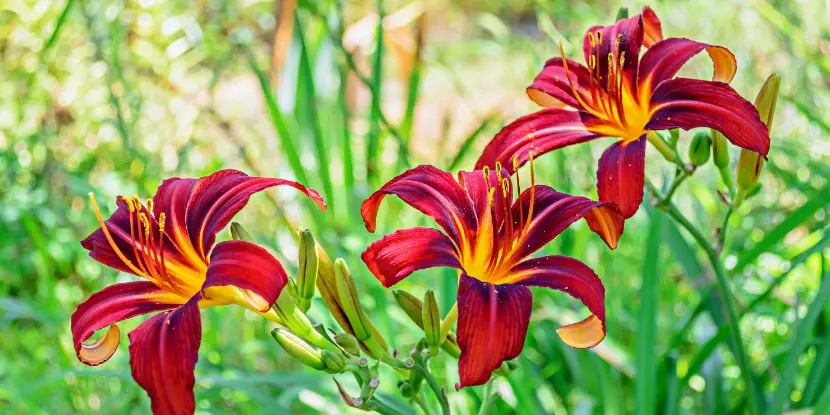
Deep red daylilies in a field.
Controlling Pests & Diseases
Pests
- Aphids: Small, soft-bodied insects that cluster on new growth and flower buds, sucking plant juices and causing deformed leaves and stunted growth. Spray with a strong stream of water to dislodge them, or apply insecticidal soap or neem oil. Introduce beneficial insects like ladybugs to keep aphid populations in check.
- Spider Mites: Tiny, spider-like pests that cause stippling and yellowing on leaves, often leaving behind fine webbing. Regularly mist the plants with water to prevent infestations, as spider mites thrive in dry conditions.
- Thrips: Minute, slender insects that scrape and suck plant tissues, causing silvery-white streaks or spots on flowers and leaves. Use sticky traps to reduce their numbers. Neem oil or insecticidal soap can also be effective.
- Slugs and Snails: Mollusks that leave ragged holes in leaves and flowers and slime trails on plants. Hand-pick slugs and snails during the evening or use beer traps to lure and drown them. Barriers like crushed eggshells or diatomaceous earth around plants can deter them.
Diseases
- Daylily Rust: Rust-colored, powdery spots on leaves, which may eventually cause leaf drop. Remove and destroy infected foliage to prevent the spread. Ensure good air circulation around the plants. Fungicidal sprays containing sulfur or copper can also help manage this disease.
- Crown and Root Rot: Soft, dark, and rotting areas at the base of the plant, often caused by poor drainage and overwatering. Improve soil drainage by amending with organic matter. Avoid overwatering. Remove and destroy affected plants. Treat the soil with beneficial microbial fungicides.
- Leaf Streak: Yellow streaks on the leaves that eventually turn brown and die back. Remove and dispose of affected leaves to prevent the spread. Ensure plants are well-spaced to improve air circulation and avoid wetting the foliage when watering.
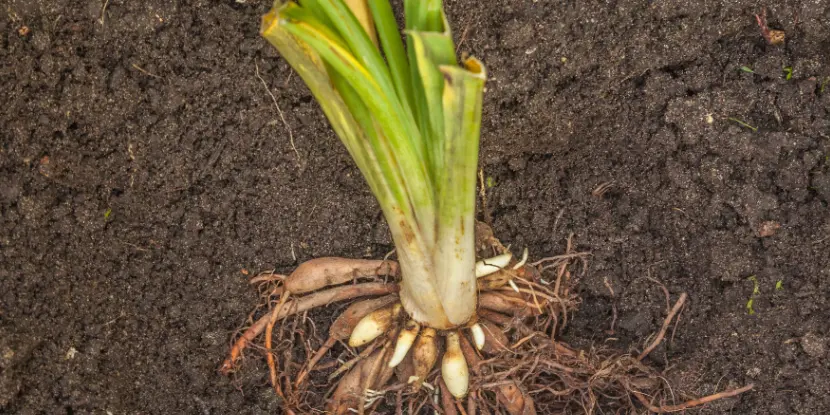
Daylily roots ready for planting.
Dividing Daylilies
Dividing daylilies rejuvenates the plants so that they continue to produce vibrant blooms. Over time, daylilies can get crowded, leading to reduced flowering and increased competition for nutrients and water.
Daylilies should be divided every 3 to 5 years. However, if you notice a decline in the number or size of blooms or if the clump appears congested, it may be time to divide them sooner.
Process of Dividing Daylilies
- The best time to divide daylilies is in early spring or late summer to early fall, when temperatures are cooler and the plants aren’t in active bloom.
- Water the clump thoroughly a day before dividing.
- Use a spade or garden fork to dig around the clump and lift the entire root system. Be careful not to damage the roots.
- Shake off excess soil and rinse the roots to get a clearer view of where to make the divisions.
- Using a sharp knife or your hands, gently separate the clump into smaller sections, each containing at least 2-3 fans (leaf clusters) and a healthy portion of roots.
- Trim the foliage back to about 8-12 inches to reduce water loss and stress on the newly divided plants.
- Prepare the new planting locations by loosening the soil and mixing in organic matter. Plant each division with the crown (where the leaves meet the roots) slightly below the soil surface.
- Water the newly planted divisions thoroughly to help them establish in their new location.
- Apply a layer of mulch around the plants to retain moisture and prevent weed growth.
- Keep the soil moist until the new divisions show signs of growth. Avoid fertilizing immediately after division to let the plants recover naturally.
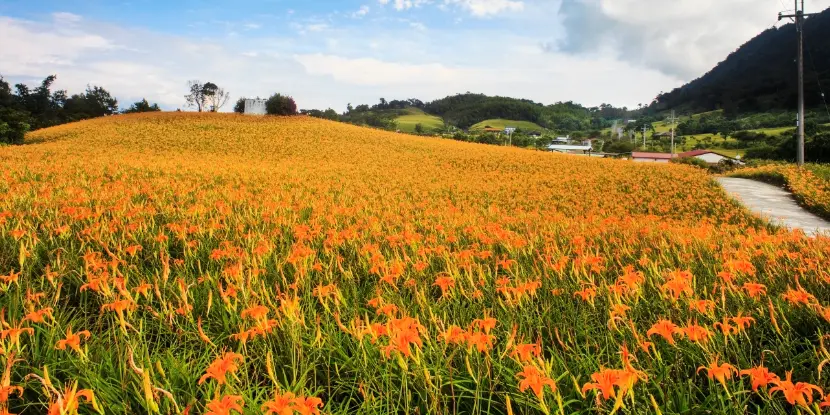
Gardener’s paradise: daylily flowers at Sixty Stone Mountain.
Cutting Daylilies for Display
- The best time to cut daylilies is in the morning, when the temperatures are cooler and the plant is fully hydrated.
- Choose flowers that are just beginning to open or are in full bloom. Avoid cutting flowers that are past their prime or showing signs of damage or disease.
- Use a clean, sharp pair of garden scissors or pruning shears to make precise cuts and minimize damage to the plant.
- Make a clean cut at a 45-degree angle to increase the stem’s surface area for water absorption and prevent the stem from sitting flat on the bottom of the vase.
- Leave enough stem length to fit the vase and allow for some trimming later. Longer stems provide better stability and arrangement flexibility.
- Strip off any leaves that will be below the waterline in the vase to prevent decay and bacterial growth.
- As soon as you cut the daylilies, place them in a bucket of cool water to keep them fresh and hydrated.
- Fill a clean vase with fresh, room-temperature water and add floral preservatives if available.
- Before arranging, trim 1-2 inches from the bottom of each stem while submerged in water to prevent air embolisms that can block water uptake.
- Arrange the daylilies in the vase, giving them room for air circulation. Place the vase in a cool location, away from direct sunlight and drafts.

Daylilies featured in a floral display.
FAQs: Caring for Daylilies
Q: How often should I water my daylilies in Southern California?
Water them thoroughly once a week, ensuring the soil is moist but not waterlogged. You may need to water them twice a week in the hottest months.
Q: What’s the best soil type for daylilies?
Daylilies thrive in well-drained soil with a slightly acidic to neutral pH. Adding organic matter can improve soil structure.
Q: Do daylilies require full sun?
Yes, daylilies perform best in full sun, requiring at least 6 hours of direct sunlight daily for optimal blooming.
Q: When is the best time to plant daylilies in Southern California?
During the fall or early spring, to avoid the extreme heat of summer.
Q: How should I fertilize my daylilies?
Apply a balanced, slow-release fertilizer in early spring as new growth appears and after blooming.
Q: Can I grow daylilies in containers?
Yes, as long as they have adequate drainage and regular watering.
Q: How should I deal with pests on my daylilies?
Watch for common pests like aphids and thrips. Insecticidal soap or neem oil can be effective, eco-friendly options for control.
Q: Do daylilies need to be deadheaded?
Removing spent blooms (deadheading) encourages more flowers and prevents seed formation, focusing the plant’s energy on root and foliage development.
Q: How often should I divide my daylilies?
Daylilies should be divided every 3 to 5 years to maintain vigor and bloom quality. The best time for dividing is early spring or late fall.
Are daylilies resistant to drought conditions?
Daylilies are drought-tolerant once established, making them ideal for Southern California gardens, although regular watering improves performance.
Q: What should I do if my daylilies aren’t blooming?
Ensure they get enough sunlight, proper nutrition, and water. If they’re overcrowded, dividing them may also help.
Q: Can daylilies survive Southern California’s winter temperatures?
Daylilies can easily survive the mild Southern California winters without special care.