
Iris plants are long-lasting perennials belonging to the Iridaceae family. Some varieties can live more than a century.
They’re native to Europe, North America, Asia, and Africa and have adapted to diverse habitats, from temperate climates to semi-desert regions. The result is a wide variety of iris plants, all with captivating blooms and sword-like foliage, each with unique characteristics and care requirements.
Southern California’s mild winters, dry summers, and well-drained soil allow irises to flourish, and the region’s climate stimulates a robust growth cycle, from dormancy in the hotter months to spectacular blooms in the cooler seasons.
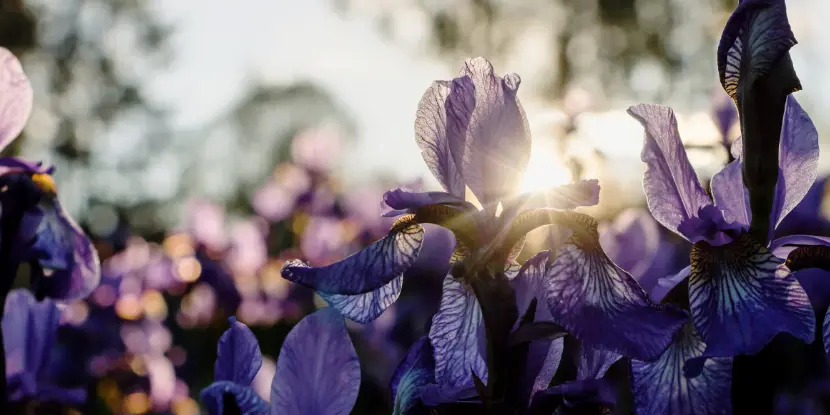
Purple iris flowers in the garden.
Types of Iris Plants
There are over 300 species of iris plants, with numerous cultivars and hybrids. Types suitable for Southern California gardens include:
- Bearded Iris: The most common type, featuring bushy blooms on tall stalks.
- Louisiana Iris: Native to the southern United States, they thrive in wet or boggy conditions.
- Japanese Iris: Feature large, showy flowers with contrasting colors and variegated foliage.
- Dutch Iris: Appreciated for their tall, elegant foliage and eye-catching spring blooms in various colors.
- Pacific Coast Hybrids: Bred for West Coast conditions, these irises thrive in areas with mild, wet winters and dry summers.
- Spuria Iris: This striking variety appreciates warm, dry summers and mild winters.
- Siberian Iris: Hardy plants with narrow leaves and delicate flowers in shades of blue and purple.
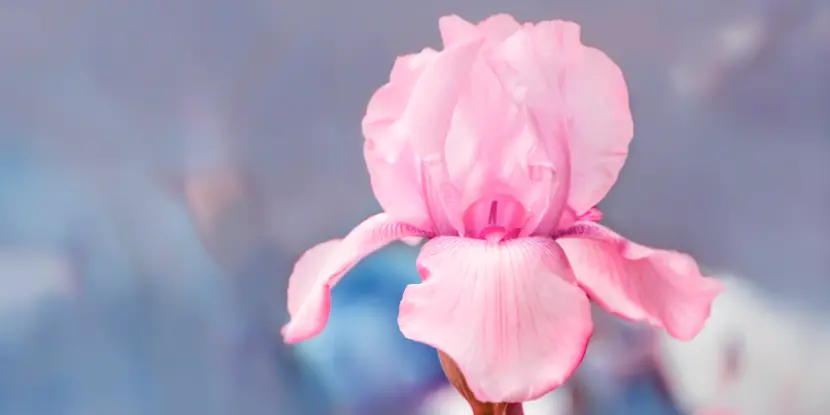
A gorgeous pink iris flower.
Propagating Irises
Irises can propagate through division, seeds, and offsets:
- Division is the most common method of propagation for iris plants. It involves dividing the rhizomes (thick, underground stems) of established iris plants into smaller sections and replanting them. The best time to do this is in late summer or early autumn, when the plants are dormant.
- Growing from seeds takes longer to produce mature plants. Iris seeds must be stratified (exposed to cold temperatures) before planting to encourage germination. It can take several years for iris seeds to grow into flowering plants.
- Some iris species produce offsets, which are small, new plants that form around the base of the parent plant. Offsets can be detached and replanted to propagate new iris plants.
Planting Iris Bulbs
- Time to Plant: The ideal time to plant iris bulbs, particularly in regions with seasons similar to Southern California, is late summer to early fall. This allows the bulbs to establish themselves before the winter.
- Soil Type: Iris plants prefer well-drained, moderately fertile soil. Avoid areas where water stands as irises don’t like “wet feet.” If soil is heavy clay, amend it with organic matter to improve drainage.
- Spacing: Bulbs should be spaced approximately 12 to 24 inches apart to give each plant enough room to grow and ensure adequate air circulation.
- Light: Irises require at least 6 hours of direct sunlight each day. They prosper in full sun exposure but tolerate partial shade. Too much shade can reduce blooming.
- Climate: For your Southern California garden, choose a variety that can tolerate mild winters and dry summers.
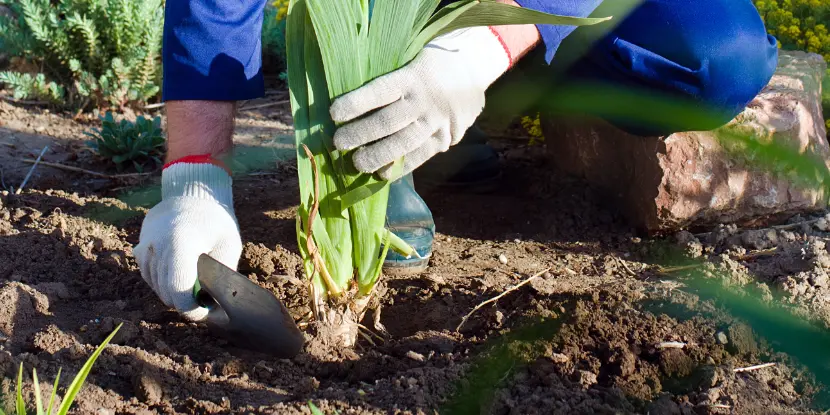
Transplanting an iris plant.
Watering & Fertilizing Iris Plants
Watering
- Irises require regular watering to establish roots, especially during their first growing season. Aim for at least an inch of water per week, whether from rain or manual watering.
- Once established, irises are fairly drought-tolerant. However, they’ll need sufficient moisture to support their vibrant flowers. during the spring blooming period
- Reduce watering after the blooming period. In some regions, irises can survive on rainfall during the hotter, drier summer months. In dry climates, they may need occasional watering even after blooming.
Fertilizing
- When shoots appear in early spring, apply a low-nitrogen fertilizer or a balanced 10-10-10 fertilizer. This provides the nutrients for growth and blooming.
- To encourage future growth, you can apply an optional second dose of fertilizer immediately after the irises have bloomed.
- Don’t fertilize irises in late summer or fall. This could promote late-season growth and make the plants more susceptible to cold damage.
Reduce watering and fertilizing as the plants enter dormancy in late spring to early summer. Excess water or nutrients can do more harm than good during this time, potentially leading to rot or poor readiness for winter dormancy.

Healthy iris rhizomes.
Dealing with Pests & Diseases
Irises, while robust, can be susceptible to these common pests and diseases:
Pests
- Iris borers are moth larvae that burrow into the rhizomes, causing rot. Remove and destroy any infested rhizomes, and clean up plant debris in the fall to remove their overwintering sites.
- Aphids are small, sap-sucking pests that collect on leaves, flower buds, and the plant base. You can knock them off with a water jet or introduce predator insects like ladybugs.
- Slugs and snails feed on the tender parts of the iris. Handpick them during the evening or place barriers like copper tape or diatomaceous earth around your iris plants.
Diseases
- Bacterial Soft Rot: Infected rhizomes become soft and emit a foul smell. Improve soil drainage, and when you notice signs of rot, cut away the infected tissue and allow the rhizome to dry. Sterilize tools to prevent spread.
- Leaf Spot: This fungal disease appears as brown spots on the leaves. Minimize overhead watering to keep foliage dry and improve air circulation around the plants. Remove and destroy infected leaves to reduce fungal spores.
- Crown Rot: Another fungal issue manifesting as a soft, rotting base. Ensure good air circulation and avoid overcrowding. As with bacterial soft rot, trim any infected parts.
Pruning & Deadheading
Pruning and deadheading can enhance an iris plant’s appearance and promote healthy growth.
Pruning
Trim dead or diseased foliage from the plant to increase air circulation and reduce disease risk. Cutting away old, damaged, or diseased leaves also prevents pests from harboring in the debris.
Deadheading
Deadheading is the process of removing spent blooms. It prevents Irises from expending energy on seed production and redirects their resources toward root and rhizome development. Deadheading also encourages irises to produce additional blooms and can extend the flowering period.
Supporting Tall Varieties
Tall iris varieties may need support to prevent their stems from bending or breaking, especially in windy conditions.
- Insert stakes into the ground near your iris plants early in the season. Stakes should be tall enough to support the plant at full height but discreet enough to remain mostly out of sight.
- Secure the iris stalks to the stakes with soft ties, such as Velcro plant ties or strips of old T-shirt fabric. The ties should be snug but not tight enough to cut into the stalks as they grow.
- Adjust and loosen the ties as the plants grow and the stalks thicken.
- For clusters of tall irises, consider using a circular plant support that can hold multiple stems.
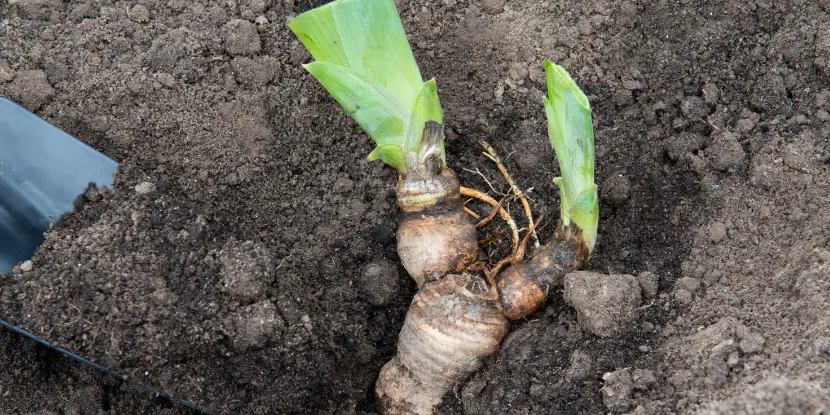
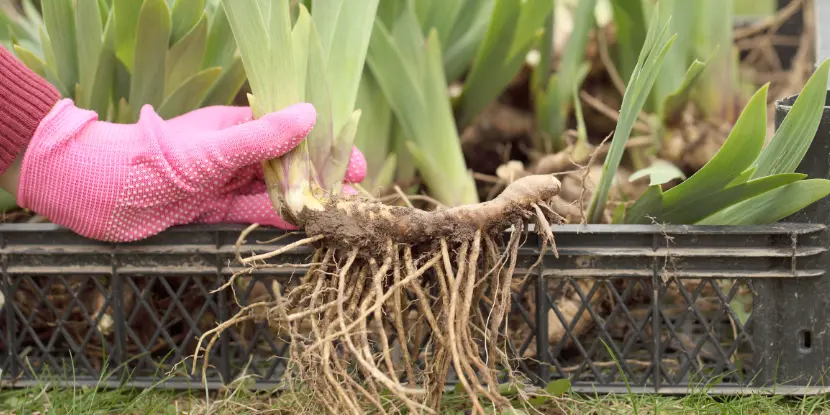
Planting an iris rhizome.
Dividing Iris Clumps
Iris plants should be divided every three to five years.
- Dividing rejuvenates the plants and encourages more vigorous blooming.
- It reduces overcrowding and the risk of disease and pest infestation.
- It allows better distribution of water, nutrients, and sunlight among plants.
- It provides an opportunity to remove and discard diseased or damaged rhizomes.
- It lets you expand your garden or share beloved iris varieties with friends and family.
The ideal time for dividing iris plants is late summer to early fall, after the blooming season has ended. This gives the new transplants time to establish their roots before winter.
- Select a new planting site with at least six hours of sunlight daily and well-draining soil. Prepare the area by loosening the soil and adding compost to improve fertility.
- Carefully dig around the Iris clump with a spade or fork, lifting the entire mass gently to avoid damaging the rhizomes.
- Wash the rhizomes with water to remove soil and inspect them closely. Discard any soft, rotting, or pest-damaged rhizomes.
- Use a sharp knife to cut the rhizomes into sections, ensuring each piece has at least one healthy fan of leaves and a section of roots. Trim the leaves to about one-third of their length to reduce moisture loss and make planting easier.
- Plant the Iris divisions in the prepared area. Set the rhizomes so the top is slightly exposed above the soil surface, with the roots spread out beneath. Space the divisions 12 to 24 inches apart, depending on the variety.
- After planting, water the new transplants thoroughly to settle the soil around the roots and mitigate transplant shock.
- Apply a light layer of mulch around but not on top of the rhizomes to retain moisture and regulate soil temperature. Keep the area watered, but allow the top inch of soil to dry out between watering to prevent rot.
An iris rhizome with spring roots.
Overwintering Iris Plants
In cold climates, cut back foliage after the first frost. Apply a layer of mulch to insulate the soil and protect the rhizomes from freezing temperatures. Consider lifting and storing rhizomes indoors until the following spring to prevent frost damage in regions with severe winters.
Tips for Stunning Blooms
- Provide adequate sunlight and well-draining soil.
- Water consistently, avoiding overwatering or drought stress.
- Apply a balanced fertilizer in early spring and mulch to conserve moisture.
- Monitor for pests and diseases, addressing any issues promptly.
- Deadhead spent blooms to encourage more flowering.
- Divide overcrowded clumps every 3 to 4 years to promote vigor and blooming.
Happy gardening!
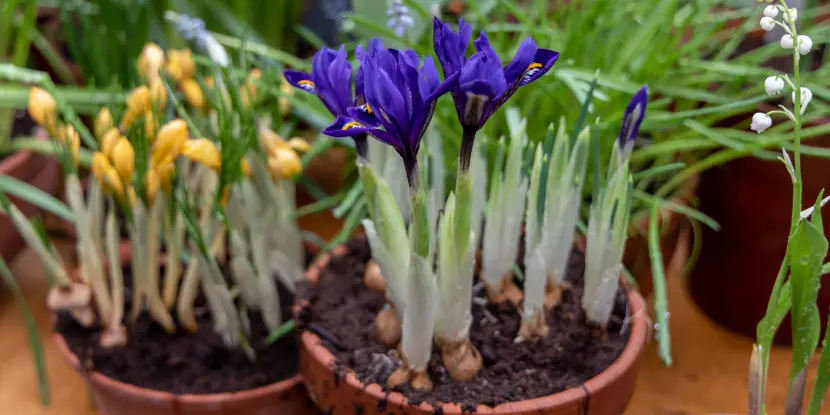
Container-grown miniature iris plants.
FAQs: Growing Iris Plants
Q: When is the best time to plant irises?
The best time to plant irises is in late summer to early fall, after the blooming season has ended. This gives new transplants time to establish their roots before winter.
Q: How often should I water my iris plants?
Water deeply once a week or when the top inch of soil is dry, but avoid overwatering to prevent rot and fungal diseases. Adjust watering according to weather conditions.
Q: How do I know if my iris plants should be divided?
A: Signs include decreased blooming, overcrowding, and reduced vigor. You can also check the rhizomes for indications of overcrowding or rot.
Q: Can I grow irises in containers?
Yes, as long as the container is large enough to accommodate their growth and has adequate drainage.
Q: Can irises grow in shade or require full sun?
Some varieties tolerate partial shade. However, too much shade can reduce blooming and weaken plants. For healthy growth, aim for at least six hours of sunlight daily.
Q: Should I fertilize my irises? If so, what type of fertilizer should I use?
Apply a low-nitrogen or balanced NPK fertilizer in early spring to encourage growth and blooming. Avoid high-nitrogen fertilizers, which promote leaf growth at the expense of blooms.
Q: How long do iris blooms last?
Individual iris flowers may last only a few days. Still, since plants often have multiple buds on each stem, the blooming period can extend for several weeks, especially if cooler weather prevails.
Q: Can I grow different varieties of irises together?
Absolutely! Growing different varieties together can extend the blooming period, as different irises bloom at different times.
Q: How should I deal with an iris plant that produces leaves but no flowers?
This could be caused by too much shade, excessive nitrogen, or overcrowded rhizomes. Ensure your irises are planted in a sunny spot, limit high-nitrogen fertilization, and divide crowded clumps to stimulate blooming.