
Hydrangea plants are Native Americans. They’re also Native Asians.
The flowering plants were first cultivated in Japan, a country known for its gardening traditions and deep appreciation of nature.
Hydrangea fossils date back 40-65 million years and have been discovered in North America, Europe, and Asia. The plants grew wild in forests and along riverbanks.
Today, hydrangeas are beloved worldwide for their stunning blooms and easy care requirements. They thrive in various climates and can enhance any landscape, including your Southern California yard.
Hydrangea Varieties
There are over 75 hydrangea species, but only six are commonly grown in gardens. The best varieties for Southern California’s conditions include:
- Bigleaf Hydrangea (Hydrangea macrophylla): This plant is particularly well-suited for Southern California. It flourishes in the morning sun and partial afternoon shade.
- Lacecap Hydrangeas: Known for their flat-topped flower clusters, these do well in the California climate.
- Mophead Hydrangeas: With their large, globular flower clusters, mopheads are another excellent choice for the region.
- Panicle Hydrangeas: Varieties like ‘Limelight,’ which has greenish-ivory flowers, and ‘Pinky Winky,’ with ivory blooms, are good choices for Central and Southern California.
- Oakleaf Hydrangea (Hydrangea quercifolia): This variety has unusual oak-shaped leaves and cone-shaped flowers. It does well in Southern California’s inland valleys.
- Climbing Hydrangea (Hydrangea anomala subsp. petiolaris): A vigorous vine that can handle heat and droughts, this plant produces fragrant white flower clusters.
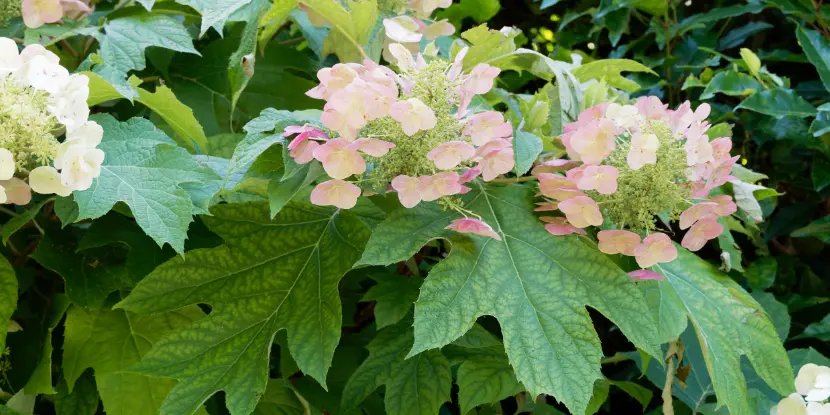
The usual oak-like foliage of Hydrangea quercifolia.
Planting Hydrangeas
- Choose a location with morning sun and afternoon shade.
- The soil should be moist but well-draining and rich in organic matter. Soil pH should be between 5.2 and 6.8.
- Dig a hole twice as wide and deep as the root ball, and loosen the soil at the bottom of the hole.
- Gently remove the plant from its container and place it in the hole to sit with or slightly above ground level.
- Backfill with soil, pressing lightly to eliminate air pockets.
- Water thoroughly after planting and mulch around the base of the plant to retain moisture.
Hydrangea Care: Daily & Seasonal Tips
Watering Hydrangeas
Hydrangeas love water, but there’s a fine line between keeping them hydrated and drowning them.
- Aim for deep watering once or twice a week, depending on the weather.
- Water in the morning to allow leaves to dry out during the day, preventing mildew.
- Apply a layer of mulch around the base to retain moisture and regulate soil temperature.
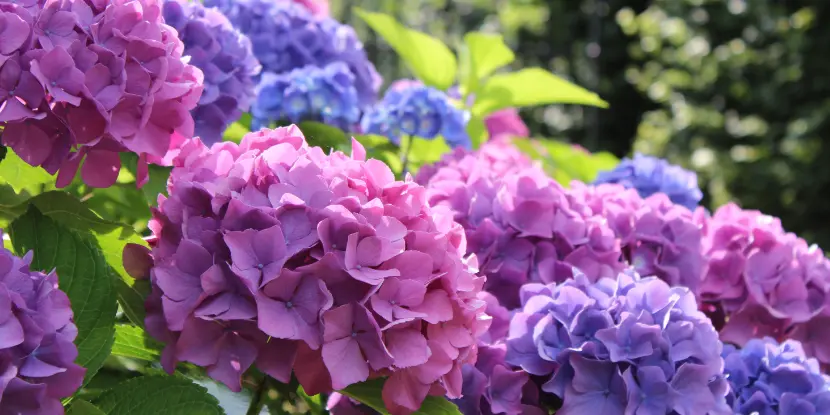
Beautiful blue and pink Hydrangea macrophylla flower heads.
Fertilizing Hydrangeas
- Use a balanced, slow-release fertilizer in the spring.
- Too much nitrogen can lead to lush leaves but fewer flowers.
- Periodically test your soil’s pH and nutrient levels to adjust fertilization accordingly.
Dormancy
Like many perennial plants, hydrangeas enter dormancy during the winter. This allows the plant to conserve energy and prepare for vigorous growth in the spring.
During dormancy, hydrangea plants lose their leaves, and their growth slows significantly.
Protect your hydrangeas during this time by reducing watering and avoiding fertilization. Proper winter care ensures your hydrangeas will emerge from dormancy ready to produce beautiful blooms in the upcoming growing season.
Pruning Hydrangeas: The Dos & Don’ts
When to Prune
- Bigleaf and Oakleaf Hydrangeas: Prune after they bloom in the summer.
- Panicle and Smooth Hydrangeas: Prune in late winter or early spring before new growth starts.
- Climbing Hydrangeas: Prune after they bloom in the summer, but only if necessary. They don’t require regular pruning.
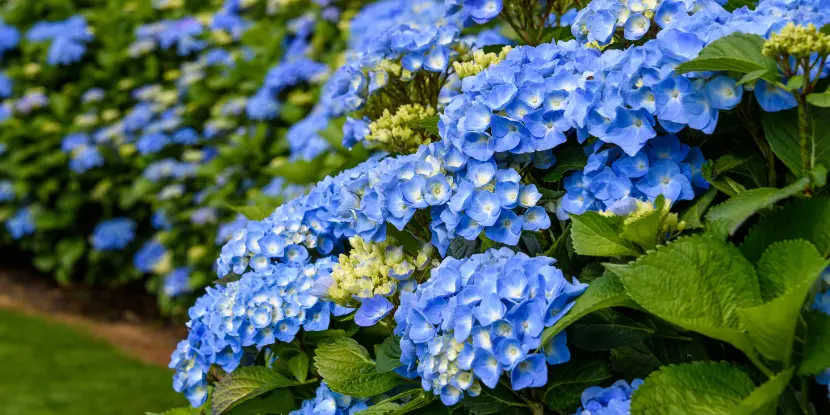
Hydrangeas can easily be shaped into flowering hedges.
How to Prune
- Cut back any dead or damaged stems.
- Trim back to maintain the desired shape and size.
- Cut just above a healthy bud to promote new growth.
Common Pruning Mistakes to Avoid
- Don’t prune too late in the season; this can remove next year’s flower buds.
- Don’t over-prune, which can lead to weaker stems and fewer blooms.
- Don’t use hedge trimmers – hand pruners are best for precise cuts.
- Don’t be afraid to leave some dead flowers on your hydrangea plant. They can add winter interest and protect new growth from frost damage.
Troubleshooting Common Hydrangea Problems
Despite your best efforts, hydrangeas can face various issues. Here’s how to address some common problems:
Yellow Leaves
Yellowing leaves can indicate:
- Overwatering: Check the soil moisture and adjust watering practices.
- Nutrient Deficiency: Test the soil and consider adding a balanced fertilizer.
- Pests or Disease: Inspect for signs of pests like aphids or diseases like powdery mildew.
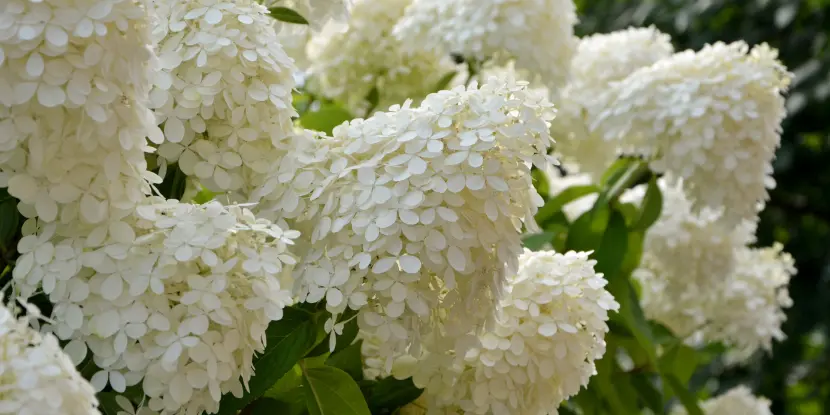
The conical flower clusters of Hydrangea paniculata.
Lack of Blooms
If your hydrangeas aren’t blooming, consider these factors:
- Improper Pruning: Ensure you’re pruning at the right time of year.
- Too Much Shade: Relocate to a spot with more sunlight.
- Nutrient Imbalance: Avoid over-fertilizing with high-nitrogen products.
- New Planting: It can take a year or two for newly planted hydrangeas to establish and produce blooms.
Wilting Flowers
Wilting flowers could be due to:
- Underwatering: Check soil moisture levels to ensure you’re watering deeply.
- Heat Stress: During heatwaves, provide temporary shade or mist the plant to cool it down.
- Pest Infestation: Inspect for pests like aphids and treat them accordingly.
Propagating Hydrangeas
Methods of Propagation
- Stem Cuttings
- Layering
- Division
Propagating by Stem Cuttings
- Select a healthy, non-flowering stem with at least three sets of leaves.
- Using sharp pruners, cut the stem just below a set of leaves. The cutting should be about 4–6 inches long.
- Remove the leaves from the lower half of the cutting to expose the nodes where roots will form.
- Dip the cut end into rooting hormone to encourage root development.
- Insert the cutting into a pot filled with a moistened mix of peat and perlite or potting soil.
- Cover the pot with a clear plastic bag to retain humidity, ensuring the plastic does not touch the leaves.
- Place the pot in a warm, bright area but out of direct sunlight. Keep the soil consistently moist.
- After a few weeks, gently tug the cutting to see if it has rooted. Once rooted, transplant to a larger pot or directly into your garden.
Propagating by Layering
- Choose a low-growing, flexible branch easily bent to the ground.
- Make a small cut or wound on the underside of the selected branch where it will touch the soil.
- Bend the wounded section to the ground and secure it with landscape staples or a bent wire.
- Cover the wounded section with soil, exposing the branch’s tip.
- Water the layered section regularly to maintain soil moisture.
- After a few months, check for roots by gently uncovering the soil. Once roots are established, cut the new plant from the parent and transplant it.
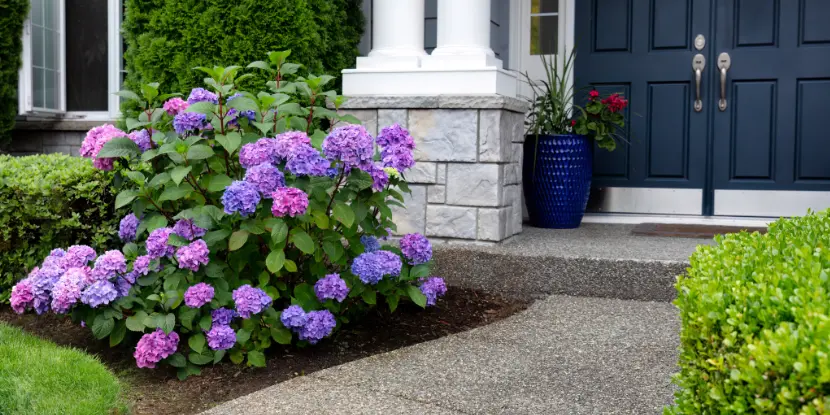
A hydrangea bush near the entrance of a house.
Propagating by Division
- The best time for division is early spring or fall when the hydrangea is dormant.
- Carefully dig up the hydrangea, preserving as much of the root system as possible.
- Using a sharp, clean knife or spade, divide the root ball into smaller clumps, ensuring each division has several stems and healthy roots.
- Plant each division in a prepared hole, keeping the root depth similar to its original planting.
- Water thoroughly to help the plant settle and establish its roots.
FAQs: Answering Your Queries about Hydrangea Care
Q: Can hydrangeas grow in pots?
Yes, with proper care. Ensure the pot is large enough for the root system and has good drainage. Use a high-quality potting mix and follow regular watering and fertilizing routines.
Q: How can I change the color of my hydrangeas?
Soil pH can influence the color of bigleaf hydrangeas :
- For Blue Blooms: Increase soil acidity by adding aluminum sulfate or sulfur.
- For Pink Blooms: Raise soil pH by adding lime.
Q: Do hydrangeas need to be covered in winter?
Cover hydrangeas with burlap or mulch in colder climates to insulate the roots and prevent damage from freezing temperatures.
Q: How often should I water my hydrangeas?
Hydrangeas need consistent moisture. Water deeply once or twice a week, depending on local weather conditions. Ensure the soil is well-drained to prevent root rot.
Q: Can I grow hydrangeas indoors?
Yes, if you provide sufficient light and humidity. Place the plant near a bright window and use a humidity tray or mist regularly.
Q: Why are my hydrangea leaves curling?
Leaf curling may result from various stressors, including underwatering, pest infestations, or disease. Check soil moisture, inspect for pests, and apply appropriate treatments if necessary.
Q: Can I grow hydrangeas in full sun?
Some varieties, like panicle hydrangeas, can tolerate full sun, especially in cooler climates. However, most hydrangeas prefer morning sun and afternoon shade to protect them from intense heat.
Q: What type of fertilizer is best for hydrangeas?
Hydrangeas benefit from a balanced, slow-release fertilizer. An all-purpose 10-10-10 or 14-14-14 formula applied in spring and once more in early summer typically works well. Avoid over-fertilizing, which can lead to fewer blooms and more leafy growth.
Q: How do I prevent hydrangea diseases?
Ensure proper air circulation around your hydrangeas by spacing plants and pruning as needed. Water at the base of the plant to keep foliage dry and avoid overhead watering. Removing and disposing of any infected leaves can also prevent the spread of disease.