The carrot originated in Central Asia, about 9,000 miles from Bugs Bunny and Warner Brothers Studios in Burbank. Cultivation began around 3,000 to 5,000 years ago in the Afghanistan region.
The earliest varieties were primarily purple and yellow, while the now-common orange carrot was developed later by Dutch farmers in the 17th century.
Carrots were introduced to Europe by the 12th century, but weren’t widely consumed until the Middle Ages. Other root vegetables, like parsnips, were more popular at the time.
Today, the humble carrot is a key ingredient in almost every salad, veggie platter, and stew. And, of course, it has a starring role in every Bugs Bunny cartoon.
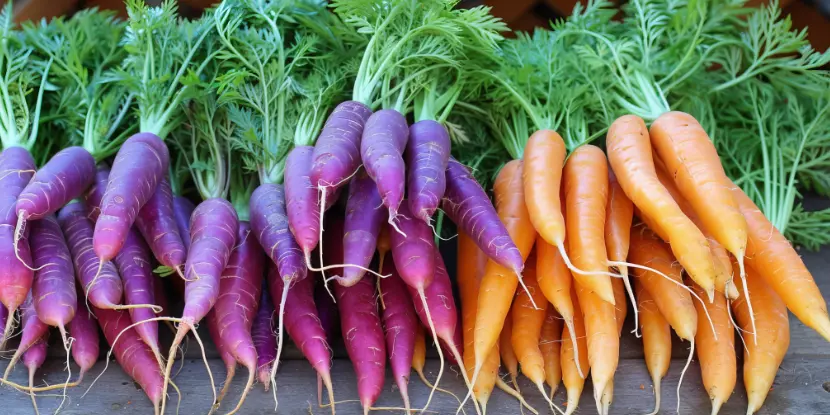
The first carrots were purple. Dutch farmers developed the orange variety in the 17th century.
Home-Grown Carrots Vs. Store-Bought
Have you noticed the difference between store-bought and home-grown produce?
- Home-grown carrots are sweeter and more flavorful than commercial carrots.
- They retain their natural sugars and have a better nutrition profile.
- They’re free from harmful pesticides and chemicals.
- Freshly picked carrots have a satisfying crunch and juiciness that store-bought carrots don’t.
This guide will show you how to cultivate delicious, nutritious carrots in your backyard or even in containers on your apartment balcony.
Choosing the Right Variety
Carrots come in many different shapes, sizes, and colors. Some varieties are better suited for Southern California’s conditions than others. These include:
- Nantes have a sweet flavor and crisp texture. They’re cylindrical with blunt tips and mature in 65–70 days.
- Imperator is a favorite among commercial growers for its long, tapered shape and deep orange color. It matures in 75–80 days.
- Danvers carrots are an excellent choice for heavier soils. They’re medium-length with pointed tips and reach maturity in 70–75 days.
- Chantenays are ideal for clay and shallow soils. They’re short, stout, sweet, and starchy (just like some people you know). They mature in about 65–70 days.
- Purple Haze carrots are as beautiful as they are tasty, with a time to maturity of around 70 days. No, they’re not named after the song, although it would be very cool if they were.
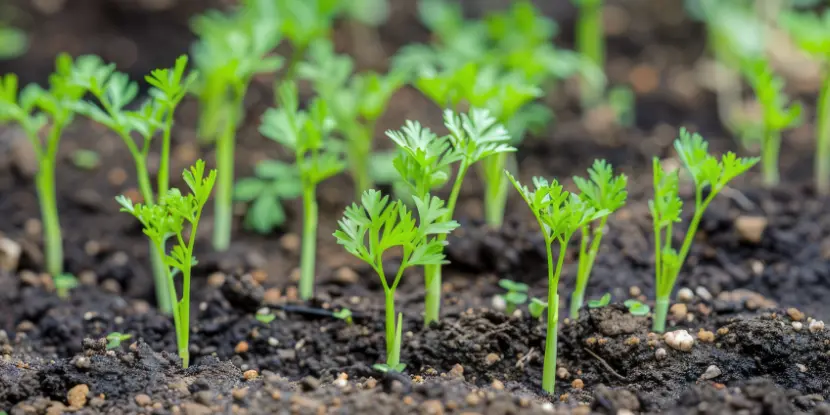
Carrots don’t transplant well. Place seeds directly into the soil.
Ideal Growing Conditions
- Carrots thrive in cooler temperatures, making spring and fall the best planting times.
- Aim for soil temperatures between 50°F and 85°F.
- Carrots need full sun, so choose a spot that receives at least 6 hours of sunlight daily.
Preparing the Garden Bed
- Remove all weeds, rocks, and debris from the garden bed. These obstacles can impede carrot growth and affect root formation.
- Till the soil to a depth of at least 12 inches to aerate it. Carrots grow underground and need loose soil to develop unobstructed.
- Mix in plenty of well-rotted manure or compost to enrich the soil and improve its texture.
- Check the soil using a soil test kit. If necessary, amend the soil to achieve the desired pH level between 6.0 and 6.8.
- Smooth out the garden bed surface with a rake, breaking apart any large clumps of soil to create a fine, even top layer.
- Lightly moisten the soil before planting to help seeds settle in and start germination promptly.
Planting Your Carrots
- Plant your carrot seeds in early spring, as soon as the soil can be worked. This lets you take advantage of the cool temperatures carrots prefer.
- If you live in a milder climate (like Southern California), you can also plant in the fall for a winter harvest.
- You can start container gardening anytime if you provide a stable environment with the proper temperature range.
Planting Process
- Plant carrot seeds directly in the garden bed or containers. Sow seeds 1/4 inch deep and about 2 to 3 inches apart in rows 12 to 18 inches apart.
- Water gently and regularly to maintain consistent soil moisture, but avoid waterlogging. Young carrot plants need consistent moisture to develop.
- Once seedlings are about 2 inches tall, thin them so each carrot has enough room to grow. Aim for a 2-inch spacing between plants.
- Apply a thin layer of mulch to retain soil moisture and suppress weeds. Watch for pests and protect young seedlings with row covers if necessary.
Watering Schedule
Carrots need about 1 inch of water per week, including rainfall.
- Keep the soil evenly moist until seedlings emerge.
- After seeds germinate, reduce watering frequency but increase volume to encourage deep root growth.
- Water just after thinning and again in a week or so when seedlings have recovered and started growing new leaves.
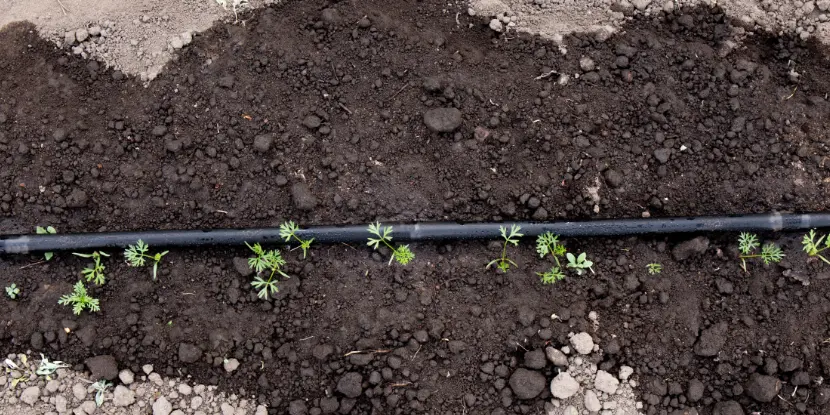
- A soaker hose or drip irrigation system can deliver water most efficiently.
Fertilizing
Carrots are heavy feeders and need regular treatments with a balanced fertilizer.
- Before planting, mix in compost or well-rotted manure to provide organic matter and nutrients for root development.
- If you’re not using compost or manure, apply a slow-release fertilizer following the recommended application rate on the label.
- Avoid high-nitrogen fertilizers, which promote big, bushy carrot tops but stunt root growth.
Pests & Diseases
Common pests like carrot rust flies, aphids, carrot weevils, and cutworms can damage your crop.
- Use floating row covers to shield your plants.
- Introduce beneficial insects like ladybugs to control pests naturally.
- Rotate crops annually to prevent soil-borne diseases.
- Apply organic insecticides if needed.
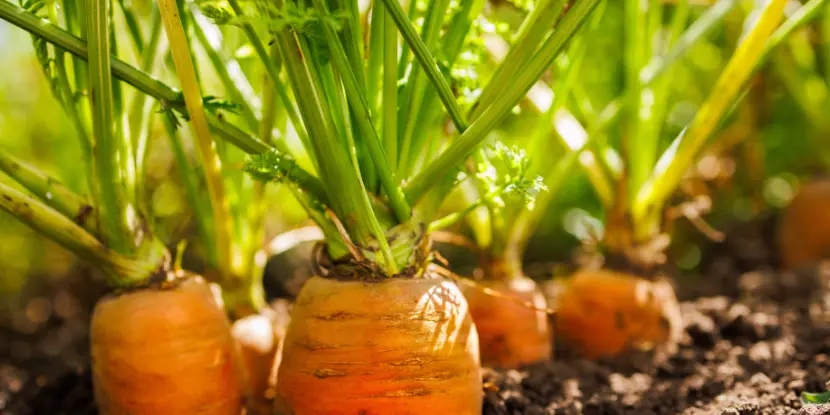
Carrots are ready for harvest when their tops push up through the soil.
Companion Planting
Carrots thrive when planted with certain vegetables and flowers.
- They grow well alongside tomatoes, onions, leeks, and chives.
- Avoid planting them near dill, parsnips, parsley, or celery, as these can attract pests that harm carrots.
- Flowers like marigolds and nasturtiums can also help repel pests.
Harvesting & Storage
- Carrots mature in 60 to 80 days, depending on the variety.
- They’re ready for harvest when their tops push out from the soil surface.
- Gently loosen the soil around the root and pull it carefully to avoid breakage. Use a garden fork or trowel if necessary.
- After harvesting, store carrots in perforated plastic bags in the refrigerator for up to two weeks.
- Don’t wash them before storing them, as moisture promotes spoilage.
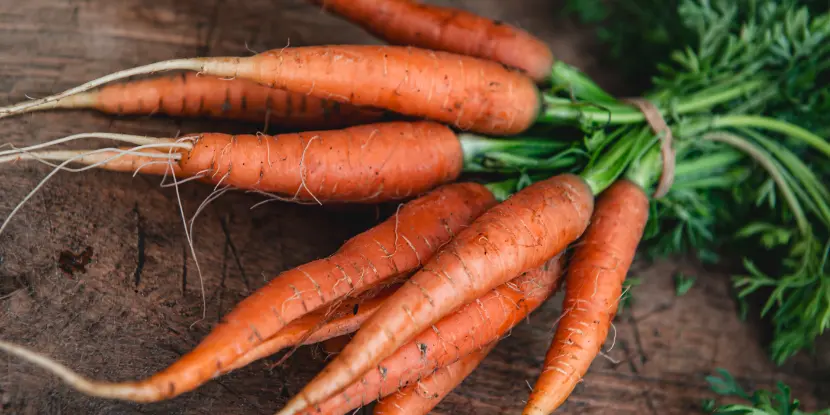
Carrots freshly harvested from the garden are sweeter and crisper than commercial carrots.
FAQs: Growing Carrots
Q: How long do carrots take to grow?
Most carrot varieties mature in 60 to 80 days.
Q: Why are my carrots short and stubby?
Compacted soil or stones can impede root growth. Ensure your soil is loose and rock-free.
Q: Can I grow carrots in containers?
Yes. Choose a deep pot with good drainage and follow the abovementioned planting steps.
Q: What soil type is best for growing carrots?
Carrots prefer loose, sandy, well-draining soil. Heavy clay or rocky soils can impede root development, leading to misshapen carrots.
Q: How can I prevent my carrots from developing a bitter taste?
Bitterness can occur if carrots are left in the ground too long. Harvest them promptly at maturity and ensure they receive consistent water. Stress from drought or high temperatures can also cause bitterness.
Q: Can I plant carrot seeds directly in the garden?
Yes, we recommend sowing carrot seeds directly into the garden bed. Carrots don’t transplant well because their roots can be easily disturbed, which affects their growth.
Q: Why are my carrot seedlings not emerging?
Seeds may fail to germinate due to improper soil temperatures, lack of moisture, or poor-quality seeds. Keep the soil moist. Temperatures within 50°F to 85°F are ideal for germination.
Q: What should I do if my carrots have forked roots?
Forked roots can result from rocky soil or too much nitrogen. Clear the bed of debris and avoid high-nitrogen fertilizers. Thin seedlings to prevent overcrowding, which can also cause root deformities.

