When was the last time you trudged for miles to a waterfall, legs aching and lungs burning, only to find it overrun by rowdy “nature lovers” with the same idea?
There’s an easier way to enjoy gently cascading water and have it all to yourself. Or maybe you’ll share it with birds, butterflies, and squirrels in the neighborhood, but that isn’t that part of the charm?
“If you build it, they will come.”
A DIY waterfall can be a stunning feature in a landscape, and constructing one may be easier than you think.
Why Build a Waterfall in Your Backyard?
A waterfall offers several benefits:
- The soothing sound of cascading water reduces stress and promotes relaxation.
- Birds, butterflies, and small mammals are naturally drawn to water sources, making your yard feel alive and vibrant.
- A well-designed waterfall can increase your home’s curb appeal and market value.
- Building a waterfall is a challenging and satisfying DIY project, blending creativity and craftsmanship.
Step-by-Step Guide to Building a Waterfall
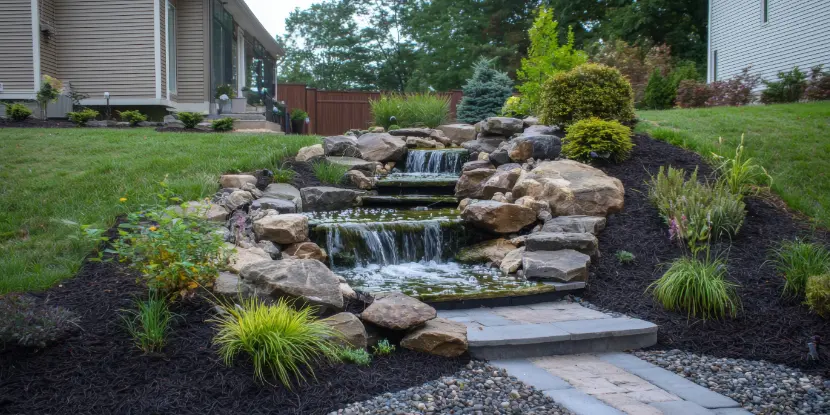
A gorgeous waterfall with multiple levels and a mulch border.
1. Plan Your Design
Begin by considering:
- Placement: Where will your waterfall go? Most people choose an area near patios, decks, or gardens.
- Budget: How much will you spend on materials like pumps, liners, rocks, and plants?
- Size: Do you envision a small bubbling waterfall or a multi-tiered extravaganza?
Visualize your design with sketches or landscape software. Once you know what you want, collect the necessary materials.
2. Gather Materials
Here’s a list of essentials for your waterfall:
- A water pump (submersible or external)
- A water reservoir or pond liner
- Flexible PVC pipe to carry water back to the top
- Underlayment (to protect the liner)
- Rocks and boulders of varying sizes
- Gravel and pebbles
- Decorative plants and ornaments (optional)
You can find these materials at garden centers, hardware stores, or specialized pond supply retailers.
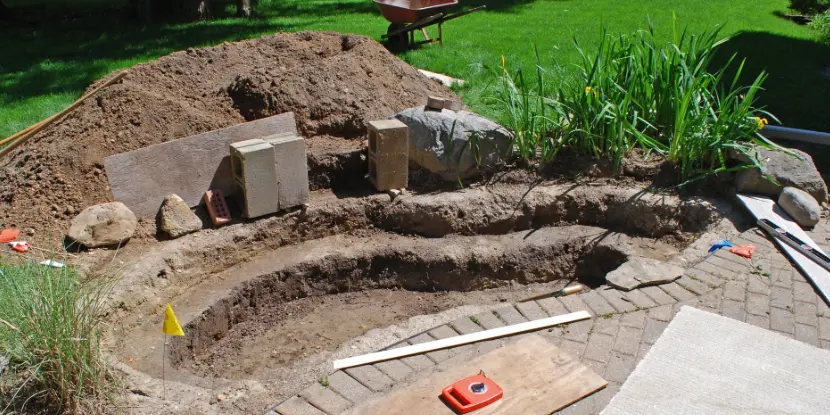
3. Excavate the Site
Mark the area where your waterfall will sit, then start digging.
- Pond or Reservoir: This will serve as the water collection point. The depth generally depends on your design, but 18–24 inches is typical for smaller waterfalls.
- Waterfall “Steps”: For a cascading effect, dig steps or tiers where the water will flow or use large flat rocks that overlap.
Your pond should be at least 18 inches deep if you want it to support fish.
4. Lay the Liner & Underlayment
To prevent water from seeping into the ground, install a pond liner and underlayment.
- Line the excavated pond and waterfall area with the underlayment first.
- Carefully lay the liner, ensuring there are no wrinkles or folds. Adjust as needed for a smooth fit.
Secure the edges with large rocks or staples, leaving excess material at the top for adjustments later.
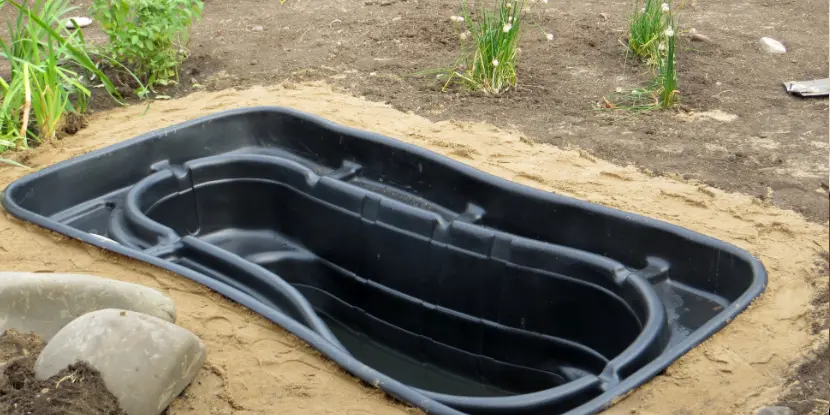
A plastic tub is easier to install than a pond liner, though not as natural-looking.
5. Position the Pump & Plumbing
Place the water pump in the reservoir or pond.
- Attach flexible PVC piping to the pump and route it to the path of your waterfall.
- Hide the pipe by burying it or covering it with rocks and plants for a natural look.
Test your pump to verify it runs smoothly, and water reaches the top of your waterfall.
6. Arrange Your Rocks & Boulders
This step makes a huge difference.
- Start with larger rocks and boulders at the base and work your way upward.
- Overlap rocks to control water flow, creating small cascades or streams.
- Fill gaps with smaller pebbles and gravel for support and a polished aesthetic.
Take your time arranging the rocks — they create the visual appeal.
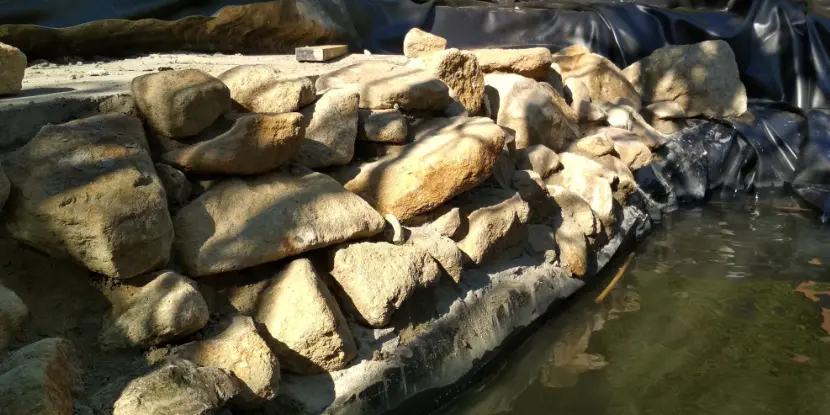
This stone wall hides the pond liner and creates a terrace for the waterfall.
7. Add Water & Test
Fill the reservoir or pond with water, covering the pump entirely.
Switch on the pump and observe how the water flows. Are there leaks? Does it cascade smoothly? If needed, adjust the liner or rock placement.
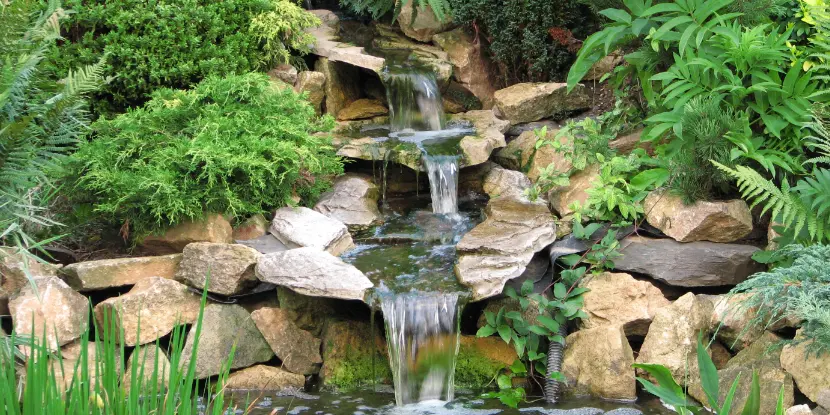
A finished waterfall with rocks and vegetation.
8. Landscape & Decorate
Now for the fun part — landscaping!
- Add decorative plants like ferns, hostas, or water lilies around the waterfall for a lush look.
- Incorporate LED lights to enjoy your feature day and night.
- Add small statues or ornaments for a personal touch. Garden gnomes, baby!
Your waterfall is now ready for prime time!
Tips for Maintenance
Maintaining your backyard waterfall is simple if you practice basic care:
- Periodically check for debris that may clog the pump or pipes.
- Clean algae buildup using eco-friendly pond-safe solutions.
- Top off water levels as they evaporate.
- During winter in colder climates, shut off and cover the pump to prevent freezing.
FAQs: Building a Waterfall
Q: Do I need a professional to build a backyard waterfall?
With proper planning and patience, most homeowners can complete this DIY project.
Q: How much does it cost to build a waterfall?
Costs vary depending on size and materials, but small DIY waterfalls typically range between $300 and $1,000.
Q: What type of pump should I use?
A submersible pump is ideal for small to medium-sized designs, while external pumps work better for larger waterfalls.
Q: Do I need a pond for a waterfall?
Not necessarily. You can use a pondless design where water recirculates into a hidden reservoir.
Q: Can I build a waterfall on a flat yard?
Yes! Use mounds of soil or stacked rocks to elevate the waterfall steps.
Q: Is it a waterfall eco-friendly?
Yes! Flowing water supports local wildlife and reduces reliance on artificial lawn features.
Q: How do I size my pump?
Match the pump’s flow rate (GPH) to the width and height of your waterfall. Most pumps include guidelines.
Q: Can I add fish to my pond?
Yes, but ensure the pond is deep enough (18–24 inches) and maintain good water quality.