So you’re making a splash in the kitchen!
More precisely, a new backsplash to replace the early-70s avocado tile inspired by the Brady Bunch ranch house. The matching avocado shag carpet is long gone, and now it’s the kitchen’s turn for a makeover.
You can call in the contractors or save a pretty penny and do the job DIY. Installing a tile backsplash is within the reach of even novice home renovators willing to learn.
This guide will walk you through every step of the process, from gathering the right tools to grouting those magnificent tiles and achieving a professional-looking finish.
1. Gather Your Supplies
Essential Tools
- Safety glasses and mask
- Scoring wheel
- Metal straight edge
- Level
- Notched trowel
- Rubber grout float
- Tile cutter (manual or wet saw)
- Tile nippers (optional)
- Tile spacers
- Bucket
- Sponges
- Caulk gun
- Pencil
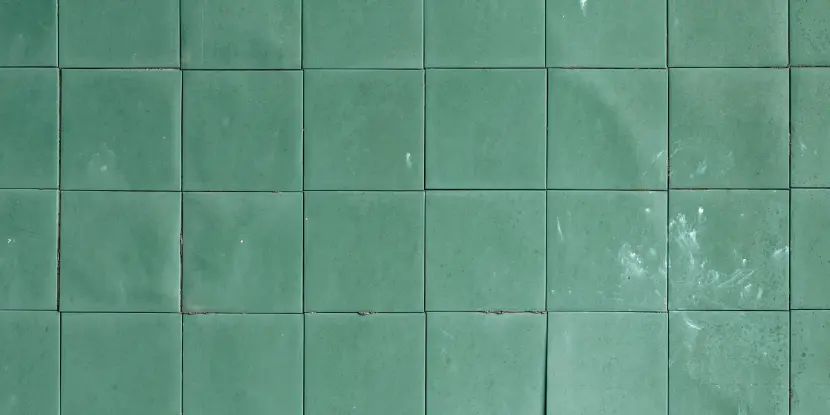
Eeew! This grubby 70s-era tile should be replaced.
Supplies
- Tile: Select tiles that complement your kitchen’s style and color scheme. Account for factors like size, material (ceramic, glass, etc.), and whether you prefer a uniform or patterned look.
- Mortar and grout: Thinset mortar bonds your tiles to the wall. Grout fills the gaps between tiles and comes in sanded and unsanded varieties. Sanded grout is best for wider grout lines (1/8 inch or more).
- Caulk: Waterproof caulk seals the edges and corners of your backsplash.
- Sealer: A sealer protects porous tiles (like natural stone) from staining. Skip this step if you opt for non-porous ceramic tiles.
- Backing material: You’ll need something to attach your tile to – drywall, cement board, or masonry.
- Safety glasses, gloves, and dust mask: Safety glasses and masks protect your eyes and lungs from dust particles. Work gloves protect your hands as you handle sharp tools and messy materials like mortar and grout.
2. Prepare the Wall Surface
- Use a damp cloth and a mild cleaning solution to remove any existing grease, dirt, or debris from the wall. Allow the surface to dry thoroughly before proceeding.
- If you have an existing backsplash, carefully remove it with a pry bar or utility knife. Be mindful of electrical wiring and plumbing behind the backsplash.
- Use a sanding block to smooth the wall’s surface. For larger bumps or dips, apply a thin layer of joint compound to create a level canvas.
- While not mandatory, a backerboard adds an extra layer of protection against moisture and improves the stability of your backsplash. Cement board or HardieBoard are popular choices.
2. Plan Your Backsplash Layout
- Measure the area: Start by measuring the length and height of the space the backsplash will occupy. Subtract the areas where cabinets, windows, or fixtures occupy space. This will help you determine how much tile you need, including extra for cuts and waste.
- Dry lay the tiles (optional): Before applying adhesive, consider laying your tiles on a flat surface, mimicking the backsplash area. This lets you visualize the result and adjust tile placement or cuts for obstacles like electrical outlets.
- Create a pattern (for intricate designs): If your design involves various colors and shapes, draw it on paper or use design software. This step is vital for complex designs to eliminate errors during installation.
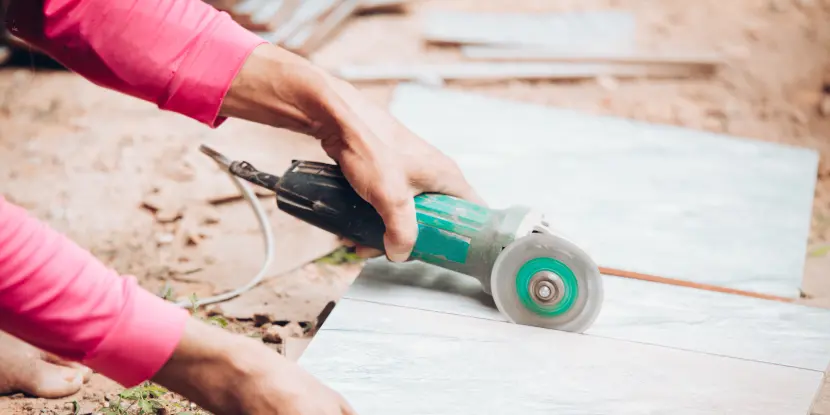
Cutting marble with a compact circular saw.
4. Cut Tiles Like a Pro
Scoring & Snapping
- Mark the tile: Mark the cut with a pencil or marker. Place a straight edge along the marked line to guide your cut.
- Score the tile: Firmly drag your tile cutter’s scoring wheel across the tile surface along the marked line. This creates a groove in the tile.
- Snap the tile: Move the tile to the tile cutter’s breaking wings or use your hands to apply pressure on either side of the scored line. The tile should snap cleanly along the scored line.
Cutting Around Outlets & Switches
- Measure and mark: Measure the distance between the outlet or switch and the nearest tile. Transfer this measurement to your tile, marking where you’ll cut.
- Cut the notch with a tile saw: Use a tile saw to create a straight cut along the marked line. If there’s an L-shaped section, make two perpendicular cuts and carefully remove the piece.
Nipping Tiles (for irregular cuts)
- Mark the cut: Mark the surface of your tile where you need to make a curved or irregular cut.
- Score and snap off large pieces: Use tile nippers to chip away at larger areas of excess tile, working towards the marked line.
- Smooth the edges: Use the nippers to make smaller, more precise cuts until you reach your desired shape.
Tips for Precision & Safety
- Always wear safety glasses and gloves to protect yourself from sharp edges and flying debris.
- Practice cutting a few spare tiles to get comfortable with the cutting tools and techniques before starting on your backsplash tiles.
- Double-check your measurements before cutting to minimize waste and ensure a tight fit around outlets, switches, or other obstructions.
- Keep your work area clean and organized to reduce the risk of accidents.
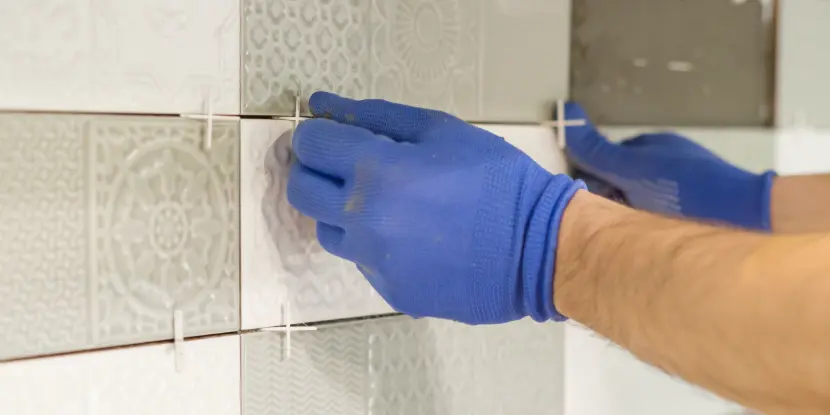
Inserting spacers between tiles for a precise layout.
5. Apply Mortar & Set the Tiles
Mixing Mortar
- Prepare the mix: Pour the specified amount of water into a clean bucket (check the mortar package for ratios). Slowly add mortar powder to the water.
- Stir the mortar: Use a mixing paddle attached to a drill or mix manually with a trowel until you achieve a smooth consistency similar to peanut butter. If the mix is too wet or dry, add more powder or water.
- Let it slake: After mixing, let the mortar sit for about 10 minutes. This process, known as slaking, gives chemicals in the mortar time to activate.
- Stir again: Mix the mortar again after slaking to ensure it’s thoroughly blended.
Applying Mortar
- Apply to the wall: Scoop mortar onto the flat side of the notched trowel and spread it over the wall area where you will set the tiles. Work in small sections to prevent the mortar from drying out.
- Comb the mortar: Hold the notched side of the trowel at a 45-degree angle to the wall and drag it across the mortar to create even ridges. These ridges help secure the tiles.
Setting the Tiles
- Place the first tile: Firmly press the first tile into the mortar, wiggling it slightly so that it makes good contact with the adhesive.
- Continue setting tiles: Use tile spacers to maintain consistent grout lines between tiles. Check alignment with a level periodically.
- Cut tiles as needed: Measure and cut tiles to fit around outlets, switches, and the edges of the backsplash area.
- Allow to dry: Once all tiles are in place, allow the mortar to set as per the manufacturer’s instructions, typically for 24 hours, before grouting.
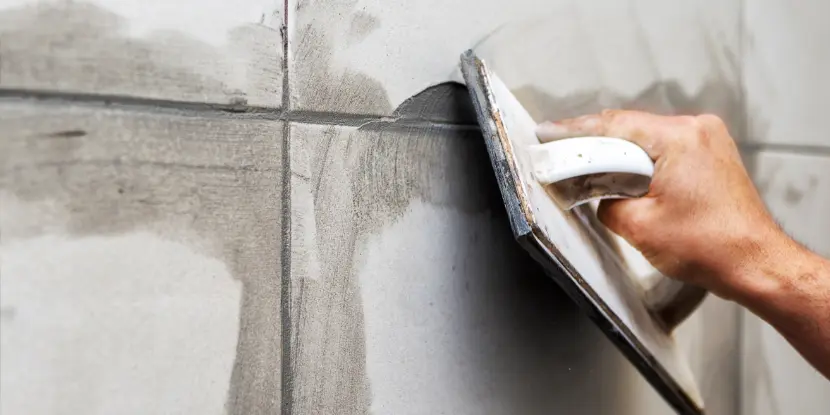
Appling grout with a grout float.
6. Grout the Tiles
- Choose your grout: Sanded grout is best for wider gaps, while unsanded grout is for narrower lines.
- Mix the grout: Follow the manufacturer’s instructions to mix the grout to a smooth, paste-like consistency. Avoid making it too watery.
- Apply the grout: Scoop grout onto a grout float and apply it over the tiles at a 45-degree angle, pressing it into the spaces between tiles.
- Clean excess grout: After applying grout to a section, hold the float at a 90-degree angle and skim over the tiles to remove excess grout.
- Smooth the grout lines: Gently wipe the grout lines with a damp sponge to smooth them out and clean the tile surface. Rinse the sponge frequently in clean water.
- Wipe away haze: Once the grout begins to set, use a clean, dry cloth to wipe away any hazy film from the tile surface.
- Curing time: Allow the grout to cure, typically for 24-72 hours, before exposing it to water or sealing it.
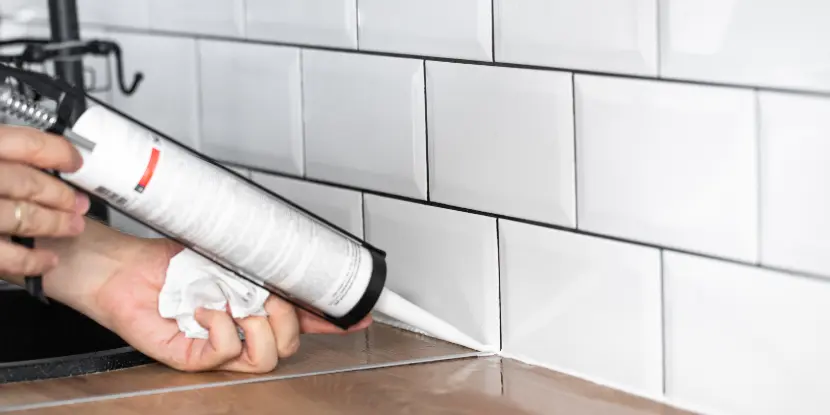
7. Caulk the Base
Caulking the edges of your backsplash, especially where it meets the countertop, gives it a clean, finished appearance. It also prevents water from seeping behind the tiles, which could lead to damage or mold growth.
- Choose the caulk: For a cohesive look, select a silicone-based, waterproof, and mold-resistant caulk that matches the color of your grout.
- Prepare the area: Thoroughly clean the area where the caulk will be applied. Make sure it’s dry and free of grout residue or debris.
- Apply the caulk: Cut the tip of the caulk tube at a 45-degree angle. Using a caulking gun, apply the caulk smoothly along the seam between the backsplash and the countertop. If you’re caulking corners or where two edges of tile meet, apply it in these areas as well.
- Smooth the caulk: Wet your finger or a caulk finishing tool with soapy water and gently run it along the caulk line to smooth it out.
Caulking the base of the tile backsplash.
7. Seal the Backsplash (Optional)
Sealing your backsplash, especially with natural stone tiles, can protect it from stains and moisture.
- Choose the right sealer: Select a sealer appropriate for your tile. For marble or granite, use a sealer designed for natural stone. For ceramic or porcelain, a general-purpose grout sealer will suffice.
- Dry tiles and grout thoroughly: Ensure the grout has cured completely, typically taking 24-72 hours. The tiles and grout should be dry to the touch.
- Clean the surface: Wipe down the tiles and grout lines with a clean, damp cloth to remove dust or debris. Allow them to dry.
- Apply the sealer evenly over the tiles and grout lines with a foam brush or spray applicator. Consider using a sealer applicator bottle with a roller wheel or brush tip for intricate tile patterns or smaller grout lines.
- Allow sealer to penetrate: Leave the sealer on the surface for the time specified by the manufacturer, usually between 5 and 15 minutes, to let it penetrate the grout and tile.
- Wipe away excess sealer with a clean, dry cloth. For textured tiles, you may need to buff the surface gently to remove all residue.
- Second coat (optional): Apply a second coat of sealer following the same process for extra protection, especially in high-moisture areas like kitchens.
- Cure time: Allow the sealer to cure, typically 24 hours, before exposing the backsplash to water or heavy use.
- Maintenance: Reapply the sealer once a year or as the sealer manufacturer recommends.

Removing excess caulk with a scraper tool.
Conclusion
Et voilà! Your backsplash is a fait accompli!
While the process may seem daunting, nothing compares to the satisfaction of completing this home improvement project. And with all the money you’ve saved, you can stock up for your next big DIY project. What shall it be? An enclosed patio? New flooring for the living room? You’re ready for anything now!
FAQs: Installing a Tile Backsplash
Q: Can I install a tile backsplash over existing tiles?
Yes, but it requires thorough preparation. Existing tiles must be cleaned and sanded, and a bonding primer applied to ensure the new tiles adhere correctly. For the best results, we recommend removing the old tiles.
Q: Do I need to seal all types of backsplash tiles?
Not all tile types require sealing. Porcelain and ceramic tiles, for example, don’t need sealing due to their low porosity. Natural stone tiles, like marble or granite, should be sealed to protect them from stains and moisture. Always check the manufacturer’s recommendations for your tile type.
Q: How often should I clean my tile backsplash?
Wipe spills and splatters immediately to prevent staining, and clean the backsplash with mild detergent and warm water at least once a week.
Q: Can I use any type of cleaner on my tile backsplash?
Avoid abrasive cleaners or pads that can scratch the surface of the tile and the grout. Read the cleaner’s label to ensure it’s safe for your backsplash material.
Q: What’s the best way to cut tiles for a backsplash?
A wet saw is ideal for precise cuts and hard materials like porcelain and stone. A manual score and snap cutter might suffice for softer tiles like ceramic.
Q: Do I need to remove electrical outlet covers before installing a tile backsplash?
Yes. It ensures a clean installation around these areas. When working around them, turn off the power to these outlets.
Q: How do I handle tiles that need holes for outlets or switches?
Measure and mark the tile where the cut needs to be. Use a drill with a diamond-tipped hole saw for round cuts or a wet saw for square or rectangular cuts. Be patient and go slowly to avoid cracking the tile.
Q: What’s the difference between sanded and unsanded grout, and which should I choose?
Sanded grout is thicker and used for broader grout lines (over 1/8 inch wide) because the sand adds strength. Unsanded grout is smoother and better for thinner grout lines, as it provides a tighter seal. Choose based on the width of your grout lines and the tile’s texture.
Q: How long do I have to wait after installing the tiles before I can start grouting?
Wait at least 24 hours after laying down tiles to begin grouting. This ensures the mortar is set and the tiles won’t shift during the grouting process.
Q: Is there any special care needed for grout?
Seal it at least once a year. Clean spills and stains promptly, and use a grout cleaner or mild bleach solution for tough stains. Avoid harsh chemicals that can break down the grout.