
The Money Pit, a 1986 comedy starring Tom Hanks and Shelley Long, follows the misadventures of a couple who buy a fixer-upper home. Their bargain buy turns into one maintenance disaster after another, wiping out their savings and throwing them into financial ruin.
The movie exaggerates the struggles of home ownership for laughs, but older houses can be money pits. Even newer homes may have their share of maintenance headaches and suck your savings dry. Calling a pro for every little fix-it task can quickly blow the budget.
Many smaller jobs can be done DIY for a fraction of the cost. You’ll need the right tools, a bit of know-how and effort, and the ability to recognize when you’re in over your head (at which point you should call the pros).
Here, we’ve listed several easy home repairs that usually don’t require a professional license or expertise. These aren’t the only repairs you can attempt DIY, but they’re some of the most common and important ones.
1. Unclog a Drain
Hair blockage, soap buildup, or grease cause most drain clogs.
Tools You’ll Need
- Cup plunger
- Hair snake
- Drain snake (optional)
Process
- Place the plunger over the drain. Make sure there’s enough water to cover the plunger’s bottom and create a seal. Pump vigorously for about 20 seconds.
- If the plunger doesn’t clear the clog, gently push a plumber’s snake down the drain until you feel resistance. Twist it to catch the clog and pull it out. An inexpensive hair snake works equally well for high-up clogs.
- If the physical methods don’t work, pour a cup of baking soda down the drain, followed by a cup of vinegar. Wait for an hour, then flush with hot water. This combination can dissolve fatty or greasy clogs without the harsh effects of chemical cleaners.
Always wear gloves to protect your hands, and proceed gently to avoid damaging your pipes. Avoid chemical drain cleaners, which can corrode pipes and cause serious injury if they splash onto your skin.

A woman plunging a washroom sink.
2. Fix a Leaky Faucet
A leaking faucet wastes water, drives up your water bill, and creates that annoying drip, drip, drip that keeps you up at night.
Tools & Supplies You’ll Need
- Adjustable wrench
- Flathead and Phillips screwdrivers
- O-ring and rubber washer (specific to your faucet model)
Process
- Turn off the water supply to the faucet. This valve is usually located under the sink.
- Remove the faucet handles. You may need a flathead screwdriver to pry off the decorative caps and a Phillips screwdriver to unscrew the handles.
- Inspect the O-ring and washer inside the valve seat; these often cause leaks. If worn or damaged, replace them with new ones that match your faucet model.
- Reassemble the faucet and turn on the water supply. Check for leaks to ensure everything is reassembled tightly.
If you’re uncomfortable replacing parts, take a picture of your faucet to help you find the right replacement at the store. Also, YouTube may have instructional videos specific to your faucet model.
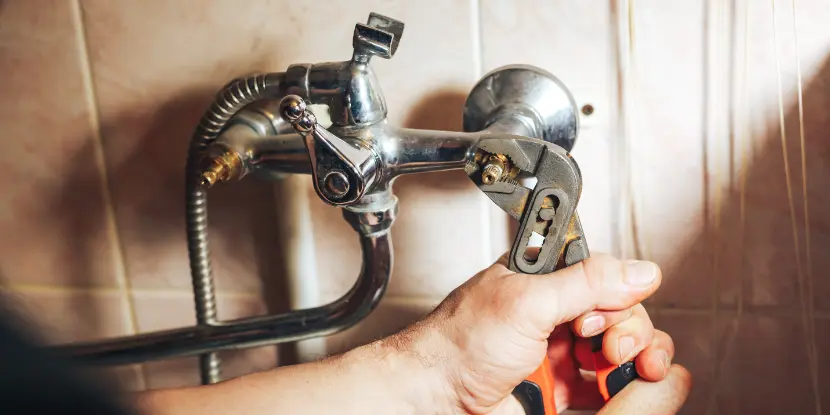
Replacing the washers of a shower fixture.
3. Unclog a Blocked Toilet
A blocked toilet is one of the most common household plumbing problems. Fortunately, it’s usually an easy fix.
Tools & Supplies You’ll Need
- Flange plunger (designed for toilets)
- Rubber gloves
- Bucket
- Toilet auger (for tough clogs)
- Bucket
Process
- Place the plunger over the toilet drain and pump vigorously for about 20 seconds. Repeat as necessary until the blockage is cleared.
- If the plunger doesn’t work, use a toilet auger to remove blockages. Do not use a plumbing snake, which can damage the toilet’s enamel.
- For stubborn clogs, you pour hot water into the toilet bowl from your waist level. The added pressure may dislodge the blockage.
Remember to use caution with plumbing tools. Never flush anything besides toilet paper down the toilet.
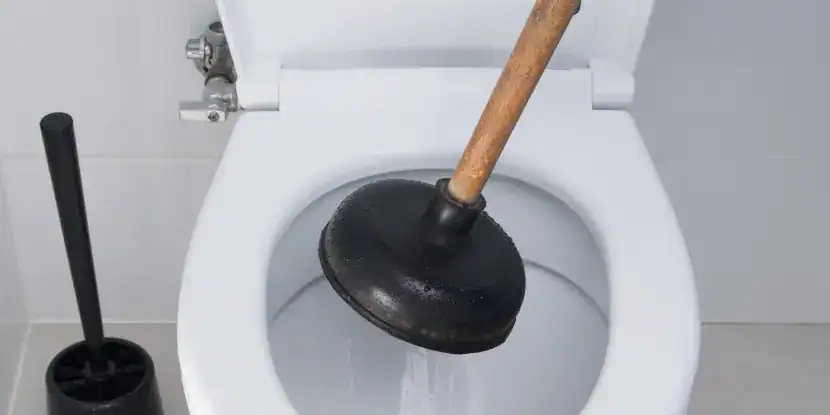
A clogged toilet is usually an easy fix, but if a plunger or toilet auger can’t solve the problem, call a plumber.
4. Patch Holes & Cracks in Walls
Accidents happen. Sometimes, they leave unsightly holes in the walls. But you don’t need to call a handyman for this simple repair job.
Tools & Supplies You’ll Need
- Spackling compound
- Putty knife
- Fine-grit sandpaper
Process
- Clean around the hole and remove any loose debris. Use a putty knife to apply the spackling compound over the hole and smooth it out.
- Let the compound dry for 24 hours, then sand down any rough spots with fine-grit sandpaper.
- If necessary, repeat the process until the surface is smooth and even with the surrounding wall.
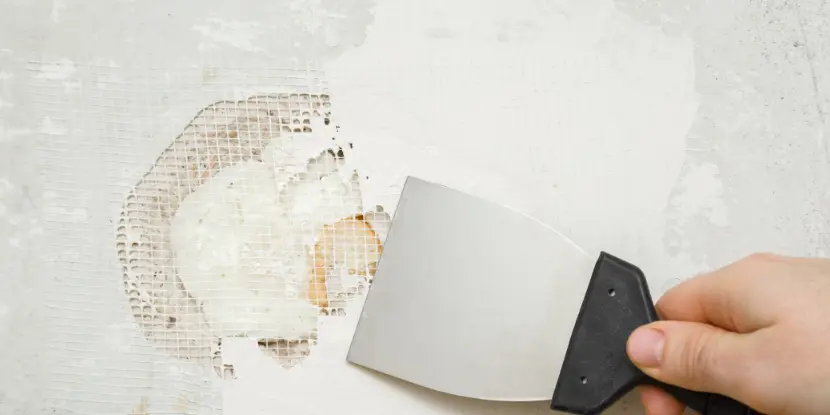
Applying spackle to a hole in the wall.
4. Seal Windows & Doors
Cracks and gaps allow air leaks, making your heating and cooling systems work harder and increasing utility bills.
Tools & Supplies You’ll Need
- Caulk and caulk gun
- Weatherstripping
- Tape measure
- Utility knife
- Cleaning supplies (mild detergent, cloth)
Process for Weatherstripping
- Inspect all windows and doors for gaps and drafts. Feel for air movement or use a candle flame or incense stick; the smoke will move where air leaks are present.
- Clean the area around the gaps with a mild detergent and allow it to dry. This ensures a good seal when you apply weather stripping.
- Measure the gap and cut weather stripping to fit.
- Peel off the backing paper or apply adhesive according to the package instructions, then press the weatherstripping into place.
Process for Caulking
- Clean around windows and mild detergent and allow them to dry
- Load the caulk into the gun and cut the tip at a 45-degree angle.
- Apply a continuous bead of caulk along the gap, then use your finger or a wet cloth to smooth it out.
- Wait for the caulk to dry before painting over it.
Regularly inspect and replace weatherstripping and caulking to keep your home energy-efficient.
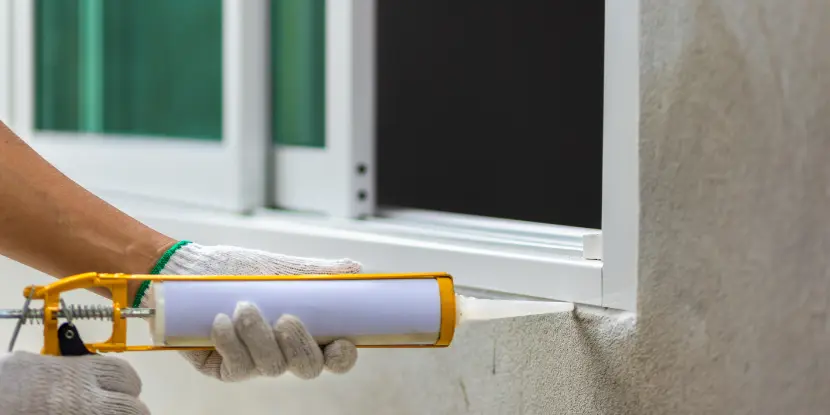
Applying fresh caulk around a window frame.
5. Fix a Running Toilet
A running toilet can waste hundreds of gallons of water, increasing your utility bill and potentially damaging your plumbing system.
Tools & Supplies You’ll Need
- Adjustable wrench
- Flathead screwdriver
- Replacement flapper or fill valve (specific to your toilet model)
Process
- Turn off the water supply to the toilet.
- Remove the tank lid and check the flapper and fill valve for damage or wear. If necessary, replace them with new ones that match your toilet model.
- Adjust the water level in the tank by turning the fill valve screw counterclockwise until it’s at least 1 inch below the top of the overflow tube.
- Turn the water supply back on and check for leaks.
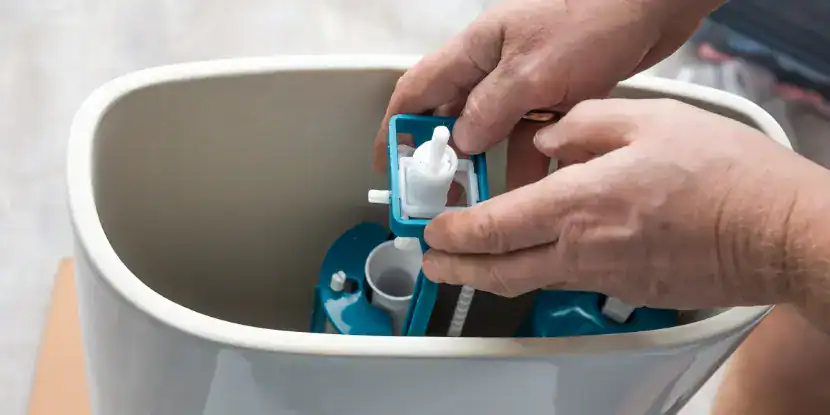
A running toilet can waste hundreds of gallons of water. The problem is usually solved with a few simple adjustments.
6. Fix a Squeaky Door
A squeaky door can be surprisingly annoying. Luckily, it’s a simple fix.
Tools & Supplies You’ll Need
- Screwdriver
- Lubricant (e.g. WD-40)
Process
- Use a screwdriver to tighten any loose screws in the hinges.
- Remove the hinge pins and clean them with a cloth and lubricant. Wipe off any excess lubricant.
- Apply a small amount of lubricant to the top and bottom of each hinge pin, then reinsert them into the hinges.
- Open and close the door a few times to distribute the lubricant evenly.
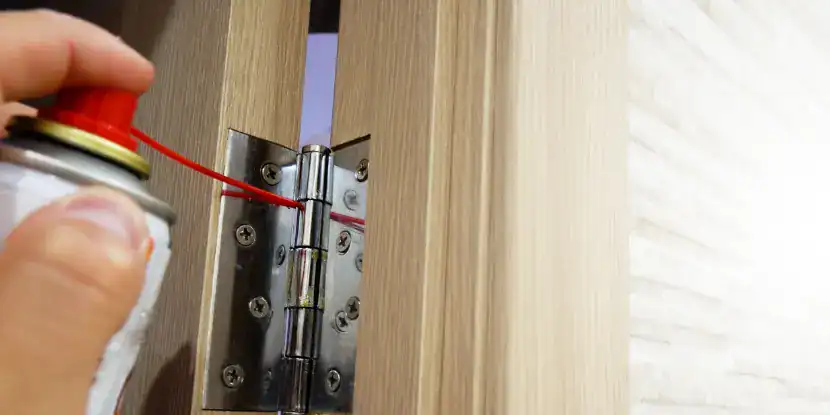
Fixing a squeaky door is home repair 101. Just get out the lubricant!
7. Caulk Bathtubs & Showers
Properly caulked bathtub and shower edges prevent water from seeping into the walls, preventing costly water damage and mold buildup.
Tools & Supplies You’ll Need
- Caulk and caulk gun
- Utility knife
- Cleaning supplies (mild detergent, cloth)
Process
- Clean around the tub’s edges or shower with a mild detergent and allow it to dry.
- Load the caulk into the gun and cut the tip at a 45-degree angle.
- Apply a continuous bead of caulk along the edge, then use your finger or a wet cloth to smooth it out.
- Allow the caulk to dry for 24 hours before using the tub or shower.
8. Maintain an Air Conditioner
Maintaining your air conditioner system is crucial for efficient operation and appliance life. Essential maintenance tasks you can do yourself are replacing the filters and cleaning the coils.
Tools & Supplies You’ll Need
- Screwdriver
- Replacement air filter (specific to your AC model)
- Soft brush
- Coil cleaner (follow the manufacturer’s recommendation)
- Garden hose (for outdoor units)
Process for Replacing the Filter
- Turn off the air conditioner.
- Locate the air filter. This is usually found in the return air duct or on the furnace or air handler.
- Remove the old air filter. Note its size and type, and purchase a replacement that matches.
- Install the new air filter, ensuring it faces in the correct direction (arrows on the frame should point toward the blower).
Process for Cleaning the Coils
- Indoor Coils: Use a soft brush to remove dust and debris from the coils. If necessary, apply a coil cleaner according to the manufacturer’s instructions.
- Outdoor Condenser Coils: Turn off the power supply. Then, use a garden hose to spray water through the coils from the inside out.
Regularly replace or clean your AC filters every month during the summer for optimal performance. Additionally, schedule professional maintenance services annually for a thorough cleaning and inspection of your unit.
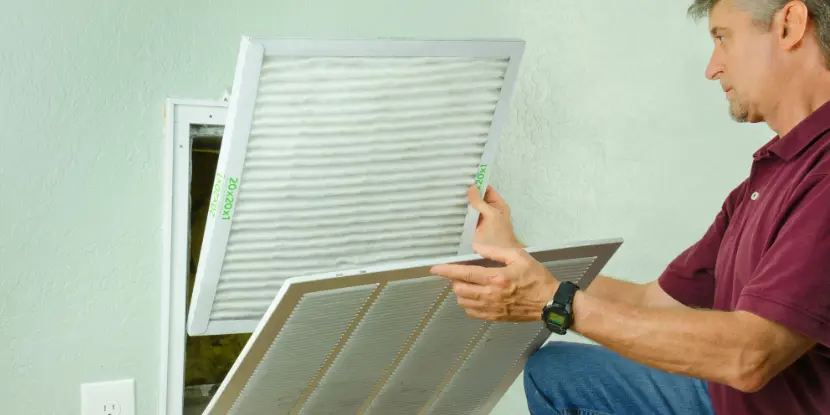
Replacing the air conditioner filter.
9. Install a Programmable Thermostat
A programmable lets you set different temperatures for different times of the day (i.e., cooler temperatures at night).
Tools You’ll Need
- Screwdriver
- Level
- Drill (optional)
Process
- Turn off the power supply to your thermostat.
- Remove the old thermostat and its mounting plate from the wall.
- Install the new mounting plate, ensuring it’s level.
- Connect the wires according to the manufacturer’s instructions.
- Attach the new thermostat to the mounting plate.
- Enter your desired temperature settings and program your preferred schedule.
- Turn the power supply back on and test your new thermostat.
Correctly setting your programmable thermostat can significantly reduce your heating and cooling costs. For additional energy-saving features, consider upgrading to a smart thermostat.

A man installs a smart thermostat. Note that the temperature is set to 200 degrees! Apparently, he likes it warm.
10. Insulate Your Attic
Adding insulation to your attic keeps the heat from escaping during the winter and entering during the summer, making your home more energy-efficient.
Tools & Supplies You’ll Need
- Protective gear (gloves, goggles)
- Ruler or measuring tape
- Insulation material (e.g., fiberglass batts, blown-in cellulose)
- Utility knife
Process
- Put on protective gear to prevent irritation from the insulation material.
- Measure the area of your attic to determine how much insulation you’ll need (aim for an R-value of at least 38).
- If using fiberglass batts, cut them to size and lay them between the floor joists in your attic.
- For blown-in cellulose, use a machine or hire a professional to blow it into the attic.
- Ensure all areas are evenly covered with insulation.
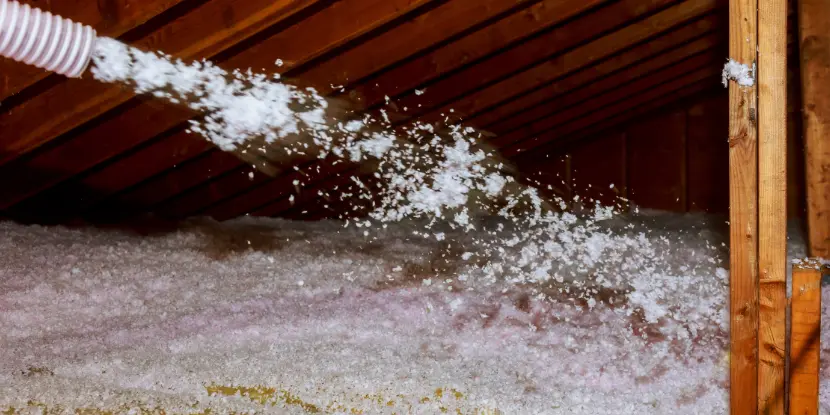
Blowing insulation into an attic.
11. Install Shelving or Storage Solutions
Maximize your home’s storage space and organization by installing new shelving or storage solutions.
Tools & Supplies You’ll Need
- Measuring tape
- Stud finder
- Drill and screws
- Shelves/organizers of choice
Process
- Measure the area where you want to install shelves or organizers.
- Use a stud finder to locate the studs in the wall.
- Mark where you want to install the shelves or organizers, making sure they’re level.
- Use a drill and screws to secure the shelves or organizers in place.
- Test their stability and adjust as needed.
Consider additional storage solutions, such as hanging racks and drawer dividers, for even more organization options. Maintaining a well-organized and clutter-free home makes daily tasks more manageable and can improve your overall well-being.
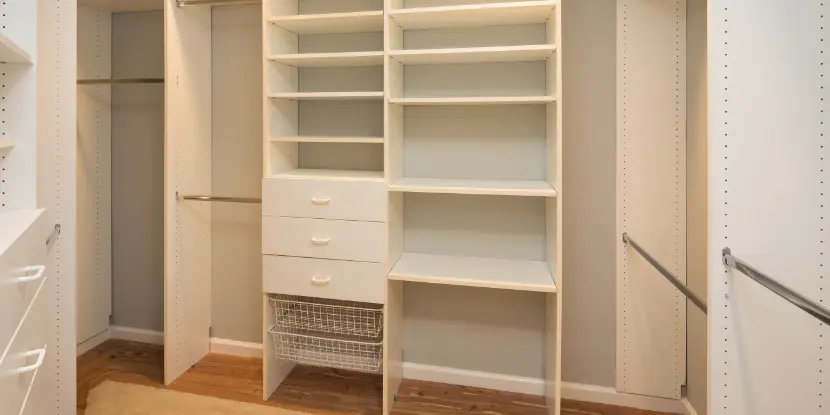
Newly installed closet shelving.
12. Unjam a Garbage Disposal
A jammed garbage disposal can be a major inconvenience in the kitchen. Follow these steps to unjam it safely.
Tools & Supplies You’ll Need
- Allen wrench
- Tongs or pliers
- Garbage disposal wrench (optional)
Process
- Turn off the garbage disposal’s power supply by unplugging it or turning off its circuit breaker.
- Use an Allen wrench to rotate the blade manually. Insert the wrench into the hole underneath the disposal and move it back and forth to loosen any obstructions.
- If you see an object stuck in the disposal, use tongs or pliers to remove it carefully.
- If you have a garbage disposal wrench, insert it into the hole and manually turn the blade until it moves freely.
- Test the garbage disposal by turning on its power supply and running water through it.
To prevent future jams, avoid placing large food scraps and non-food items down the disposal. Always run water when it’s in use.
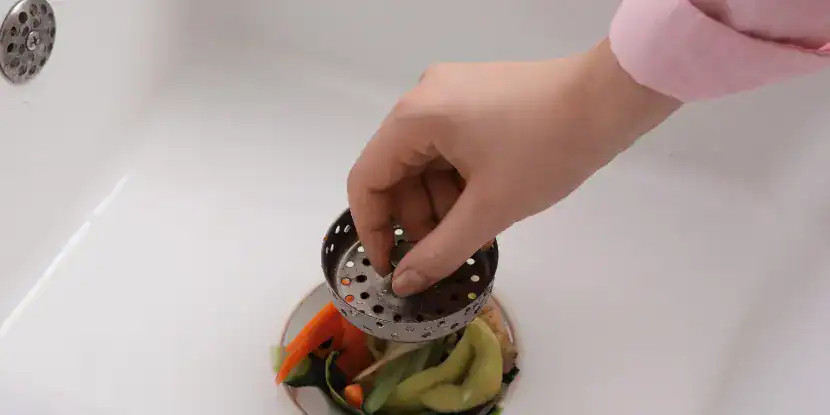
If the disposal is clogged, these veggies are going nowhere.
13. Clean & Seal Grout
Grout is the material between tiles that fills gaps and keeps them in place. Over time, dirt, grime, and moisture can stain grout. Regularly cleaning and sealing grout will make your surfaces look cleaner and prolong their lifespan.
Tools & Supplies You’ll Need
- Grout cleaner
- Soft-bristle brush or toothbrush
- Clean, damp cloth
- Sealant (penetrating or topical)
Process
- Mix the grout cleaner according to the manufacturer’s instructions.
- Apply the cleaner to the grout lines and let it sit for a few minutes.
- Use a soft-bristle brush or toothbrush to scrub the grout lines.
- Wipe away the cleaner with a clean, damp cloth.
- Let the grout dry completely before applying sealant.
- If using a penetrating sealant, apply it in thin coats and wipe off any excess after a few minutes.
- If using a topical sealant, follow the manufacturer’s instructions for application and drying time.

Cleaning the grout of shower tiles.
14. Flush the Water Heater
Flushing your water heater removes sediment and buildup that can affect its efficiency and lifespan. We recommend doing this annually.
Tools & Supplies You’ll Need
- Garden hose
- Screwdriver (if needed)
- Gloves
- Bucket
Process
- Turn off the power supply or gas to your water heater.
- Attach a garden hose to the drain valve at the bottom of the water heater.
- Place the other end of the hose in a bucket or outside.
- Open a hot water faucet to allow air into the tank as it drains.
- Open the drain valve and let the water drain completely.
- Once empty, remove and clean any buildup from the filter screen on the cold-water inlet valve (use a screwdriver if needed).
- Close the drain valve and remove the hose.
- Refill the tank by turning on the cold water supply.
- Once filled, turn on a hot water faucet to let out any air in the pipes.
- Turn the power supply or gas back on and test your water heater.

Flush your water heater annually to remove calcium buildup and debris.
15. Remove Water Stains from a Ceiling
Water stains on a ceiling are unsightly and may indicate a leak. Follow these steps to remove them.
Tools & Supplies You’ll Need
- Bucket
- Bleach or vinegar
- Water
- Clean sponge or cloth
- Rubber gloves
- Paint (if needed)
Process
- Locate and fix the source of the water stain to prevent future damage.
- Mix equal parts water and bleach or vinegar in a bucket.
- Dip a clean sponge or cloth into the solution and gently blot the stain, working from the outside in to avoid spreading it.
- Continue blotting until the stain fades or disappears.
- Rinse the area with clean water and let it dry completely.
- If necessary, touch up the area with paint to match the rest of the ceiling.
Summary
Regular home maintenance can keep your home in good condition and prevent major problems from arising.
Always follow safety precautions and seek professional help if needed. Also, remember to clean your tools after use, so they’re ready for the next project.
We could add many more tasks to this list, from cleaning the gutters to replacing plumbing fixtures. The important thing is to create a schedule for home maintenance and stay on top of it. So don’t wait until something breaks — start incorporating these tasks into your routine today! A little maintenance now can save you big headaches later.
FAQs: DIY Home Repairs
Q: What are some of the easiest home repairs I can do myself?
Simple fixes like patching nail holes, replacing weatherstripping, updating cabinet hardware, and fixing leaky faucets are all easy and impactful DIY repairs.
Q: Do I need special tools for basic home repairs?
Most simple repairs require only basic tools like a hammer, screwdriver, tape measure, caulking gun, utility knife, and possibly a cordless drill.
Q: How can I quickly improve the appearance of a room without major remodeling?
Try repainting the walls, updating light switch covers, or installing new cabinet hardware. These small updates can dramatically refresh a space.
Q: How do I know when it’s time to replace weatherstripping?
If you feel drafts near windows and doors, or if you see cracks or gaps in the existing stripping, it’s likely time to replace it.
Q: What’s a quick way to fix a squeaky door?
Apply a lubricant like WD-40 or a silicone-based spray to the hinges, and open and close the door several times to work it in.
Q: Is caulking around sinks and tubs difficult?
Not at all. Just remove the old caulk with a scraper, clean the area, and apply a smooth, even bead of new caulk for a fresh, sealed look.
Q: Can small home repairs really increase my home’s value?
Yes, minor updates like improving curb appeal, fixing leaks, and updating fixtures can enhance your home’s value and appeal to buyers.
Q: Where can I find supplies for these home repairs?
You can find everything you need — including tools, hardware, and materials — at your local Anawalt Lumber location or online at anawaltlumber.com.