Dirt is the downside of gardening.
You pick it up on the soles of your shoes and track it into the kitchen, foyer, car, or wherever else you go.
And when the rains come, you may as well move to the garage if you want to preserve the new carpet in your home.
A well-designed garden pathway solves the problem. It keeps the mud off your feet while you tend to your plants and adds character to your outdoor space.
Here are some affordable DIY garden path ideas to get you started.
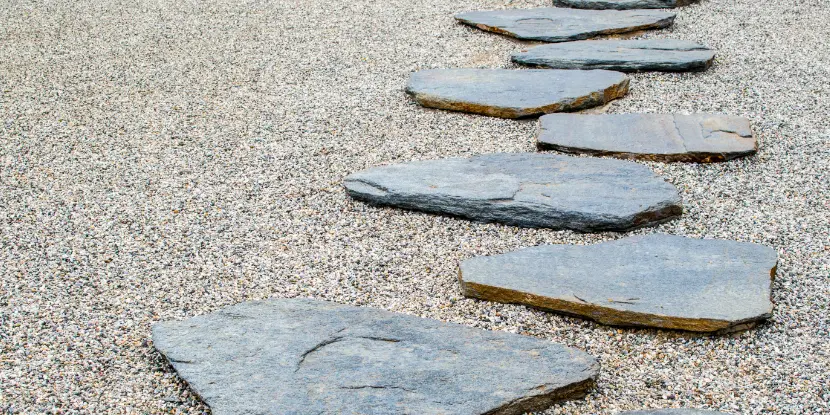
1. Classic Stepping Stones
Stepping stones are easy to install, budget-friendly, and can be arranged in countless ways. They can be natural rocks, concrete pavers, tiles, or flagstone. Place them in a line or scatter them throughout your garden plot.
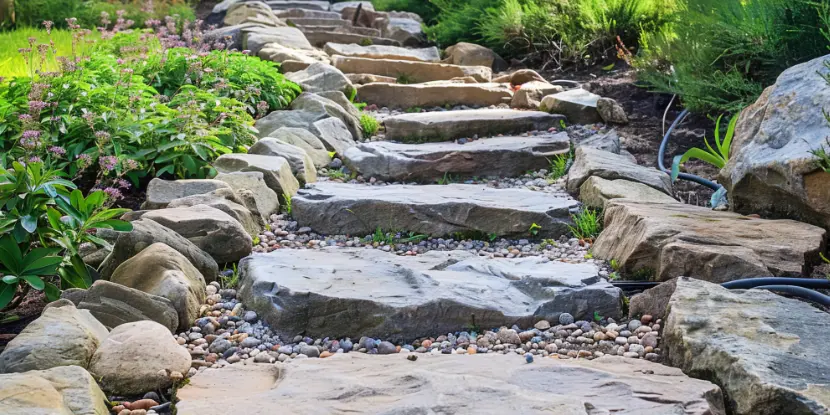
A beautiful stone staircase with gravel fill.
Materials Needed
- Concrete stepping stones (or make your own with molds)
- Sand or gravel for leveling
- Garden hose or string for outlining
Steps to Create
- Mark out your path with string or chalk.
- Remove any grass or weeds and level the ground where the stones will go.
- Arrange your stepping stones in the desired pattern, spacing them evenly.
- Add sand or gravel around the stones to keep them in place and fill gaps.
Voilà! A charming path that invites you to explore your garden.
2. Recycled Brick Path
Recycled bricks introduce country charm to your garden. You can find old bricks at salvage yards, online marketplaces like Craigslist or Facebook Marketplace, or by asking around your neighborhood.
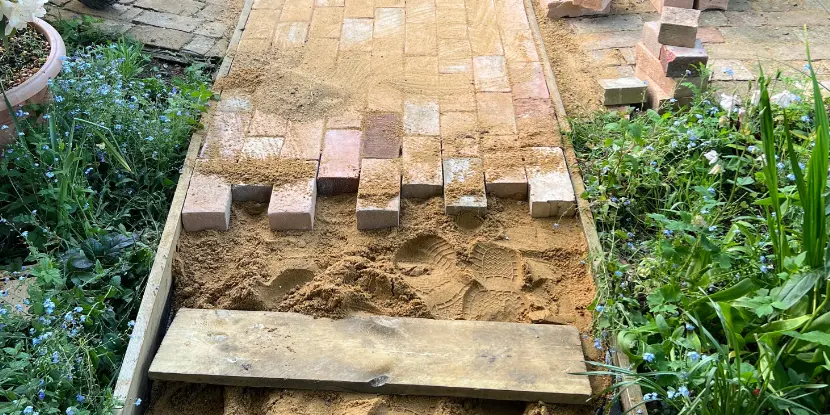
Recycled bricks lain on a sand bed.
Materials Needed
- Recycled bricks
- Gravel for leveling
- Shovel for digging and leveling
Steps to Create
- Mark your path with string or chalk.
- Dig down about six inches along the outline of your path, removing any grass or debris.
- Add a layer of gravel and pack it down to create a firm base.
- Place your bricks in the desired pattern, using a level to ensure they’re even.
- Fill in the gaps between the bricks with more gravel or sand.
3. Wood Mulch Trail
A wood mulch trail is inexpensive and organic. It’s a breeze to build and provides a soft surface that’s gentle on the knees and feet.
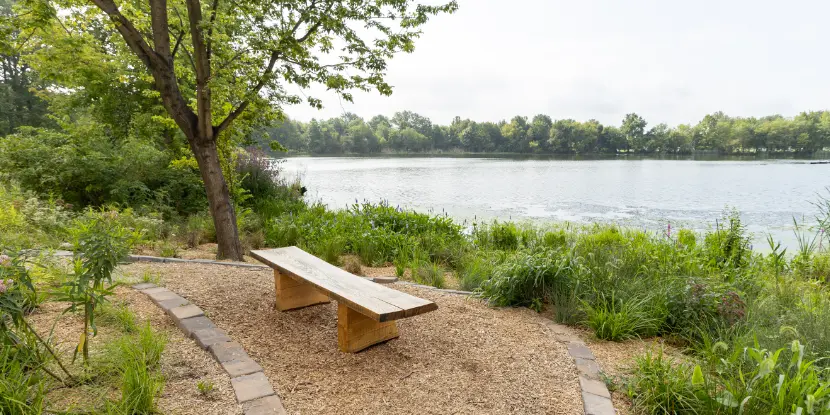
A wood mulch path beside a river.
Materials Needed
- Wood mulch or chips
- Garden hoe or rake
Steps to Create
- Mark out your path with string or chalk.
- Remove grass or weeds along the path and smooth the ground with a hoe or rake.
- Spread a layer of wood mulch about two inches thick along the path.
- Rake the mulch to even it out and create a smooth surface.
Optional: Add Metal or Wood Strips to Hold Mulch in Place
Consider adding strips of metal or wood along the edges of the path. This will keep the mulch in place and give the trail a more polished look.
Materials Needed
- Metal or wood strips for edging
- Stakes for securing the strips
- Hammer or mallet
Steps to Create
- position the metal or wood strips along the edges once your mulch path is smoothed.
- Use stakes to secure the strips into the ground, spacing them evenly along both sides of the path.
- Hammer the stakes down firmly to hold the strips in place.
- Adjust the mulch as needed to fit snugly against the edging.
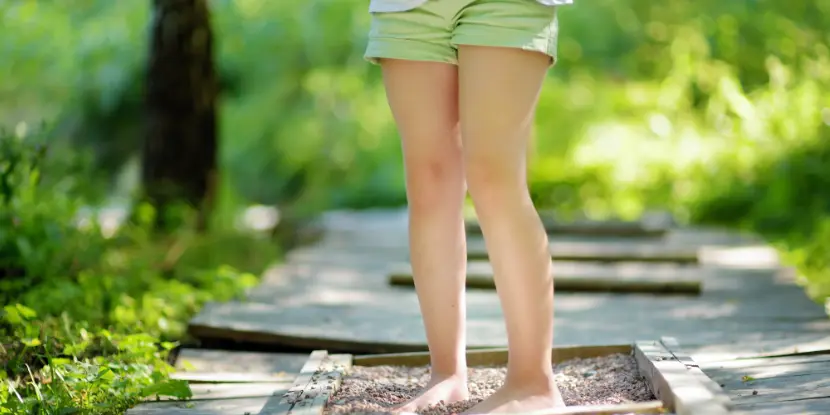
4. Pallet Wood Path
Pallet wood paths are versatile, budget-friendly, and surprisingly beautiful. Plus, recycling old pallets keeps bulky waste out of landfills.
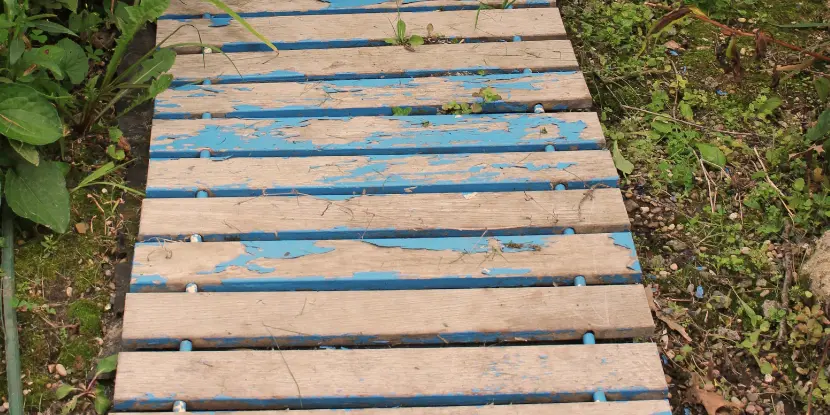
An old wood path with chipping paint (paint is optional).
Materials Needed
- Recycled pallets (can be found at warehouses or online marketplaces)
- Saw for cutting pallets
- Gravel or sand for leveling
Steps to Create
- Disassemble the pallets and cut the wood planks to your desired length.
- Lay out your path with a garden hose or string.
- Remove any grass or debris and level the ground where your path will go.
- Place the pallet wood planks in the desired pattern, using a level to ensure they are even.
- Fill in gaps between the planks with gravel or sand.
5. Brick or Stone Border Path
A brick border path gives you the look of a brick path without the cost and effort of laying down an entire brick surface.
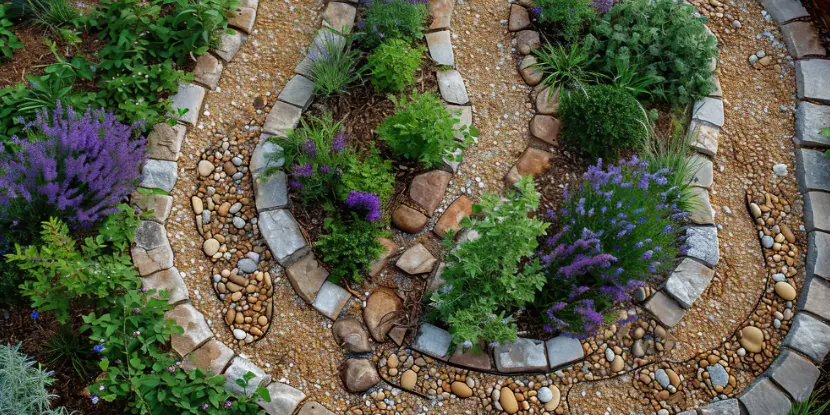
A lovely meandering gravel path with stone borders.
Materials Needed
- Bricks (new or recycled)
- Garden hoe or shovel for digging
- Gravel for leveling
Steps to Create
- Mark your path with string or chalk.
- Dig down about six inches along the outline of your path, removing any grass or debris.
- Add a layer of gravel and pack it down to create a firm base.
- Place bricks on their ends along both sides of the path, using a level to ensure they are even.
- Fill in any gaps with more gravel or sand.
6. Gravel Path
A gravel path is a cost-effective option that provides excellent drainage and withstands heavy foot traffic.
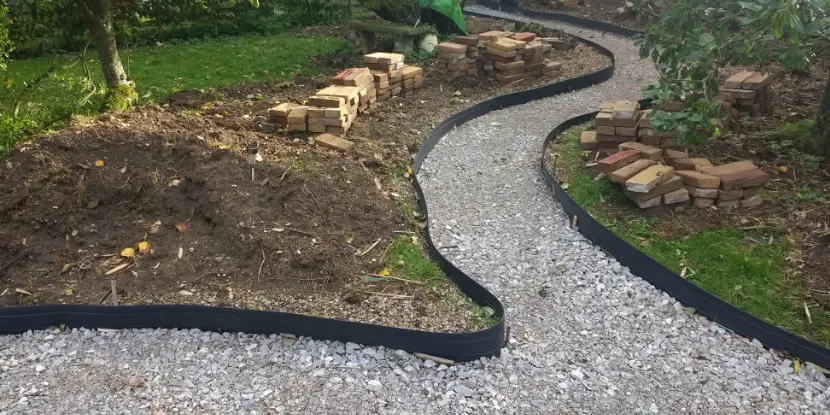
A gravel path with brick borders soon to come!
Materials Needed
- Gravel (pea gravel works well)
- Garden hoe or rake
- Metal or wood strips for edging (optional)
- Stakes for securing the strips (optional)
- Hammer or mallet (optional)
Steps to Create
- Mark your path with string or chalk.
- Remove grass or weeds along the path and smooth the ground with a hoe or rake.
- Spread a layer of gravel about two inches thick along the path.
- Rake the gravel to create a smooth surface.
- Optional: Add edging strips as mentioned in the Wood Mulch Trail section.
7. Stone & Moss Path
Stone and moss trails offer a natural, rugged look and are perfect for woodland gardens or shady areas.
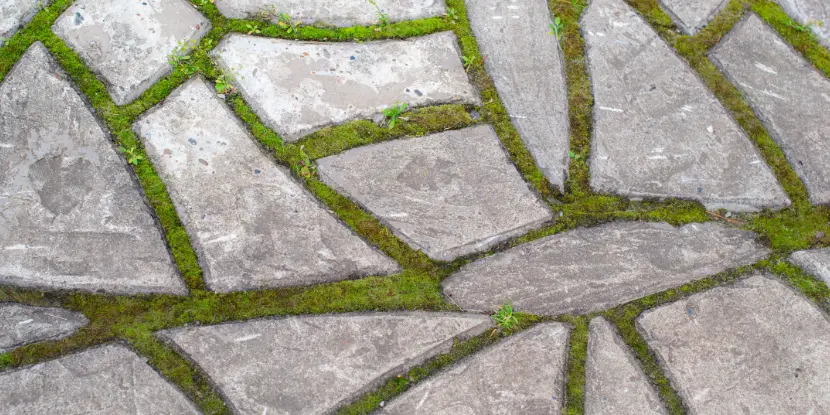
A stone path with moss fill.
Materials Needed
- Flat stones (can be found in nature or purchased at garden centers)
- Moss (can be found in nature or purchased online)
- Gravel for leveling
- Garden hoe or rake
Steps to Create
- Mark your path with string or chalk.
- Remove grass or weeds along the path and smooth the ground with a hoe or rake.
- Place flat stones in the desired pattern, using gravel to level them as needed.
- Fill in gaps between the stones with moss, pressing it down firmly to create a textured surface.
- Optional: Add gravel or sand between the stones for a more stable surface.
8. Flagstone Path
A flagstone path is elegant and durable, with a natural look that blends into your landscape.
Nothing beats the elegance of a flagstone path.
Materials Needed
- Flagstones (can be found in nature or purchased)
- Garden hoe for digging and leveling
- Gravel for leveling
Steps to Create
- Mark your path with string or chalk.
- Dig down about six inches along the outline of your path, removing any grass or debris.
- Add a layer of gravel and pack it down to create a firm base.
- Place flagstones in the desired pattern, using a level to ensure they’re even.
- Fill in gaps between the stones with more gravel or sand.
9. Concrete Pavers Path
Concrete pavers offer a clean and modern look. They’re comparatively easy to install and come in various sizes, shapes, and colors. If you feel especially ambitious, you can even cast your own!
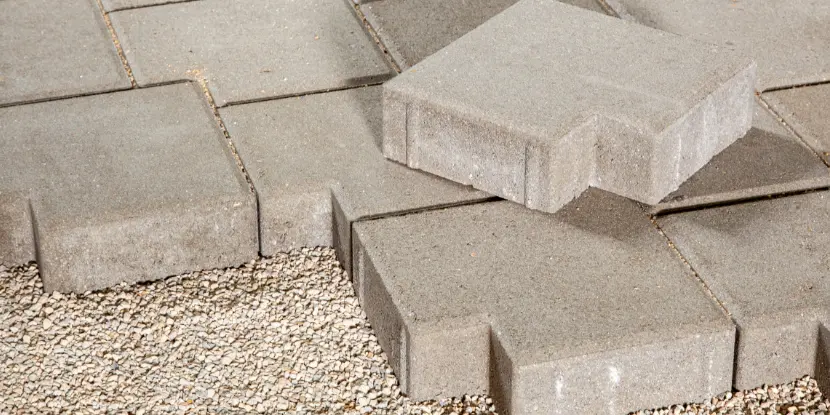
Concrete pavers on a bed of gravel.
Materials Needed
- Concrete pavers (can be found at hardware or home improvement stores)
- Garden hoe for digging and leveling
- Gravel for leveling
Steps to Create
- Mark your path with string or chalk.
- Dig down about six inches along the outline of your path, removing any grass or debris.
- Add a layer of gravel and pack it down to create a firm base.
- Place pavers in the desired pattern, using a level to ensure they’re even.
- Fill in gaps between the pavers with more gravel or sand.
- Optional: Seal the pavers for extra protection and longevity.
10. Recycled Tire Path
If you have a few old tires lying around, why not repurpose them? A tire path is long-lasting, economical, and environmentally friendly.
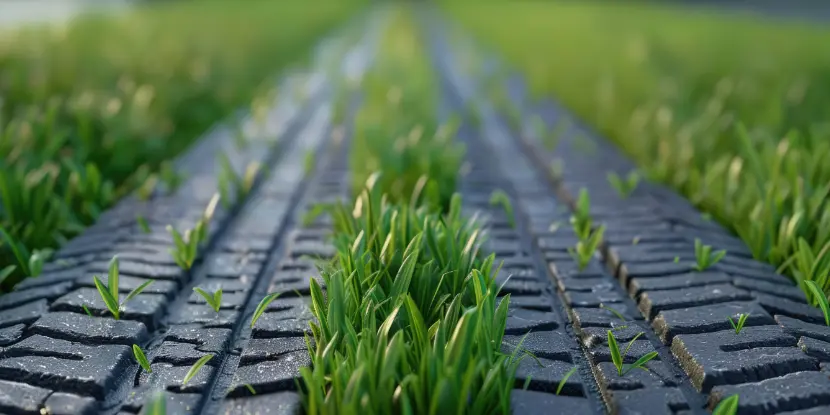
This recycled tire path is guaranteed for 40,000 miles!
Materials Needed
- Recycled tires (can be found at tire shops or online marketplaces)
- Saw or utility knife for cutting tires (optional)
- Garden hoe for digging and leveling
- Gravel or sand for leveling
Steps to Create
- Mark out your path with string or chalk.
- Dig down about six inches along the outline of your path, removing any grass or debris.
- Cut the tires into halves or thirds (optional) and place them along the path, leaving a small gap between each tire.
- Fill in any gaps with gravel or sand to create a flat surface.
- Optional: Paint the tires to add color to your garden.
11. Mixed Material Path
Don’t limit yourself to just one material for your garden path — mix it up! Combining different materials can add interest and texture to your landscape.
A mixed material path with wood, brick, and gravel.
Materials Needed
- Any combination of the above materials (stones, wood, bricks, gravel, etc.)
- Chalk or string for marking out the path
- Shovel or hoe for digging and leveling
Steps to Create
- Mark your path with string or chalk.
- Remove grass or debris along the path and smooth the ground with a hoe or rake.
- Begin by laying down the largest material, such as stones or pavers.
- Fill in gaps between larger materials with smaller ones, such as gravel or wood chips.
- Continue adding different materials until you’ve reached your desired look, and all gaps have been filled.
Conclusion
There’s a DIY path project for every style and budget. Yeah, yeah, you’ve heard it all before, but here’s where the rubber hits the road.
Pick a style that suits your garden and budget, and start digging!
These ideas are only a starting point — you can mix and match different materials, patterns, and designs to create a trail as unique as the Yellow Brick Road.
And remember — it’s supposed to be fun!
FAQs: More Ideas for Walkways
Q: How much does it cost to create a DIY garden path?
The cost varies depending on the materials used. On average, a DIY garden path can cost between $2 and $10 per square foot.
Q: How long does it take to build a garden path?
That depends on the complexity of the path and the materials used. Most DIY garden paths can be completed in a weekend.
Q: Do I need special tools to create a garden path?
Basic tools like a shovel, rake, and level are usually all you need. However, some projects may require additional tools, like a power saw or mallet.
Q: Can I create a garden path on uneven ground?
Yes, but leveling the ground will require extra preparation. Using gravel or sand as a base can help level the path area.
Q: How do I maintain a garden path?
Regular maintenance involves sweeping, weeding, or raking the path to keep it clean. Occasionally, you may have to add fresh material for gravel or mulch paths.
Q: Can I plant grass between the stones on my garden path?
Planting grass or ground cover between stones can create a lush, green look. It requires some maintenance to keep the grass trimmed and healthy.
Q: What type of gravel is best for garden paths?
Pea gravel and crushed stone are popular choices for garden paths due to their durability and aesthetic appeal. Pea gravel is more comfortable to walk on, while crushed stone provides a more stable surface.
Q: How do I ensure my garden path is accessible for all users?
To ensure accessibility, ensure the path is wide enough for wheelchairs or strollers, has a smooth surface, and has gentle slopes instead of steep inclines. Avoid using loose materials like gravel that may be difficult to navigate.
Q: Can I use recycled materials for my garden path?
Absolutely! Recycled materials like broken concrete, reclaimed wood, or old bricks can be creatively repurposed to create unique, eco-friendly garden paths.
Q: What are some ways to light my garden path at night?
Solar-powered lights, LED string lights, or lanterns can illuminate your garden path, ensuring safety and creating a magical ambiance in your garden.