There’s an unsightly crack in your once-pristine floor tile.
How did it get there? Kids, settling foundation, the hand of God… who knows?
More important, how can you get rid of it? Should you? And how soon?
More than a nuisance, a cracked tile is a potential cancer waiting to metastasize to nearby tiles.
Why Replace a Cracked Floor ASAP?
A cracked floor tile compromises the integrity of the surrounding tiles. Cracks can weaken the grout and adhesive beneath tiles, allowing them to shift and increasing the likelihood of additional cracking.
Moreover, moisture can seep through the cracks, reach the subfloor, and cause further damage, such as mold growth or rotting.
In high-traffic areas, the stress applied to surrounding tiles exacerbates the issue, accelerating the spread of cracks.
Still need convincing? Here are some other reasons for immediate repair:
- Safety Hazard: Cracked tiles can create sharp edges that pose an injury threat, especially to children and pets playing or walking barefoot.
- Visual Appeal: Cracked tiles can be an eyesore, detracting from the appearance of your home. Keeping your tiles in good condition helps maintain the aesthetics of your living space.
- Property Value: Cracked tile is a red flag to potential buyers, suggesting issues with the home’s structure or maintenance. Replacing the tile promptly can maintain or even increase your property value.
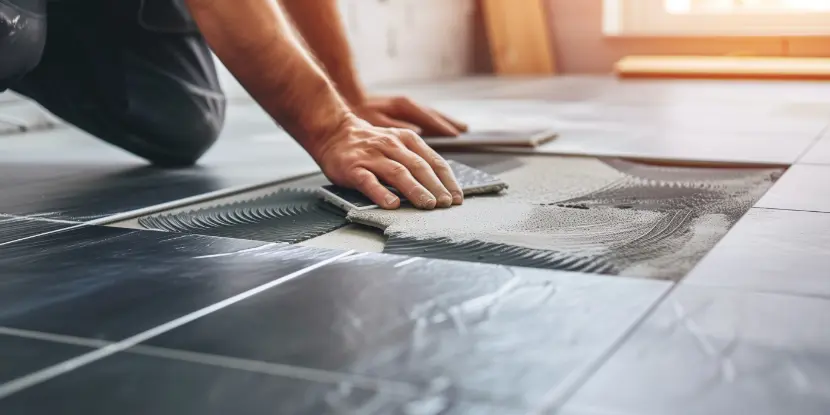
A homeowner replacing bathroom tile.
Where to Buy Replacement Tiles
Your local hardware or flooring store should carry various options. Take a sample of the cracked tile to find the closest match.
Online retailers offer a wide selection of tiles, but be aware that colors and textures will look different in person.
If your tile is no longer in production or you can’t find a suitable replacement, consider retiling the room for a fresh and cohesive look.
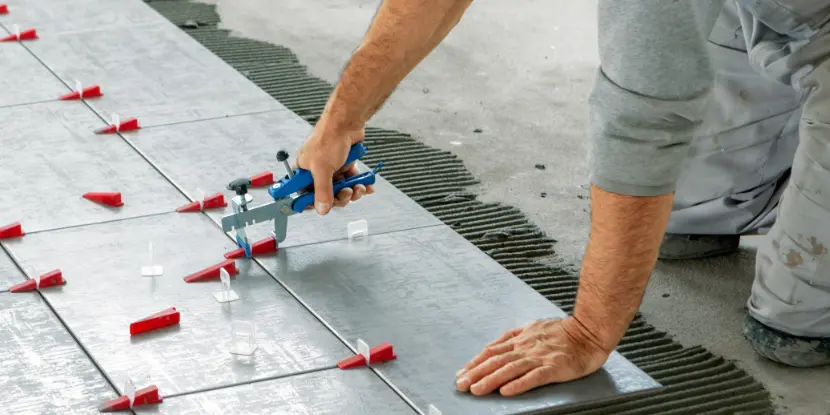
Using spacers to position new tiles.
Tools You’ll Need
- Safety Gear: We suggest work gloves, eye protection, and closed-toe shoes.
- Hammer and Chisel: You’ll need a hammer to break the damaged tile into pieces and a chisel to pry them from the adhesive.
- Putty Knife or Flat Blade Screwdriver: These tools can help remove any remaining tile fragments and scrape adhesive residue from the subfloor.
- Tile Adhesive and Grout: Choose a suitable adhesive and grout for your tile type.
- Sponge, Bucket, and Rags: For cleaning up any mess during removal.
- New Tile: Purchase enough to cover the area you’re replacing and account for errors.
- Notched Trowel: Used to spread the adhesive evenly on the subfloor.
- Tile Spacers: These small, plastic pieces ensure even spacing and alignment of tiles during installation.
- Rubber Mallet: This is for gently tapping the new tile into place without damaging it.
- Grout Float: A tool for spreading and smoothing grout over the tile surface.
- Tile Saw or Tile Cutter: A tile saw makes clean, precise, and intricate cuts in hard materials like porcelain. A manual tile cutter might suffice for simpler, straight cuts.
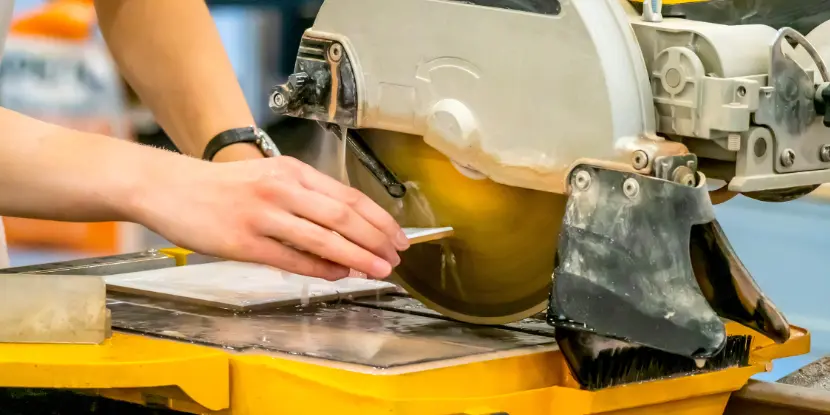
Cutting ceramic tile with a wet saw.
Step-by-Step Guide to Replacing a Cracked Floor Tile
- Prepare the Area: Clear the area around the cracked tile. Lay down a drop cloth or old sheet to catch debris or splinters.
- Remove the Old Tile: Don your safety gear and begin by breaking the tile into smaller pieces with a hammer. Be careful not to damage any surrounding tiles. Pry up each piece with a chisel, starting from the center of the tile and working outward.
- Clean the Subfloor: Use a putty knife or flat-blade screwdriver to scrape adhesive residue from the subfloor. Wipe down the area with a damp sponge and allow it to dry thoroughly.
- Prepare the Adhesive: Follow the manufacturer’s instructions for mixing and preparing your adhesive.
- Apply Adhesive to the Subfloor: Use your notched trowel to spread the adhesive evenly over the subfloor, including corners and edges.
- Install the New Tile: Gently press the new tile into place, spacing evenly with tile spacers. Use a rubber mallet to tap the tile firmly into the adhesive.
- Grout the Tile: Use a grout float to spread grout over the tile’s surface, pressing it into all spaces between tiles. Wipe away excess grout with a damp sponge.
- Let the Grout Cure: The grout should cure for 24-48 hours, as the manufacturer specifies.
- Seal the Grout (Optional): Consider applying a grout sealer to protect it from moisture and stains.
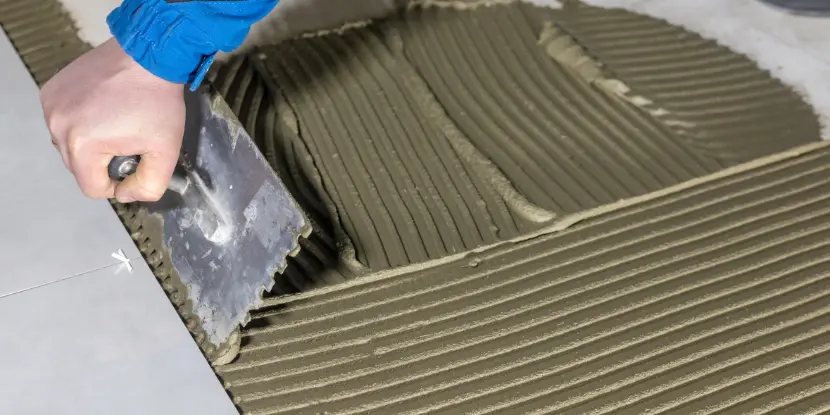
Applying tile adhesive with a notched trowel.
Conclusion
Voilà! You’re done! You’ve replaced that cracked floor tile and earned the rest of the day off.
Replacing a single tile is a relatively straightforward task that most homeowners can tackle over a weekend.
On the other hand, retiling an entire floor is a much more time-consuming, labor-intensive, and demanding project.
When should you call the pros to do the work for you?
- For large areas or multiple damaged tiles that require extensive repairs.
- If you’re unsure about the adhesive or grout needed for your tile.
- When dealing with specialty, decorative, or hard-to-find tiles.
- If the subfloor is uneven or requires significant preparation before installing new tile.
Remember, prevention is the best approach. Regularly inspect your floors and address any issues promptly to maintain their durability and aesthetic appeal. Happy tiling!
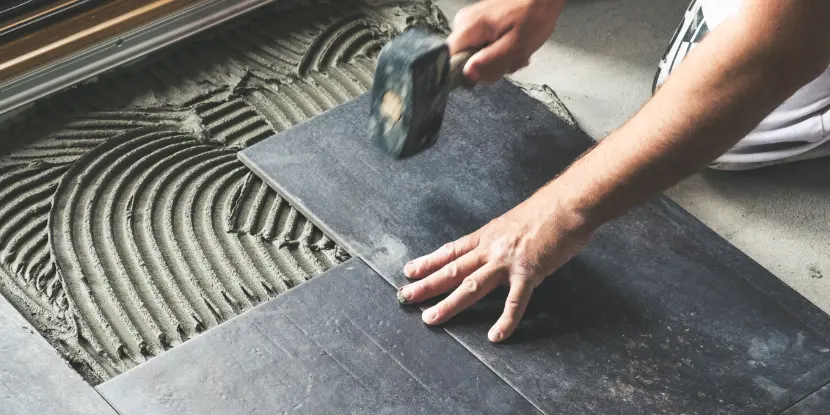
Tapping new tile into position.
FAQs: Replacing Cracked Floor Tiles
Q: Can I replace a cracked tile without removing the surrounding tiles?
It’s possible, but it can be challenging and may not provide long-term stability. We recommend replacing damaged tiles and those immediately surrounding them for optimal results.
Q: How long does it take to replace a cracked floor tile?
Replacing a cracked floor tile can usually be completed within a few hours. However, the adhesive and grout’s drying and curing time can take an additional 48-72 hours.
Q: Can I replace a tile without removing the grout?
No, you need to remove the grout surrounding the cracked tile to avoid damaging adjacent tiles during the removal process.
Q: What adhesive should I use to replace a floor tile?
Select an adhesive appropriate for your tile type. Thin-set mortar is a common choice for most floor tiles.
Q: How do I ensure the replacement tile is level with the surrounding ones?
Use a level to check that the new tile is flush with the surrounding tiles. If needed, a rubber mallet can help you adjust the tile. Use tile spacers to maintain even spacing.
Q: What if I can’t find an exact match for the broken tile?
Consider retiling the entire room for a cohesive look. Or you can place the mismatched tile in a less noticeable area, such as under furniture.
Q: Is it necessary to use a notched trowel when applying adhesive?
A notched trowel applies an even adhesive layer, providing better adhesion between the tile and the subfloor.
Q: How can I avoid making a mess with grout?
Work in small sections and use a damp sponge to clean excess grout promptly. Rinse the sponge frequently and keep the grout lines undisturbed.
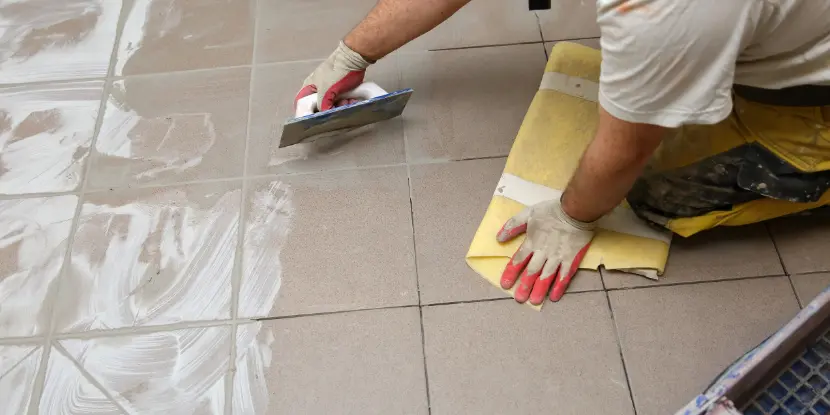
Applying new grout to a tile floor.
Q: Can I walk on the new tile immediately after installation?
You should wait at least 24 hours or follow the adhesive manufacturer’s instructions before walking on new tile.
Q: Do I need to seal the grout after replacing the tile?
Sealing the grout is optional but recommended. Sealer protects the grout from moisture and stains, prolonging its life and maintaining its appearance.
Q: What can I do to prevent tiles from cracking in the future?
Ensure your subfloor is stable and adequately prepared before tile installation. Avoid dropping heavy objects on the floor, and properly care for your flooring to prevent damage.
Q: Can I use this guide to replace wall tiles, too?
The steps are similar, but observe extra caution to prevent tiles from falling and causing injury or damage. Use appropriate safety gear and follow the same general process.
Q: What should I do if the adhesive or grout gets on the tile surface?
Wipe it off immediately with a damp sponge to prevent it from setting. Once adhesive or grout dries on the tile surface, it can be challenging to remove without damaging the tile.