
Your driveway takes a beating. Sun, rain, oil spills, and vehicle traffic wear down the asphalt surface, leading to cracks, fading, and deterioration.
In Southern California, an asphalt driveway with basic installation and minimal upkeep lasts about 15 years. A driveway with superior installation and care will hold up for 20 to 25 years, gradually losing its luster.
The good news is that you can restore your driveway’s appearance and extend its lifespan with a weekend DIY sealing project.
For a typical 600-square-foot driveway, the costs are approximately:
Sealing
- DIY/basic sealing: $90–$180
- Full-service professional sealing: $1,050–$1,500
Driveway Replacement
- Estimated replacement: $3,000 to $4,800 (at $5–$8/ft)
- Overlay may be $1,800 to $2,400 (at the lower $3–$4/ft overlay rate)
How Often Should a Driveway Be Resealed?
- The industry standard is to reseal asphalt driveways every 2 to 5 years.
- Southern California’s intense UV exposure and high heat accelerate oxidation and fading.
- Because freeze-thaw cycles aren’t a major issue, SoCal driveways don’t suffer as much cracking from expansion — but UV damage is a bigger concern.
Insights & Considerations
- Sealcoating is much cheaper than replacement — even high-end professional sealcoating costs roughly one-fifth per square foot compared to complete repaving.
- Overlaying can be a cost-effective middle ground if the existing asphalt is structurally sound — but it’s not always advisable if underlying damage exists.
- Sealcoating prolongs the life of an existing driveway by protecting against UV, water damage, and wear. Replacement is a larger upfront investment but resets the lifespan.
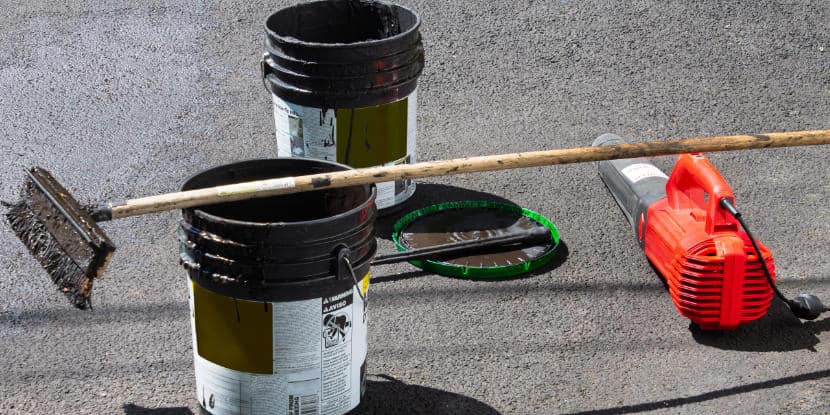
Tools for the job of sealcoating include a blower and a stiff brush or squeegee.
What You’ll Need for DIY Sealing
Materials
- Driveway sealer (calculate 1 gallon per 80-100 square feet)
- Crack filler or patching compound
- Cleaning solution or degreaser
- Sand (for large cracks)
Tools
- Pressure washer or garden hose
- Stiff-bristled brush
- Squeegee or brush applicator
- Putty knife
- Leaf blower or broom
- Protective gear (gloves, old clothes, safety glasses)
Time investment
- 6–8 hours over two days (allowing for drying time)
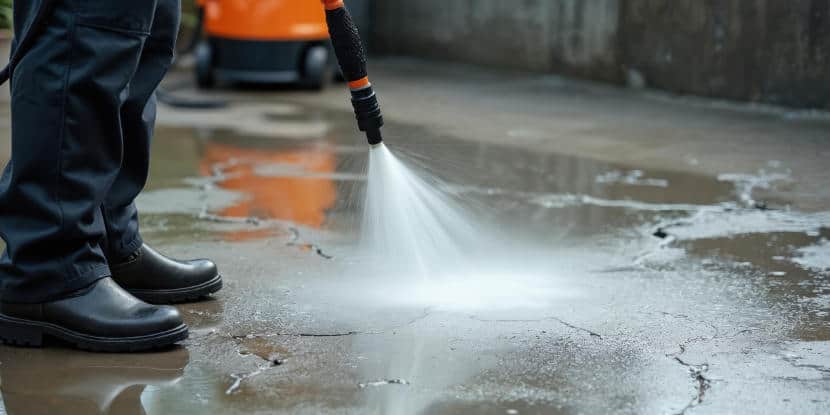
A man power-washes a driveway to prepare it for sealing.
Step 1: Choose the Right Weather Window
You need at least 48 hours of dry weather — 24 hours before application and 24 hours after. Ideal conditions include:
- Temperature between 50-85°F
- No rain in the forecast
- Low humidity levels
- Minimal wind
Avoid sealing during peak summer heat in Southern California. Early morning or late afternoon applications work best when temperatures are more moderate.
Step 2: Clear & Inspect Your Driveway
Remove all vehicles, furniture, and debris from the driveway. Use a leaf blower or broom to clear loose dirt and leaves. Walk the entire surface, noting:
- Crack locations and sizes
- Oil stains or discoloration
- Areas with vegetation growth
- Drainage patterns
Take photos of problem areas. This will help you track your repair progress and serve as a reference for future maintenance.
Apply thin, even coats rather than one thick application.
Step 3: Clean Thoroughly
A clean surface ensures proper sealer adhesion. Start with a thorough sweep, then:
For general cleaning
- Use a pressure washer on medium setting
- Work from high to low areas
- Pay extra attention to oil-stained areas
For stubborn stains
- Apply commercial degreaser
- Let it sit for 15–20 minutes
- Scrub with a stiff brush
- Rinse thoroughly
Allow the driveway to dry completely, typically in 4–6 hours in moderate conditions.
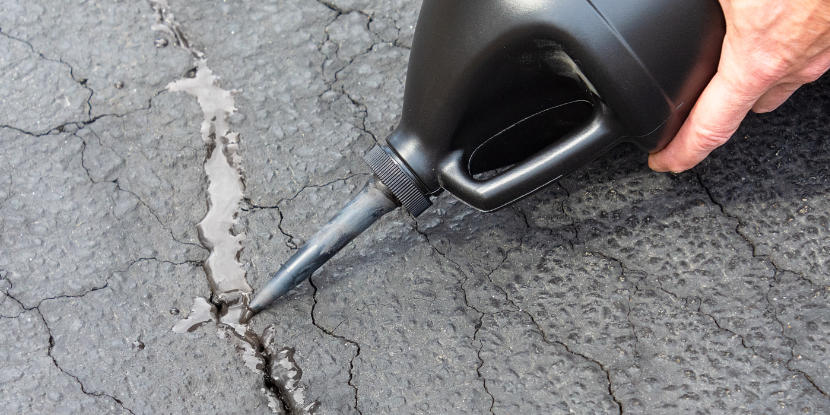
Step 4: Repair Cracks & Holes
Address all cracks before sealing. The repair method depends on crack size:
Small cracks (less than 1/4 inch)
- Clean out loose debris with a wire brush
- Apply liquid crack filler directly
- Smooth with a putty knife
- Allow to cure per manufacturer’s instructions
Large cracks (1/4 inch or wider)
- Clean thoroughly
- Fill with sand to within 1/4 inch of the surface
- Apply patching compound
- Level and smooth
- Allow 24 hours to cure
A homeowner repairs driveway cracks.
Step 5: Clean Oil Stains
Oil stains prevent proper sealer adhesion. For persistent stains:
- Apply oil stain primer designed for asphalt
- Follow the manufacturer’s drying times
- Some stains may require multiple applications
Fresh oil spills should be cleaned immediately with absorbent material and a degreaser before they penetrate the asphalt.
Step 6: Mask Adjacent Surfaces
Protect surrounding areas from sealer splatter:
- Use plastic sheeting and painter’s tape on garage doors
- Cover landscaping near driveway edges
- Protect sidewalks and house siding
- Mark sprinkler heads or drainage features
Careful masking saves significant cleanup time and prevents permanent staining of concrete or siding.
Most driveways benefit from two thin coats rather than one thick application.
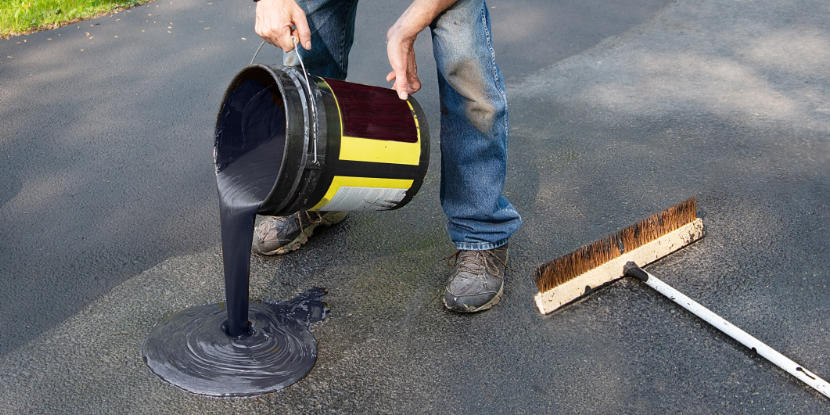
Step 7: Mix & Prepare Sealer
Most residential sealers come ready-to-use, but stirring ensures uniform consistency:
- Stir thoroughly with a mixing paddle
- Check for separation or settling
- Add recommended additives (sand for texture, if desired)
- Work in manageable batches to prevent premature drying
Calculate your coverage area accurately. Running short mid-project creates visible lap marks.
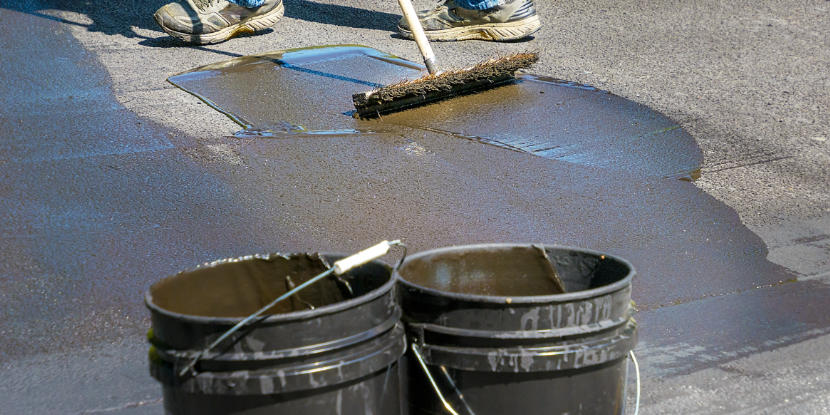
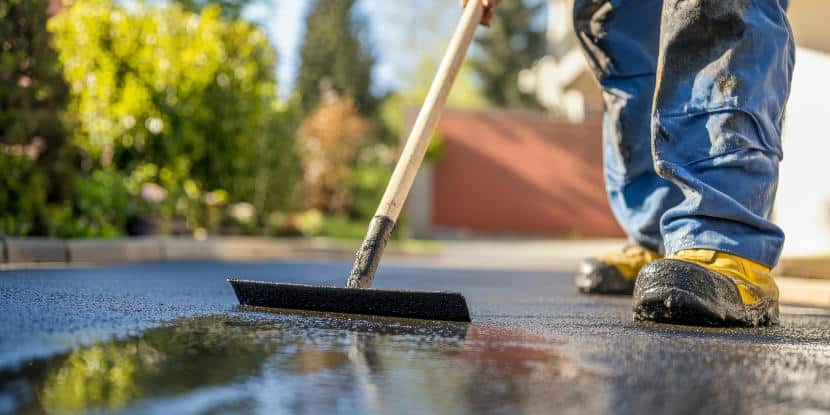
Step 8: Apply the First Coat
Start at the highest point of your driveway and work downward. This prevents pooling and ensures even coverage:
- Pour sealer in manageable sections
- Spread with a squeegee or brush in overlapping strokes
- Maintain consistent thickness
- Work quickly but avoid rushing
Pro tip: Apply thin, even coats rather than one thick application. Thick coats take longer to cure and may remain tacky.
Work in manageable batches to prevent premature drying.
Step 9: Apply a Second Coat (If Needed)
Most driveways benefit from two thin coats rather than one thick application:
- Allow first coat to dry 4–6 hours
- Check the manufacturer’s recoating window
- Apply the second coat perpendicular to the first coat’s direction
- Focus on areas that appear thin or patchy
Two coats provide superior protection and typically last 2–3 years longer than single applications.
Step 10: Final Curing & Cleanup
Proper curing ensures maximum durability:
- Keep vehicles off for 24–48 hours minimum
- Avoid foot traffic for the first 12 hours
- Remove masking materials while the sealer is slightly tacky
- Clean tools immediately with soap and water
Mark your calendar for annual inspections and, depending on traffic and weather exposure, plan to reseal every 3–5 years.
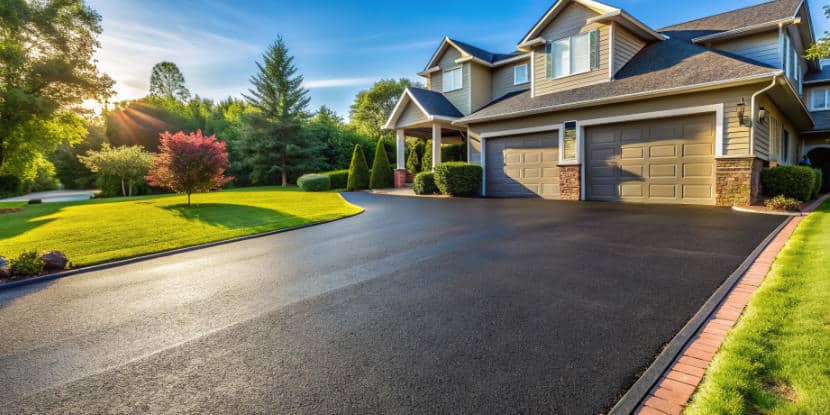
A freshly sealed driveway. We’re guessing this job took more than a day, unless the homeowner called in the pros.
FAQs: Sealing a Driveway
Q: How often should I seal my driveway?
Most residential driveways need sealing every 3–5 years. High-traffic areas or driveways with southern exposure may require more frequent treatment.
Q: Can I seal over the existing sealer?
Yes, but only if the existing sealer is in good condition. Peeling or flaking sealer should be removed first to ensure proper adhesion.
Q: What’s the difference between coal tar and asphalt-based sealers?
Coal tar sealers offer superior durability and chemical resistance but take longer to cure. Asphalt-based sealers cure faster and are more environmentally friendly.
Q: Should I add sand to my sealer?
Sand additives improve traction and hide minor surface imperfections. For standard applications, add 1–2 pounds per gallon.
Q: How do I fix sealer that looks streaky?
Streaky appearance usually results from uneven application or partially dried sealer. Light sanding followed by a thin topcoat typically resolves the issue.
Q: Can I seal a brand-new asphalt driveway?
Wait 6–12 months before sealing new asphalt. Fresh asphalt contains oils that need time to oxidize for proper sealer adhesion.
Q: What should I do if it rains before the sealer cures?
Light rain after 6–8 hours typically won’t damage cured sealer. Heavy rain within the first 4 hours may require reapplication of affected areas.
Q: How can I prevent future cracking?
Regular sealing, proper drainage, and prompt repair of small cracks prevent serious damage. Avoid parking heavy vehicles in the same spots repeatedly.bsp;