
Baby, it’s cold outside…
It may be cold inside, too, if you’re sitting by that drafty window that welcomes outside air like a long-lost friend.
Leaky windows and doors waste energy, increase your bills, and reduce comfort, maybe more than you realize.
Whether you’re dealing with scorching Southern California summers or arctic Montana winters, sealing your home is a smart and relatively simple DIY project with immediate payoffs.
Weatherproofing Your Windows
Step 1: Check Your Windows for Leaks
First, identify where the air is entering.
- Visual Inspection: Look for obvious cracks or gaps around the window frame, both inside and out. Check where the window sash meets the frame and where the frame meets the wall.
- The Smoke Test: On a windy day, close your windows and hold a lit incense stick or a smoke pen near the edges of the window frame. If the smoke flickers or is drawn inward, you’ve found a leak.
- The Flashlight Test: At night, have someone stand outside and shine a flashlight around the window edges while you look for light coming through from the inside. Do this during the summer, before the subzero Montana weather hits.
Step 2: Choose Your Materials
The right materials depend on your climate and the type of gaps you’re sealing.
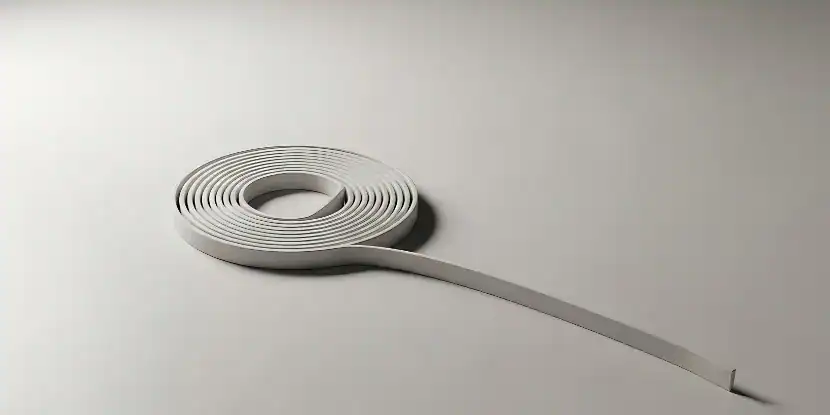
Foam weatherstripping comes in large rolls, enough to seal every window of the house,
For Southern California
In warmer climates, your main goal is to keep cool air in and hot air out.
- Caulk: Use a high-quality, paintable latex caulk for small cracks and gaps (less than 1/4 inch) around stationary window frames.
- Weatherstripping: Self-adhesive foam tape is great for sealing the gaps around movable window sashes. It’s easy to apply and effective against drafts.
For Colder Climates (like Montana)
Your focus is on preventing heat loss.
- Silicone Caulk: It’s more flexible and durable in extreme cold than latex caulk.
- V-Seal (Tension Seal) Weatherstripping: This durable plastic strip springs into place to create a tight seal. It holds up well against repeated opening and closing.
- Window Insulation Film: Apply this plastic film inside the window frame and shrink it with a hairdryer to create an insulating air pocket. It’s a cost-effective way to replicate the functionality of a double-pane window.
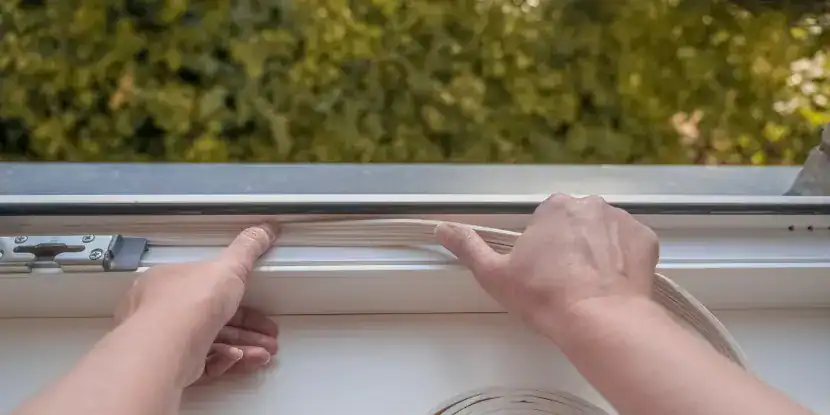
A homeowner installs a thick layer of foam to insulate a window.
Step 3: Clean & Prepare the Surfaces
The surface must be clean, dry, and free from contaminants for any sealant or adhesive to be effective.
- Use a utility knife or scraper to remove any old, cracked caulk or peeling paint.
- Clean the area with a cloth and a mixture of soap and water.
- Let the surface dry completely before applying new materials.
Step 4: Apply Caulk & Weatherstripping
Caulking
- Cut the tip of the caulk tube at a 45-degree angle to create a small opening.
- Apply a continuous bead of caulk into the gaps around the window frame.
- Use your finger or a caulking tool to smooth the bead, pressing it firmly into the gap.
- Wipe away excess caulk with a damp cloth.
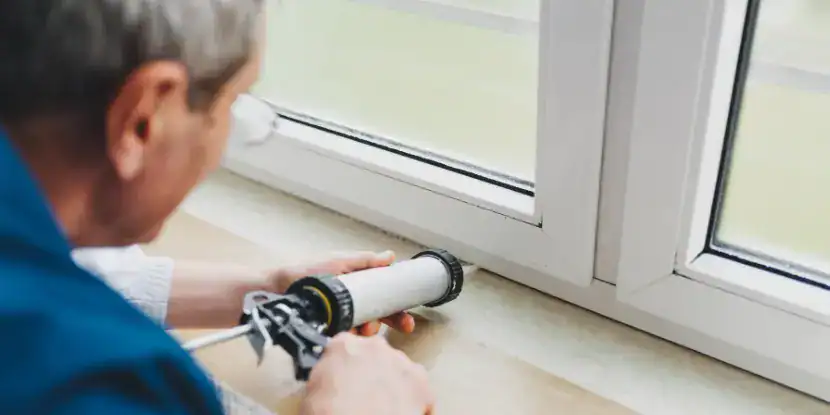
A worker caulks the interior of a double pane window.
Weatherstripping
- Measure the length of the window sash and cut the weatherstripping to size.
- Peel back the adhesive backing and press the strip firmly into place along the sides of the sash where it meets the frame.
- Ensure there are no gaps at the corners where the strips meet.
Step 5: Consider Additional Measures
For extra protection, especially in harsher climates, you might add:
- Draft Stoppers: These inexpensive fabric tubes can be placed along the bottom of window sills to block any remaining drafts.
- Thermal Curtains: Heavy, insulated curtains provide an additional barrier against heat transfer, keeping your home warmer in the winter and cooler in the summer.

Ensure there are no gaps at the corners where weatherstripping meets.
Weatherproofing Your Doors
This process is similar to weatherproofing windows. Focus on sealing the perimeter of the door.
Step 1: Check for Gaps
- Look for daylight around the door frame when it’s closed. If you see light, air is getting through.
- Feel for drafts around the edges of the door.
- Check the condition of the existing weatherstripping. If it’s cracked, compressed, or missing, it needs to be replaced.
Step 2: Seal the Door Frame
Weatherstripping
The most common solution is foam or rubber compression weatherstripping. It’s sold in rolls and is easy to install.
- Remove the old weatherstripping and thoroughly clean the door jamb.
- Measure and cut the new strips for the top and sides of the door frame.
- Peel off the backing and press the adhesive side firmly against the door stop to create a tight seal when the door is closed.
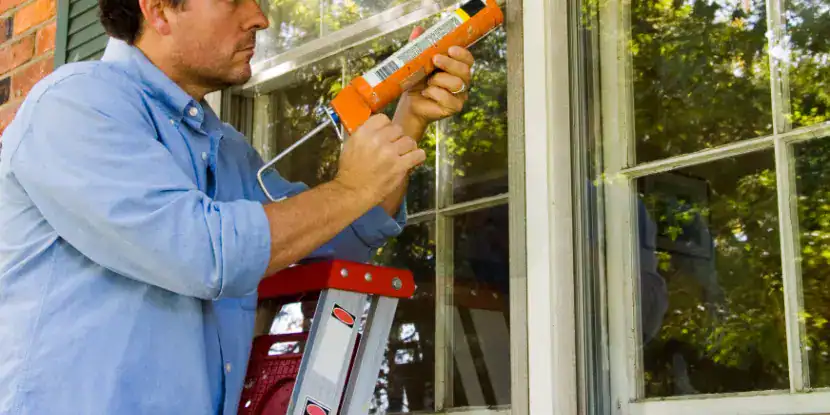
If possible, caulk both the exterior and interior of a window.
Caulk
- Apply a bead of exterior-grade caulk around the outside of the door trim where it meets the siding to seal any gaps.
Step 3: Install a Door Sweep and Threshold
The gap at the bottom of the door is often the biggest culprit for drafts.
Door Sweeps
These are installed on the bottom of the door. There are several types:
- Strip Sweeps: A simple strip of plastic or rubber that seals the gap.
- Brush Sweeps: Feature flexible and durable bristles.
- Automatic Sweeps: These lift when the door is opened and drop to seal the gap when it’s closed.
- Door Thresholds: If the threshold under your door is worn or damaged, it won’t create a proper seal. You may need to adjust or replace it. Many modern thresholds have adjustable screws to raise or lower the seal against the bottom of the door.

The gap at the bottom of the door is often the biggest culprit for drafts. Install a quality door sweep.
FAQs: Weatherproofing Doors & Windows
Q: How often should I replace weatherstripping?
Check your weatherstripping annually. Depending on the material and exposure to the elements, it typically needs to be replaced every 3 to 5 years. If it’s cracked, brittle, or no longer sealing properly, it’s time for a replacement.
Q: What’s the best type of caulk for exterior use?
100% silicone or a high-quality siliconized acrylic latex caulk is best. Silicone offers excellent flexibility and waterproofing, making it ideal for joints that expand and contract with temperature changes.
Q: Can I weatherproof my windows if I’m a renter?
Yes. Many weatherproofing solutions are temporary and won’t damage the property. Self-adhesive foam weatherstripping, removable caulk, and window insulation film kits are all great options for renters.
Q: How much money can I save by weatherproofing my home?
According to the U.S. Department of Energy, you can save 10% to 20% on your heating and cooling bills by sealing and insulating to reduce drafts and air leaks.
Q: Will weatherproofing help with noise reduction?
Yes. Sealing gaps around doors and windows also helps dampen outside noise, contributing to a quieter home environment.
Q: Is it better to apply caulk on the inside or outside?
For optimal results, seal gaps on both the interior and exterior of your windows and doors. Use exterior-grade caulk for the outside and a paintable interior caulk for the inside.
Q: What is the most durable type of weatherstripping?
V-seal (tension seal) weatherstripping is one of the most durable options. It’s made from resilient plastic or metal and withstands the friction of opening and closing windows and doors.
Q: My sliding glass door is drafty. How can I fix it?
Check the pile weatherstripping (the fuzzy strips) along the edges of the moving panel and where the panels meet. If it’s worn, replace it. You can also add foam tape to the non-moving parts of the frame for a better seal.