Creating a concrete porch, patio, or walkway sounds like a job for a seasoned pro or accomplished DIYer. But you don’t have to be an expert to get good results.
Just as your favorite marinara sauce follows a tried and true recipe, there’s a formula for pouring concrete. Although it may seem daunting, you can tackle this project DIY with proper preparation and attention to detail.
In this blog, you’ll learn how to prepare the site, mix concrete, form and pour it, and give it a smooth, professional finish.
Why Choose Concrete for Your Outdoor Space?
Concrete is durable, versatile, affordable, and it strengthens with age. The Pantheon’s concrete dome is over 2,000 years old, without reinforcement!
- Well-cured concrete can last decades with minimal maintenance.
- It stands up to rain, snow, and sun without losing integrity.
- Concrete can be molded into various shapes and stamped or stained for a decorative finish.
- Aside from the occasional cleaning and sealing, concrete requires minimal upkeep.
Here’s how to bring your concrete project to life.
Materials & Tools You’ll Need
Materials
- Concrete mix (calculate how many bags using your project dimensions)
- Gravel (for a base layer)
- Wooden or metal stakes
- Boards for forms (2×4 or 2×6, depending on your planned slab thickness)
- Rebar or wire mesh (optional, for added strength)
- Water
- Plastic sheeting (for curing)
Tools
- Shovel
- Wheelbarrow or mixing tub
- Level
- Measuring tape
- Hammer and nails (or screws and drill)
- Trowel or float
- Concrete edger and groover (optional for decorative joints)
- Broom (for a textured finish)
Now, you’re set to lay the groundwork — literally.
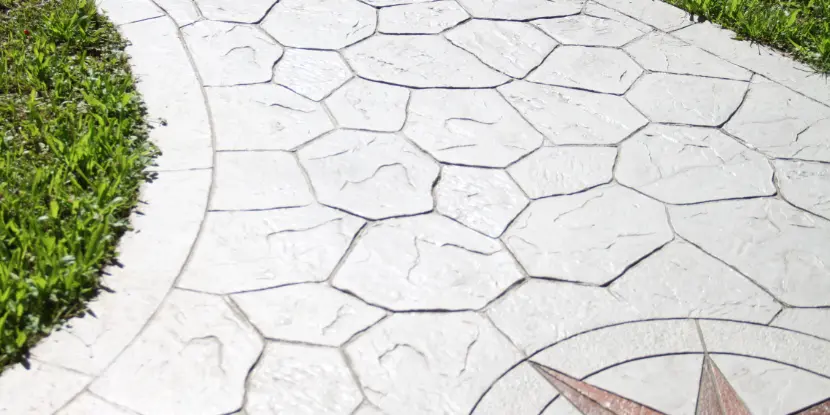
A concrete walkway with a decorative finish to look like paving stones.
Step-by-Step Instructions to Pour Concrete
1. Plan & Measure Your Space
- Mark the area. Use stakes and string to outline the shape and size of your slab.
- Double-check dimensions. Measure twice to ensure accuracy — you don’t want to run out of concrete mid-pour.
- For drainage, ensure the area slopes slightly (1/8 inch per foot) away from structures like your house.
Spread the concrete evenly and at a slight angle away from structures.
2. Prepare the Site
- Dig out the area to at least 4–6 inches deep for patios and walkways or 8–12 inches for heavy slabs like porches.
- Spread 2–4 inches of compacted gravel for drainage and a stable foundation.
3. Build Your Forms
- Attach 2×4 or 2×6 boards to stakes to create a frame around your project area.
- For larger slabs, add rebar or wire mesh for strength, especially if the area will bear heavy loads.
- Use a level at multiple points to ensure your form is even and adequately sloped.
Large concrete slabs should have rebar or wire mesh reinforcement.
4. Mix & Pour Concrete
- Follow the concrete mix instructions for the correct water-to-mix ratio. For larger batches, use a wheelbarrow or concrete mixer.
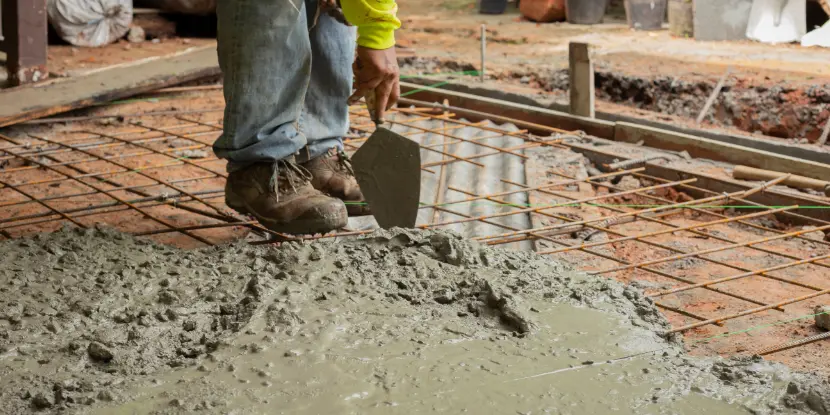
- Pour evenly. Start from one end and work your way across. Use a shovel to spread the concrete evenly within the form.
5. Smooth and Level the Concrete
- Use a straight 2×4 or screed board to level out the concrete. Drag it across the form from one end to the other.
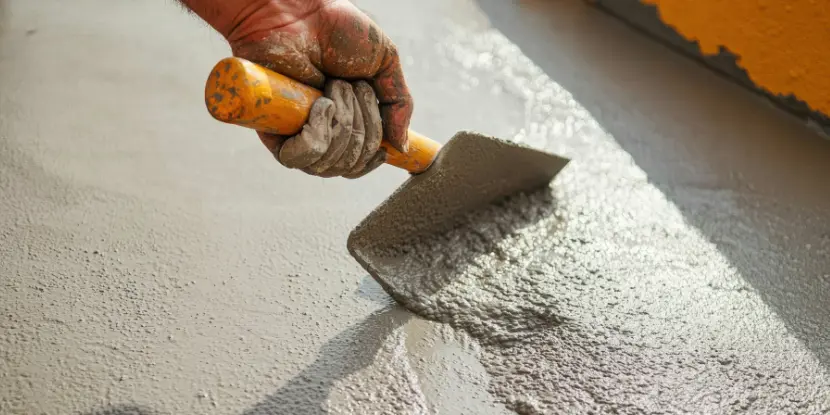
- Smooth the concrete with a trowel or float to fill gaps and create an even surface.
6. Add Finishing Touches
- Use a concrete edger for even edges and a concrete groover to add control joints every 4–8 feet to prevent cracking.
- Drag a broom lightly across the surface for a slip-resistant texture.

A groover tool creates an expansion joint.
7. Cure the Concrete
- To retain moisture and ensure even curing, cover the slab with plastic sheeting for 5–7 days.
- If you don’t have plastic sheeting, occasionally mist the concrete with water to prevent it from drying out too quickly.
That’s it! Your new porch, patio, or walkway is ready to use after at least a week of curing. For heavy loads, wait 28 days for full strength.
How to Create Expansion Joints
Expansion joints are critical for the longevity of your concrete project, particularly in large slabs. They allow the concrete to expand and contract under temperature changes without cracking or causing structural issues.
A concrete driveway with expansion joints.
1. Plan for Expansion Joints
- Before pouring the concrete, determine where the joints must be placed. A good rule of thumb is to space them no farther apart than 2–3 times the slab’s thickness in feet (e.g., place joints every 8–12 feet for a 4-inch-thick slab).
- Ensure the joints divide the slab into fairly square sections rather than long, narrow strips to prevent stress concentration.
2. Install Preformed Expansion Strips
- For larger slabs, use preformed expansion strips made of rubber, plastic, or compressible fiber.
- Position these strips where joints are required, such as where the slab meets a structure, another slab, or other fixed objects.
- Secure the strips in place before pouring to keep them aligned.
3. Score the Joints During Pouring
- If not using preformed strips, create control or expansion joints after the initial pour. While the concrete is still wet, use a groover tool to score lines on the surface.
- Make the grooves at least 1/4 of the slab’s depth to be effective.
4. Cut Joints After Pouring (Optional)
- For a more precise finish, you can cut the joints with a saw equipped with a concrete blade after the slab has partially hardened (usually within 24 hours).
- Use a chalk line to guide your cuts and maintain straight, clean joint lines.
5. Seal the Joints for Added Protection
- Once the concrete has cured, apply a flexible joint sealant to keep water, debris, and other materials out of the joints. This helps prevent damage and extends the life of the slab.
FAQs: Pouring Concrete
Q: Do I need rebar or wire mesh for my project?
It depends on the size and intended use of your slab. Rebar or wire mesh isn’t necessary for smaller projects like walkways, but it should be used for added strength on larger slabs like porches.
Q: Can I pour concrete in cold weather?
Yes, but it requires extra precautions. Concrete can freeze, which affects its strength and durability, so special steps must be taken to ensure proper curing in colder temperatures.
Q: How long does concrete take to cure?
Concrete typically takes 28 days to reach full strength, but it can be walked on after a week or so. For heavy loads, wait 28 days before putting weight on it.
Q: Can I add color to my concrete project?
You can add color pigments to your concrete mix for a custom look or apply stains or dyes after the concrete has cured.
Q: How do I calculate how much concrete I need?
Multiply your slab’s length, width, and depth to calculate the volume in cubic feet. Divide that by 27 to determine cubic yards. Most concrete bags are labeled for coverage, so check the bag for details.
Q: Can I pour concrete over existing concrete?
Yes, but it’s not always ideal if the existing concrete is damaged or unstable. If you pour over it, ensure the surface is clean and use a bonding agent for adhesion.
Q: What do I do if the concrete starts to dry before I finish?
Mist the surface with water using a spray bottle or hose to keep it workable. Avoid overwatering, which can weaken the concrete.
Q: When should I seal the concrete?
Seal it about 28 days after pouring once it has fully cured. This protects it from wear, water damage, and stains.
Q: What’s the easiest way to fix cracks in concrete?
For small cracks, a concrete filler or caulk works well. For larger cracks, use a concrete patch product. Clean the crack thoroughly before application.
Q: Can I stain or decorate the concrete later?
Concrete stains, dyes, and stamps are great options for adding decorative flair after the slab has cured.